
What if you could grow juicy tomatoes or crisp herbs right outside your apartment door? One homesteader discovered this possibility during a hectic life transition. Limited space and time didn’t stop her from cultivating fresh produce using repurposed containers. Today, this method lets anyone turn patios, balconies, or even fire escapes into thriving mini-farms.
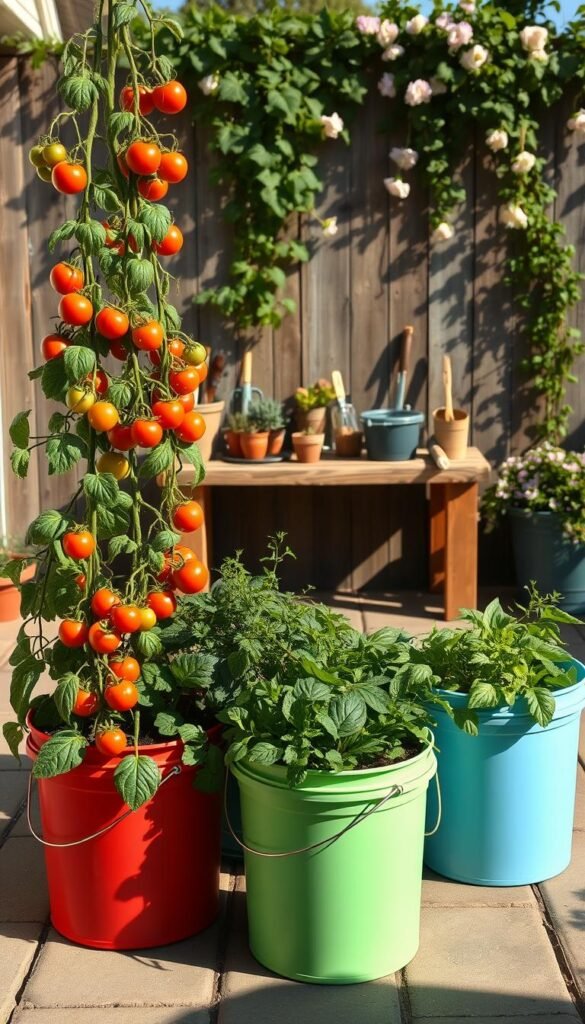
Food-safe plastic buckets – like those from local farms or hardware stores – become perfect homes for plants. Drill a few drainage holes in the bottom, fill with quality soil, and you’ve got a portable garden bed. This approach works for compact vegetable varieties, from cherry tomatoes to spicy peppers, without needing yard space.
Safety matters when reusing containers. Always choose buckets labeled “food-grade” to avoid chemical leaching. Pair them with well-draining potting mix and sunlight, and you’ll see roots thrive. Some gardeners even stack multiple buckets vertically to maximize tight areas!
Our guide walks through each step: selecting materials, preparing containers, and choosing quick-growing plants. You’ll learn how to maintain healthy crops with minimal tools. Whether you’re growing salad greens or colorful chilies, this method adapts to your schedule and space. Let’s dig into turning humble buckets into your personal produce aisle.
Getting Started with Your DIY Bucket Garden

Urban dwellers often overlook sunny windowsills or balcony corners as potential growing spaces. Yet these spots can host thriving vegetable plants with minimal effort. Let’s explore how to turn unused areas into fresh food sources.
Understanding the Benefits of Bucket Gardening
Growing in portable containers lets you chase sunlight across your patio or balcony. Move heat-loving tomatoes to afternoon rays or shift shade-sensitive lettuce to cooler spots. This flexibility helps plants grow faster and produce more.
Small-space gardening also simplifies pest control. Isolate affected plants quickly without risking your entire crop. Plus, you’ll avoid back strain since elevated buckets reduce bending.
Choosing the Right Containers and Tools
Start with food-safe plastic buckets—many bakeries give them away free. Check for recycling symbols #2 or #5 to avoid harmful chemicals. You’ll need:
- A 1/4-inch drill bit for drainage holes
- Organic potting mix (avoid dense garden soil)
- Mulch to retain moisture
| Container Type | Best For | Drainage Tips |
|---|---|---|
| 5-gallon bucket | Tomatoes, peppers | 5-8 holes in bottom |
| 3-gallon bucket | Lettuce, herbs | 3-5 holes + gravel layer |
| Wide shallow tub | Radishes, spinach | Side holes 1″ above base |
Local hardware stores often carry suitable potting soil blends for container gardening. Pair with slow-release fertilizer for steady growth. Remember: proper planning prevents overcrowded roots and ensures your green space stays productive all season.
DIY Bucket Gardening: 5-Gallon Containers for Patio Produce

Finding the right materials sets the foundation for a thriving garden. Let’s explore how to select and prepare vessels that keep your greens safe and healthy.
Sourcing Safe, Food-Grade Buckets
Start by hunting for buckets marked “food-grade” at feed stores, restaurant supply shops, or through online retailers. Many bakeries and farms discard perfectly usable containers that once held icing or pickles—just ask about their previous contents. Avoid buckets used for chemicals or paint, even if they look clean.
Check for triangular recycling symbols #2 (HDPE) or #5 (PP) on the bottom. These plastics won’t leach harmful substances into your soil. Give used buckets a deep scrub with hot soapy water and a stiff brush to remove residue.
Preparing Buckets for Planting
Remove metal handles with pliers to prevent rust stains. Rough up smooth exteriors with sandpaper if you plan to paint them—this helps spray paint adhere better. Always mask the bucket’s interior with newspaper before painting to shield your plants from fumes.
Grab a power drill fitted with a 1/4-inch bit. Create 5-8 drainage holes in the bottom, wearing safety goggles to protect your eyes from plastic shavings. This step ensures excess water escapes, preventing root rot.
Repurposed buckets save money and reduce waste while giving veggies a sturdy home. Once prepped, they’re ready for nutrient-rich soil and your favorite seeds!
Setting Up and Maintaining Your Bucket Garden

Proper preparation turns ordinary containers into thriving plant habitats. Let’s walk through creating ideal growing conditions while keeping maintenance straightforward.
Drilling Drainage Holes and Adding Bulk Materials
Grab your drill and a 1/2-inch bit. Create 5-8 openings across the bottom bucket surface for balanced drainage. This prevents soggy roots while letting excess water escape. Place a layer of gravel or broken pottery pieces over the holes to keep soil from washing out.
Filling with Potting Soil and Planting Seeds or Starters
Mix potting soil with water until it feels like a damp sponge. Fill containers two-thirds full, then position seedlings so their root balls sit 1 inch below the rim. Gently firm the mix around stems to eliminate air pockets. For seeds, follow packet depth instructions precisely.
Watering, Mulching, and Ongoing Care Tips
Use a watering can with a long spout to target soil directly. Apply moisture slowly until it seeps from the bottom holes. Spread straw or shredded leaves as mulch to lock in humidity and block weeds. Check plants weekly for discolored leaves or slow growth—early detection prevents most issues.
Rotate your containers every few days so all sides get equal sun exposure. Wipe bucket exteriors occasionally to remove dirt buildup. With these simple habits, your green space stays vibrant from planting to harvest.
Harvesting Your Bucket Garden Success
The moment you’ve been waiting for arrives when tomatoes blush red and herbs release their vibrant scents. Gently squeeze fruits to test ripeness—they should feel firm but yield slightly. For leafy greens like lettuce, snouter leaves when they reach 4-6 inches tall, letting inner layers keep growing.
Gardeners report overflowing yields from compact setups—one cherry plant can produce 100+ fruits! To remove spent crops without harming roots, tilt the bucket sideways and slide out the root ball. Use a hand trowel if roots cling stubbornly to the soil.
After harvesting, scrub containers with vinegar solution to disinfect them. Mix old potting soil with compost or worm castings to refresh nutrients. Store cleaned buckets stacked neatly until your next planting cycle.
Want to expand beyond traditional methods? Explore hydroponic setups for faster growth in the same space. Whether growing crisp peppers or fragrant basil, this project proves fresh food thrives wherever you make room for it—no backyard required.


