
Urban gardening thrives when plants get consistent hydration without wasting time or resources. Imagine a setup that waters your herbs, veggies, or flowers automatically—even when life gets busy. With basic materials like PVC pipes and soaker hoses, you can create a custom irrigation system that’s affordable, easy to maintain, and blends seamlessly into small spaces.
Why spend hours hand-watering? A well-designed drip irrigation setup delivers moisture directly to roots, reducing evaporation and overwatering. This approach saves money on utility bills and keeps your greenery thriving. Plus, it’s simpler than you think: water timers and adjustable valves let you control flow rates and schedules effortlessly.
Whether you’re tending raised beds or compact in-ground plots, this method adapts to your needs. Later, we’ll walk through planning layouts, assembling parts, and adding smart automation. You’ll learn how to avoid leaks, optimize pressure, and ensure every plant gets exactly what it needs. Let’s turn your garden into a low-effort oasis!
Planning Your DIY Watering Project

Starting with a solid plan saves time and prevents headaches later. Grab graph paper or use a free app to sketch your garden space. Mark beds, pathways, and existing structures. This helps visualize where to run water lines for even coverage.
Sketching Your Garden Layout
Measure your plot’s dimensions carefully. Note sunny vs. shady zones, as plants in these areas need different watering schedules. Use colored pencils to map out drip lines or soaker hose placements near root zones. Label each zone for clarity.
Identifying Essential Materials and Tools
You’ll need PVC pipes, connectors, and a timer for automation. Soaker hoses work well for raised beds—check out low-cost irrigation ideas to match your setup. Add shut-off valves to control flow per section. Don’t forget a pressure gauge to test your spigot’s output.
Once your sketch is complete, create a shopping list sorted by zones. Double-check measurements to avoid buying extra supplies. A little prep now means fewer adjustments once your irrigation system is live!
Mastering Creative DIY Watering Solutions for Urban Gardens

Before diving into building your setup, it’s crucial to define what success looks like. A well-planned watering system solves two big issues: uneven moisture and time spent hauling hoses. By automating the process, you’ll give plants reliable hydration while freeing up your schedule.
Clarifying Objectives and System Options
The main goal? Reduce daily tasks while ensuring every bed gets the right amount water. Manual methods often leave dry spots or drown roots. A tailored setup adjusts flow based on plant needs and local weather patterns.
Different types of systems work for urban spaces. Drip lines target roots precisely, while soaker hoses cover wider areas. Here’s a quick comparison:
| Type | Best For | Control Level |
|---|---|---|
| Drip Irrigation | Raised beds, containers | High (per-plant adjustment) |
| Soaker Hoses | In-ground plots | Moderate (zone-based) |
| Micro-Sprinklers | Leafy greens | Low (broad coverage) |
For raised beds, integrate supply lines beneath the soil surface. This keeps hoses hidden and delivers moisture directly to roots. Use shut-off valves to turn water on/off for specific zones—ideal when growing plants with different thirst levels.
Match your design to your space. Compact layouts might need more valves for precision, while larger areas can use fewer zones. Always factor in local rainfall and heat waves. A little planning ensures your watering system works smarter, not harder!
Step-by-Step Guide to Building an Automatic Irrigation System

Transform your green space with a hands-free watering setup that keeps plants healthy while you’re home or away. Start by gathering your tools: PVC pipes, a digital timer, and a shovel. This system works for small plots or container gardens, adapting to your space’s unique needs.
Creating a Detailed Garden Map
Sketch your garden’s exact shape using measurements and soil type data. Sandy soils drain faster, so you’ll need shorter watering intervals. Clay retains moisture longer—adjust your plan to prevent overwatering. Mark where each line will run, ensuring even coverage for all beds.
Establishing the Water Flow and Timing
Connect PVC pipes to your spigot, adding shut-off valves at key points. Bury lines 6-8 inches deep to protect them from damage. Attach the timer and program it based on plant needs: 15 minutes daily for veggies, 10 minutes every other day for herbs.
Going on vacation? Set the timer to run longer sessions every 3 days. Test the system by running water through each line before covering trenches. Tighten fittings if leaks appear, and adjust spray patterns as plants grow.
This setup slashes water waste by delivering moisture straight to roots. Your gardens stay lush with minimal effort, even during summer heatwaves!
Optimal Techniques for Installing PVC and Soaker Hoses

Proper installation ensures your irrigation setup lasts through seasons. Focus on ground preparation and secure connections to avoid leaks. Let’s break down the steps to get your plastic pipes and hoses working smoothly.
Digging Trenches and Pipe Assembly Tips
Start by marking your layout with stakes and string. Dig trenches 3-4 inches deep to protect plastic pipes from foot traffic. Line the ground with sand for cushioning—this prevents sharp rocks from damaging materials.
Cut PVC pipes to size using a hacksaw. Apply primer and glue to each end before joining sections. Hold fittings tightly for 30 seconds to bond. Test joints by gently tugging—no movement means a solid seal.
Securing Fittings, Valves, and Hoses
Use weather-resistant tape on threaded connections. Install shut-off valves at the top of each zone for easy access. Cap unused end ports with plastic covers to keep dirt out.
For soaker hoses, bury them 1-2 inches under mulch. This shields them from UV rays and reduces weather wear. Check spray patterns weekly—adjust nozzles if water misses target areas.
| Step | Tool | Purpose |
|---|---|---|
| Marking Layout | Stakes & String | Ensure straight trench lines |
| Digging Depth | Shovel | Protect pipes from damage |
| Adding Sand | Garden Trowel | Cushion pipes |
If pipes shift after installation, compact the ground around them. Run water through the system before covering trenches. Fix leaks immediately by reapplying glue or tightening fittings. A little care now saves headaches later!
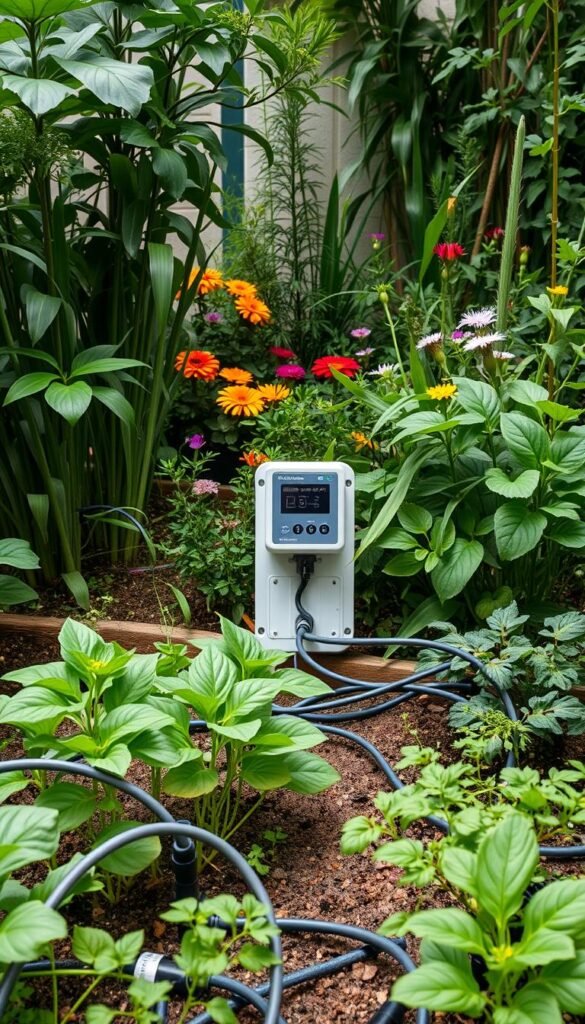
Enhancing Your System with Smart Watering Automation

Take your garden’s hydration game to the next level by adding brains to your watering setup. Smart automation lets you control flow rates, adjust schedules remotely, and even respond to weather changes—all while saving time and water.
Integrating Timers and Solenoid Valves
Swap basic timers for programmable models that sync with soil sensors. These devices adjust the amount of water based on real-time moisture levels. Pair them with solenoid valves to shut off supply lines automatically when it rains.
For example, a $25 smart valve can cut water flow during storms. Connect it to a Wi-Fi hub, and your system skips unnecessary watering times. This combo reduces waste and keeps roots healthy.
Automating Your Irrigation with Home Automation Tools
Link your setup to apps like Home Assistant using a Shelly Pro 1 relay. This $40 gadget lets you create rules like “water herbs 10 minutes daily unless soil is damp.” Sync it with weather apps to pause schedules during humidity spikes.
Set up zones to match plant needs. Leafy greens might get 20% more amount than drought-tolerant herbs. Test settings weekly and tweak based on growth stages. Most tools offer one-click adjustments from your phone.
Pro tip: Label valves clearly and keep firmware updated. A well-automated system simplifies gardening tasks while delivering water at the perfect times. You’ll spend less time managing hoses and more enjoying your green oasis!
Effective Strategies for Water Conservation and Plant Health

Keeping your plants healthy while saving water starts with smart techniques tailored to their needs. The key is delivering the right amount of moisture without waste—whether you’re home or away. Let’s explore how to balance hydration and conservation for thriving greenery.
Deep Watering vs. Frequent Soaks
Deep watering encourages roots to grow downward, building drought resistance. For vegetables and shrubs, soak the soil until it’s moist 6-8 inches deep. This method works best once or twice weekly. Frequent light sprays, however, suit shallow-rooted herbs and seedlings.
Here’s a quick guide to match methods with your garden:
| Method | Best For | Water Use |
|---|---|---|
| Deep Watering | Tomatoes, shrubs, trees | High per session |
| Frequent Soaks | Lettuce, basil, annuals | Low, multiple sessions |
Modify a standard garden hose with a soaker attachment for slow, targeted delivery. When traveling, use smart watering techniques like bottle drip systems or timer-controlled setups. These keep soil evenly moist without daily attention.
Check soil moisture weekly by sticking your finger two inches deep. Dry? Water deeply. Damp? Wait a day. Adjust based on weather—plants need 30% less during cool spells. With one two simple tweaks, you’ll conserve resources while nurturing vibrant growth!
Approaches to Maintenance and Troubleshooting DIY Irrigation

How do you keep your irrigation system running smoothly year-round? Regular checks and seasonal tweaks prevent minor issues from becoming major headaches. Start by inspecting hoses monthly for cracks or kinks blocking water flow. A quick fix now saves hours of repair later!
Leak Detection and System Repairs
Check connections in raised beds first—loose fittings often cause drips. Tighten joints with a wrench and replace worn washers. For buried lines, look for soggy soil or unusually lush grass patches. These signs hint at hidden leaks.
Use a soapy water mix to spot tiny holes in hoses. Bubbles form where air escapes. Patch small tears with waterproof tape or replace damaged sections entirely. If you’re troubleshooting common hydroponic issues, similar principles apply: always test components individually.
Seasonal Adjustments and Routine Checks
Adjust your timer every 3 months to match weather shifts. Reduce watering in spring rains and boost during summer heat. Before winter, drain hoses to prevent freezing damage. Store above-ground parts in a shed or garage.
For soaker systems, flush lines yearly to clear mineral buildup. Use vinegar-soaked cloths to clean clogged emitters. Here’s a seasonal task checklist:
| Season | Task | Tool |
|---|---|---|
| Spring | Test pressure valves | Pressure gauge |
| Summer | Inspect spray patterns | Adjustable nozzle |
| Fall | Drain & store hoses | Air compressor |
Mark your calendar for monthly inspections. Clean filters, trim plants blocking water flow, and ensure raised beds aren’t eroding around supply lines. A little upkeep keeps everything working like new!
Wrapping Up Your Garden Watering Journey
Your green oasis deserves a watering system that works as hard as you do. From sketching layouts to installing smart timers, you’ve learned how to build a setup that thrives through vacations and heatwaves. One gardener shared how their “tomatoes doubled in size after switching to drip lines”—proof these methods deliver real results.
Final checks? Test your faucet connections for leaks and adjust drip rates based on plant growth. Don’t forget to tweak schedules when rain rolls in! Many users report their systems ran flawlessly for weeks while they traveled—no overwatering or wilted greens.
Ready to make it your own? Swap DIY components like spray nozzles or buried hoses to match your space. Share your progress in the comments—we’d love to hear how your garden flourishes with these fixes. Now go enjoy that lush, low-maintenance paradise you’ve built!


