
Growing plants from tiny specks of life is one of gardening’s most rewarding adventures. Imagine plucking juicy heirloom tomatoes or vibrant specialty peppers that you nurtured from their earliest days. This method not only unlocks rare varieties but also lets you control your garden’s timeline, beating frost dates and stretching your growing season.
Whether you’re dreaming of exotic herbs or robust vegetables, seed starting indoors gives you access to options most nurseries don’t offer. You’ll learn how to pick the right trays, create ideal conditions, and time your planting perfectly for your local climate. No guesswork—just clear, step-by-step guidance.
This complete guide demystifies the process, covering everything from budget-friendly setups to troubleshooting common issues. You’ll discover why certain techniques work and how to adapt them to your space. By the end, you’ll feel confident raising sturdy seedlings ready to thrive outdoors.
Best of all, it’s affordable. Forget pricey store-bought transplants—with a few basics, you can grow dozens of plants for pennies. Ready to turn those seeds into a garden that’s uniquely yours? Let’s dig in.
Introduction to Indoor Seed Starting
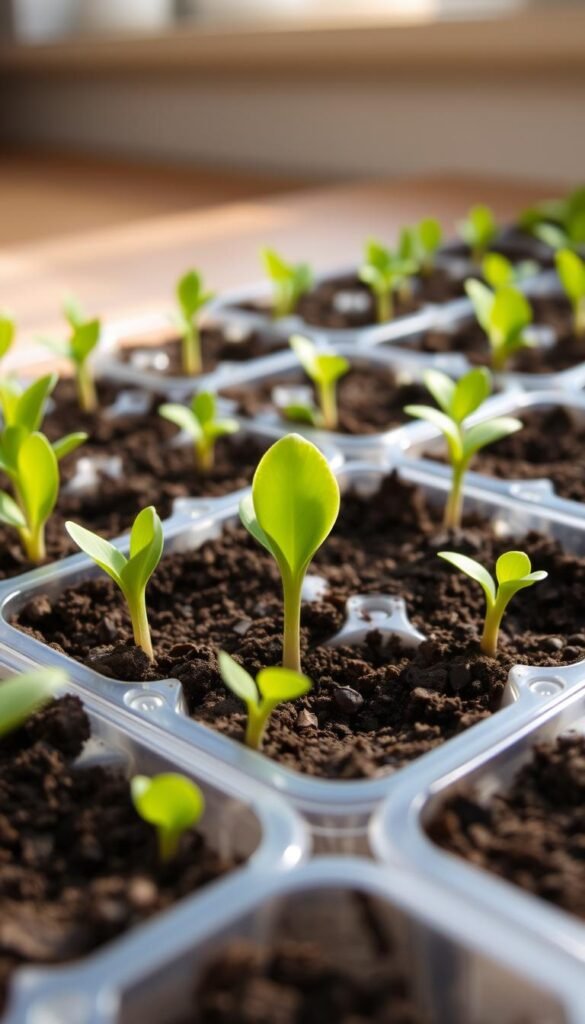
Imagine kickstarting your garden months before the last frost—right from your kitchen counter. Indoor seed starting turns any available space into a climate-controlled nursery, letting you sidestep unpredictable spring weather. Unlike direct outdoor sowing, this method gives you complete command over moisture, temperature, and light levels.
Nearly all vegetables and flowers thrive when started inside. Tomatoes, peppers, and basil grow particularly well this way. But avoid root crops like carrots or radishes—their delicate roots hate being moved. Instead, sow those directly in garden beds once soil warms up.
You don’t need a greenhouse. A basement corner, spare shelf, or sunny windowsill works perfectly. Just ensure access to power for grow lights if natural light is limited. This approach bridges late winter’s chill and spring’s arrival, letting you stretch your growing season by weeks.
By starting seeds indoors, you’re not just growing plants—you’re cultivating resilience. Young seedlings get stronger in controlled conditions before facing outdoor challenges. Plus, you’ll discover rare varieties that big-box nurseries never stock, from purple cauliflower to chocolate mint.
Benefits of Starting Seeds Indoors

Cultivating your garden’s future begins long before the soil warms outside. By nurturing plants from their earliest days, you unlock advantages that go beyond basic gardening. Let’s explore how this approach transforms your harvests and gardening experience.
Extended Growing Season
Gain up to 10 extra weeks of productivity by starting seeds indoors. While neighbors wait for frost-free days, your tomatoes and peppers will already boast sturdy stems. Cool-weather crops like kale can be timed for fall harvests through strategic indoor sowing.
“Growing from seed lets me harvest cherry tomatoes by June 1st—three weeks before local farms.”
Enhanced Variety and Control
Commercial nurseries stock limited options, but seed catalogs offer thousands of unique varieties. Discover purple carrots, lemon basil, or miniature eggplants unavailable elsewhere. You’ll also:
| Store-Bought Plants | Home-Started Seeds |
|---|---|
| 5-6 varieties | 200+ options |
| $4-6 per plant | $0.10 per plant |
| Fixed schedule | Custom timelines |
Complete control over light and nutrients means stronger plants. A $3 packet yields 30+ seedlings—enough to share with friends. No more buying six-packs when you need just two pepper plants!
The joy of watching your seeds sprout connects you deeply to every leaf and fruit. It’s gardening magic made practical, affordable, and endlessly rewarding.
Choosing the Right Seed Starting Trays and Supplies

Your seedlings’ first home makes all the difference. The right combination of containers and growing medium creates a launchpad for vigorous roots and sturdy stems. Let’s break down your options without overwhelming your counter space.
Seed Starting Trays Options
72-cell trays shine for mass-growing compact herbs like basil or flowers. They let you squeeze 30+ plants onto a single shelf. But watch those roots—you’ll need to transplant within 3 weeks before leaves overcrowd.
Upgrade to 4-cell or 6-cell packs for tomatoes and peppers. These deeper compartments give roots breathing room, delaying transplant stress by 2 extra weeks. Sturdy trays with proper drainage holes prevent waterlogging and last 5+ seasons if handled carefully.
Selecting the Ideal Seed Starting Mix
Skip garden soil—it’s a death sentence for delicate sprouts. Your mix needs to be airy yet moisture-retentive. Commercial blends labeled “seed starter” work well, but try this DIY recipe:
- 4 parts coconut coir (holds water)
- 2 parts perlite (improves airflow)
- 1 part worm castings (gentle nutrients)
Biodegradable pots seem eco-friendly but often mold indoors. Stick with reusable plastic cells for reliability. Remember: a $5 bag of seed starting mix grows 200+ plants—cheaper than buying six-packs!
Preparing Your Indoor Seed Starting Area

Transform any unused corner into a plant nursery that fuels growth. Your setup doesn’t need polished shelves or fancy equipment—just smart planning around three essentials: stable warmth, bright grow lights, and airflow management.
Ideal Temperature & Humidity
Seeds act like tiny thermometers. Most vegetables sprout fastest when soil temperature stays between 70-80°F. Use seedling heat mats under trays if your space runs cool—they’re cheaper than heating an entire room. Cover trays with humidity domes until sprouts appear, maintaining 60-70% moisture levels.
Watch for condensation buildup. Remove covers once 50% of seeds germinate to prevent mold. A small fan on low speed strengthens stems and mimics outdoor breezes. Just avoid direct drafts on tender plants.
Proper Light Setup
Windowsill light? It’s a myth-buster. Even south-facing windows deliver only 25% of the brightness seedlings crave. Invest in full-spectrum LED grow lights—they use less energy than old-school bulbs and won’t scorch leaves. Keep lights 2-4 inches above plants, raising them as stems lengthen.
“Plants stretch toward weak light sources, creating spindly stems. Consistent artificial lighting builds stocky, resilient starters.”
Set timers for 14-16 hours daily. Darkness matters too—plants use nighttime to process sunlight. For detailed guidance, explore this complete guide to seed starting that covers light positioning tricks.
Remember: Your garage or basement becomes a powerhouse with these tweaks. Pair your setup with indoor gardening basics for year-round harvests. Just plug in, adjust, and watch those seeds become your next garden stars.
Start Seedlings Indoors: A Beginner’s Guide to Seed-Starting Trays

Embarking on your seed-starting adventure feels like unlocking nature’s secret code. Forget flawless execution—success lies in embracing the journey. Even seasoned growers face unexpected twists, so celebrate every sprout as a victory.
Kick off with forgiving varieties that boost confidence. Leafy greens like buttercrunch lettuce and aromatic basil rarely disappoint. These plants tolerate minor mistakes while teaching essential care routines. Save finicky eggplant seeds for year two.
| First-Year Setup | Experienced Grower Add-Ons |
|---|---|
| Recycled containers | Heat mats |
| Window light | Adjustable LED panels |
| Basic potting mix | Custom soil blends |
“My first tray had 3 survivors out of 24 seeds. Those plants taught me more than any perfect batch ever could.”
Track progress in a dedicated notebook. Note planting dates, germination rates, and growth patterns. This data becomes gold when refining techniques next season. Limit yourself to 4-5 varieties initially—you’ll master their needs without overwhelm.
Consistency trumps complexity. Check trays twice daily for moisture levels and light exposure. Rotate containers to prevent lopsided growth. Remember: Your plants show you what they need through leaf color and stem strength.
Starting seeds at home isn’t about rigid rules—it’s developing a green thumb through observation. Each tiny plant reveals nature’s wisdom, helping you grow alongside them.
Step-by-Step Process for Starting Seeds Indoors

Your seed-starting journey begins with two critical steps: preparing the perfect soil bed and mastering planting precision. Nail these fundamentals, and you’ll see sprouts faster than you’d expect.
Soil Preparation & Pre-Moistening
Dry potting mix repels water like rain on a waxed car. Solve this by mixing water into your seed starting blend until it feels like a damp sponge. Squeeze a handful—if a few drops escape, you’ve nailed it. This helps seeds absorb water evenly without drowning.
Fill trays gently. Pressing soil creates concrete-like density that suffocates roots. Instead, sprinkle mix into cells and tap the tray’s sides. The soil settles naturally, leaving air pockets for strong root growth.
Sowing and Covering Your Seeds
Create shallow divots using a pencil tip—depth matters! Tiny lettuce seeds need just ⅛” coverage, while beefsteak tomato seeds require ¼”. Drop 2-3 seeds per cell as insurance against duds.
Cover seeds with a little bit of mix, like tucking them in with a lightweight blanket. Mist the surface until glistening, not soggy. Labels prevent future guesswork—write variety names and dates immediately.
Pro tip: Place trays in warm spots (70-80°F) to speed germination. Check moisture twice daily—if soil feels dry under your fingertip, mist lightly. Within days, you’ll witness nature’s magic as green shoots emerge.
Understanding Seed Depth and Spacing Techniques
Mastering seed placement transforms tiny specks into thriving plants. Getting cozy with your seeds’ needs ensures they emerge strong and ready to grow. Let’s decode nature’s hidden instructions for perfect sprouting.
General Planting Guidelines
Think of seeds as tiny treasure chests—they need precise conditions to unlock their potential. A simple rule guides all planting: bury each seed 2-3 times deeper than its width. Lettuce seeds (1/16”) barely need dusting with starting mix, while plump beans (1/2”) thrive at 1” depth.
Your starting mix matters here. Keep it fluffy enough to let roots breathe but firm enough to maintain contact. After covering seeds, gently press the soil line to eliminate air pockets. Some seeds need special treatment—soak peas or pumpkins overnight to soften their armor-like shells.
Spacing prevents future headaches. Overcrowded seedlings compete for light and nutrients. If your tray cells feel cramped, thin sprouts early. Those extra stems you snip? Toss them in salads—microgreens pack flavor!
Watch your seeds closely after planting. If the surface dries out, mist lightly—but avoid much water that could displace tiny seeds. Within days, emerging cotyledons will let you know you’ve nailed the depth game.


