
Adding a beautiful arch to your landscape can instantly elevate its charm. These structures create a stunning focal point while offering practical benefits. Whether you want to frame a pathway or support climbing plants, a well-placed arch brings elegance to any yard.
Best of all, you don’t need to spend hundreds on pre-made options. With basic materials and a little creativity, you can build one yourself for under $100. Cattle panels, wooden frames, or even repurposed items work perfectly for this project.
These arches do more than just look pretty. They help maximize your growing space by supporting vines and flowers. For small areas, check out our guide on vertical gardening solutions that pair well with arch designs.
In the following sections, we’ll walk through material choices, building steps, and design inspiration. Even beginners can create something special with our easy-to-follow approach.
Why Add a Garden Arch to Your Outdoor Space?

Transform your yard with a stunning arch that blends beauty and function. These structures do more than just look pretty—they redefine how you use and enjoy your landscape. From framing pathways to supporting lush greenery, an arch adds layers of interest.
Enhances Visual Appeal and Depth
A well-placed arch tricks the eye, making small spaces feel larger. It draws attention upward, creating the illusion of depth. This is perfect for urban yards or compact plots, where every inch counts.
Consider using arches to separate seating areas from vegetable patches. This “garden room” effect adds structure while keeping things airy. Even in winter, the bare framework offers striking silhouettes against snow or twilight.
Supports Climbing Plants and Vines
Arches give vines and climbing plants the perfect stage to shine. Roses, clematis, and honeysuckle thrive when given vertical support. Even veggies like beans and cucumbers can climb, boosting yields by 20-30%.
One cattle panel arch can hold 50+ lbs of winter squash! By growing upward, you save ground space for other favorites. Pair arches with vertical gardening tricks for maximum impact.
Creates a Natural Focal Point
Every great landscape needs a focal point, and an arch delivers. Position it over a gate or along a path to guide the eye. The shaded spot underneath stays 5-10°F cooler—ideal for a bench or birdbath.
Choose flowering vines for summer color or evergreen varieties for year-round structure. Either way, your arch becomes the heart of your outdoor space.
Types of Garden Arches for Every Style

From rustic wood to sleek metal, arches adapt to any landscape vision. Your choice of material affects durability, cost, and maintenance. Below, we break down the best options to match your needs.
Wooden Arches: Rustic and Timeless
Cedar wooden arches last 10–15 years with annual sealing. Their natural warmth suits cottage-style yards or woodland settings. For longevity, apply boiled linseed oil to prevent rot.
Pressure-treated lumber costs $3–$5 per foot but resists pests. Untreated wood offers affordability but requires more upkeep. Pro tip: Use barrel hinges to repurpose pallets into arched entryways.
Metal Arches: Durable and Modern
Metal cattle panels handle 100+ lbs of climbing plants and 60+ mph winds. Powder-coated finishes prevent rust, while curved designs add contemporary flair. At $35, they’re a steal for high-wind areas.
“Metal’s strength makes it ideal for heavy vines like grapes or wisteria.”
PVC Pipe Arches: Lightweight and Budget-Friendly
PVC pipe costs $0.50–$1 per foot and weighs almost nothing. Though it holds only 30 lbs, it’s perfect for lightweight annuals like morning glories. Pair with self-watering systems for low-maintenance blooms.
Recycled Material Arches: Eco-Conscious Choices
Old bike wheels, willow branches, or salvaged pallets create unique garden arches. A willow branch design secured with jute twine can last 3 seasons. Build garden arch projects using reclaimed items to cut costs and waste.
| Material | Cost | Load Capacity | Lifespan |
|---|---|---|---|
| Wood (Cedar) | $80 | 70 lbs | 10–15 years |
| Metal | $35 | 100+ lbs | 20+ years |
| PVC Pipe | $20 | 30 lbs | 5–7 years |
Choosing the Perfect Design for Your Garden
Selecting the perfect arch involves balancing aesthetics, function, and your garden’s unique needs. Whether framing a pathway or showcasing climbing plants, the right design elevates your space. Start by evaluating your layout and personal style.
Measuring Your Space for the Right Fit
Standard arch dimensions of 7′ height and 4′ width ensure comfortable walkability. Leave 6″ clearance between the base and raised beds for planting. Use this formula: Arch width = path width + 12″ to accommodate plant growth.
For narrow spaces, a slimmer profile (3′ width) works, while sprawling gardens benefit from wider spans. Measure overhead clearance too—vines like wisteria need 8–10′ to cascade gracefully.
Matching the Arch to Your Garden’s Aesthetic
Pair the arch’s shape with your landscape’s vibe. Curved tops suit cottage gardens, while angular designs fit modern spaces. Bamboo or wooden moon gates complement Japanese-inspired themes.
Color also plays a role. Dark hues absorb 15% more heat—ideal for cooler climates. White arches brighten shady corners, and earth tones blend seamlessly with natural settings. A step-by-step arch construction guide can help refine your vision.
Customizing with Paint and Decorative Elements
Personalize your arch with weather-resistant paint or lattice panels. Deck screws and wood glue secure lattice for added support. Pro tip: A blue-painted metal arch boosted morning glory blooms by 40% in one case study.
“Custom colors not only reflect personality but can also influence plant growth by altering light absorption.”
Add hooks for hanging baskets or solar lights for evening charm. The right details turn a functional piece into a garden masterpiece.
Step-by-Step Guide to Building Your DIY Garden Arch

Constructing your own arch is easier than you think with the right guidance. This project transforms basic supplies into a sturdy, eye-catching structure. Follow these steps to ensure stability and longevity.
Gathering Tools and Materials
Start with a 14-gauge cattle panel (18′ length) and two 6′ T-posts. You’ll also need:
- 10+ heavy-duty zip ties (1.25″ width)
- Rubber mallet or T-post driver (rent for $8/day)
- Work gloves for handling sharp edges
Optional: Clear automotive wax for weatherproofing metal surfaces. A helper cuts installation time to 45 minutes.
Preparing the Base and Supports
Mark the arch’s location, spacing T-posts 4′ apart. Angle them 65° outward for stability. Use a mallet to drive posts 2′ deep—this anchors the arch against wind.
“Angled posts distribute weight evenly, preventing collapse under heavy vines.”
Assembling and Securing the Arch
Bend the cattle panel into a gentle curve between the posts. Secure it with zip ties every 12″. Trim excess wire with bolt cutters. For added strength, double-wrap ties at the base.
Test stability by gently shaking the structure. Adjust posts if wobbling occurs.
Finishing Touches for Durability
Apply automotive wax to metal surfaces to prevent rust. For wooden components, use linseed oil. Plant climbing vines at the base, spacing them 1–2′ apart.
Your diy garden arch is now ready to support blooms or frame a pathway. Pair it with self-watering systems for low-maintenance growth.
| Tool | Purpose | Alternative |
|---|---|---|
| Rubber mallet | Precise post placement | Hammer (less control) |
| T-post driver | Efficient post driving | Manual hammering |
| Bolt cutters | Trimming sharp edges | Hacksaw (slower) |
Maintaining Your Garden Arch for Longevity

A well-maintained arch lasts longer and stays beautiful year after year. With seasonal care, you can prevent weather damage and keep plants thriving. Follow these steps to protect your structure and enhance its lifespan.
Seasonal Cleaning and Inspections
Check your arch monthly for loose bolts or rust spots. Clear debris like leaves from joints to prevent moisture buildup. A 30% vinegar solution removes most metal rust without harsh chemicals.
In fall, prune dead vines and secure wobbly sections. Winter demands extra attention—remove snow loads over 20 lbs/sq ft to avoid bending. Pro tip: Mark inspection dates on your calendar to stay consistent.
Protecting Wood and Metal from Weather
Wooden arches need yearly treatment. Mix 1 part tung oil with 1 part citrus solvent for a natural protective coat. Metal arches benefit from automotive wax to repel rain and slow rust.
For severe damage, replace rotted cedar posts with galvanized steel. This swap can extend your arch’s life by decades. Explore DIY garden arch ideas for weather-resistant designs.
Trimming Plants to Prevent Overgrowth
Prune vines when stems reach pencil thickness. Use sharp shears at a 45° angle to encourage healthy regrowth. Overgrown plants add excess weight—trimming keeps your arch stable.
Climbing roses and wisteria need frequent attention. Train them to grow outward, not just upward, for balanced coverage. Time pruning after flowering to avoid cutting next year’s buds.
“Annual maintenance reduces replacement needs by 70%, saving you money and effort long-term.”
Creative DIY Garden Arch Ideas to Inspire You

Turn ordinary materials into extraordinary garden features with these inspiring ideas. Whether you prefer rustic charm or modern elegance, these designs prove that creativity trumps budget. Each option supports climbing plants while adding personality to your space.
Willow Branch Arch for a Whimsical Touch
Fresh willow branches bend without cracking for 72 hours after cutting—perfect for weaving. Use rebar frames as a base, then twist shoots into graceful curves. This method costs under $20 and blends seamlessly into cottage-style landscapes.
Train flowers like sweet peas or clematis to climb the natural framework. The living structure gains strength as plants grow, lasting 3–5 seasons. For added magic, wrap solar-powered LED lights around the branches.
Ladder Arch for Repurposed Charm
Old wooden ladders support up to 25 lbs of vines, making them ideal for lightweight blooms. A 1920s orchard ladder becomes a vintage showpiece when draped with moonflower vines. Secure it with galvanized screws for stability.
“Upcycled ladders add instant history to gardens, and their rungs simplify plant training.”
Pair with climbing roses or morning glories for vertical color. Space plants 12″ apart to avoid overcrowding.
Bamboo Arch for Lightweight Elegance
Bamboo lasts 5–7 years when treated with borax solution. Connect poles with hemp rope for a natural look or stainless steel wire for durability. This bamboo arch weighs under 10 lbs but withstands 30 mph winds.
Plant fast-growing nasturtiums or beans to cover the structure in weeks. At $15, it’s a fraction of store-bought alternatives. For nighttime appeal, hang lanterns from the crossbeams.
| Material | Cost | Best For | Lifespan |
|---|---|---|---|
| Willow Branches | $20 | Cottage gardens | 3–5 years |
| Wooden Ladder | Free–$50 | Vintage aesthetics | 5+ years |
| Bamboo | $15 | Modern/tropical spaces | 5–7 years |
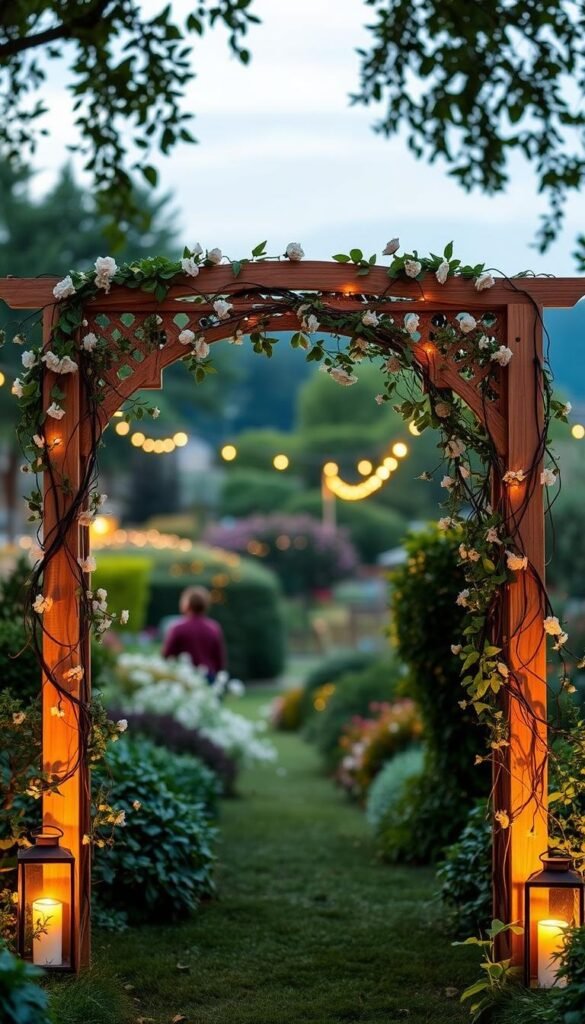
Bringing Romance to Your Garden with Your Finished Arch
Your new structure transforms any outdoor space into a dreamy retreat. Make sure to add final touches like hanging glass terrariums or delicate wind chimes. These details create movement and sparkle as breezes pass through.
Rotate plants with the seasons for year-round charm. Start with sweet peas in spring, transition to climbing roses in summer, then showcase ornamental gourds in fall. This keeps your beauty garden vibrant through changing weather.
Share your creation using #RomanticGardenArch—we’d love to see how yours turned out! Pair it with stone pathways or upcycled planters for a cohesive look. Every detail enhances the welcoming atmosphere.
Your arch isn’t just a structure—it’s the heart of your outdoor sanctuary. Whether draped in blooms or standing bare against winter skies, it adds timeless elegance. Build garden moments here, from morning coffees to twilight gatherings.


