
Rustic wooden bowls have become must-have home accents for good reason. These multi-purpose pieces bring natural warmth to any room while offering endless styling possibilities. Originally used for bread-making, their broad shape and low profile make them ideal for crafting eye-catching arrangements that evolve with the seasons.
Building your own miniature landscape combines gardening joy with interior design creativity. You can mix succulents, air plants, and decorative elements to match your personal style – whether you prefer modern simplicity or cozy farmhouse vibes. The best part? These living displays require minimal maintenance while making maximum visual impact.
Your creation becomes more than just decoration. It serves as a functional green space that freshens your environment and adapts to special occasions. Swap seasonal blooms in spring or add pinecones during winter holidays for year-round appeal. For sustainable options, consider eco-friendly container gardening techniques using repurposed materials.
This project lets you experiment with textures and colors while bringing nature’s calm indoors. Whether you’re new to plants or an experienced green thumb, crafting these portable gardens offers satisfying results that elevate your space instantly.
Understanding Dish Gardens and Shallow Bowls

Combining plants with decorative containers creates living art that enhances your home. Dish gardens thrive as self-contained ecosystems, blending multiple species in one harmonious display. These arrangements work particularly well in shallow vessels, where careful plant selection ensures healthy growth and visual balance.
What Is a Dish Garden?
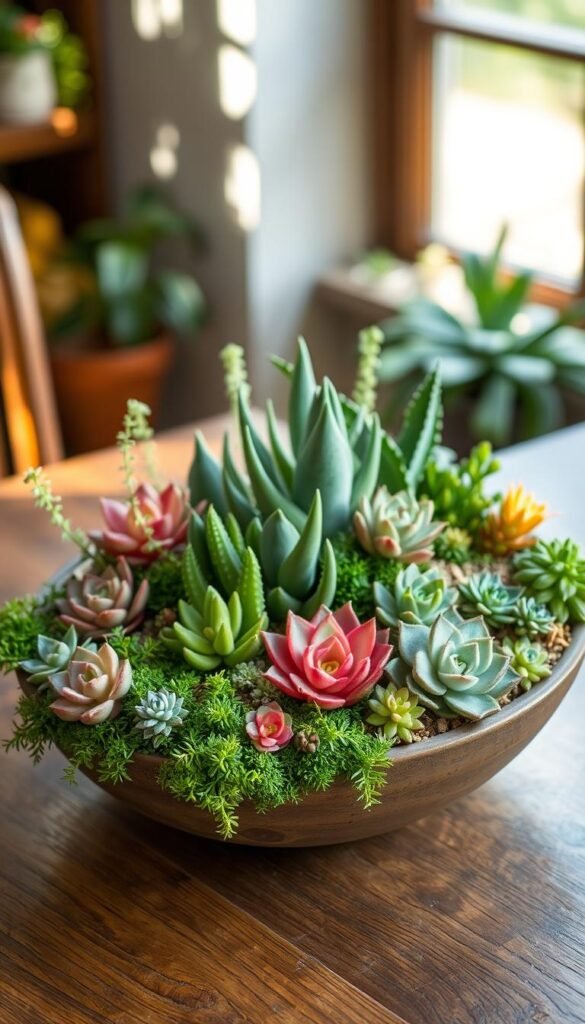
A dish garden groups compatible houseplants in a single container, mimicking natural landscapes. Unlike outdoor gardens, these mini ecosystems adapt to indoor conditions. Popular choices include succulents, ferns, and air plants – species that share similar light and water needs.
History and Versatility of Shallow Bowls
Originally crafted for bread-making, shallow wooden bowls now serve as stylish plant homes. Their wide bases provide stability, while low sides showcase layered designs. Modern versions range from reclaimed barnwood to sleek concrete, fitting any decor style from country cottages to urban lofts.
| Feature | Dish Gardens | Traditional Planters |
|---|---|---|
| Space Efficiency | Fit 3-5 plants in 12″ width | Usually hold 1-2 plants |
| Design Flexibility | Mix textures and heights | Limited arrangement options |
| Seasonal Updates | Easy to refresh with new accents | Requires full replanting |
For those seeking creative gardening ideas, dish gardens offer endless possibilities. Swap flowering annuals in spring or add evergreen sprigs during winter holidays. The art lies in balancing colors and forms while keeping maintenance simple – perfect for busy plant lovers.
Essential Materials and Tools for Your Centerpiece

Creating a thriving dish garden starts with gathering four key foundational elements. You’ll want materials that combine practicality with visual appeal, ensuring your living arrangement stays healthy while complementing your decor style.
Choosing the Right Container and Bowl
Waterproof vessels form the base of every successful display. While shallow ceramic bowls work beautifully, consider unique options like footed planters or antique ice buckets. “The container should enhance your plants without competing for attention,” notes urban gardener Lisa Chen.
Look for pieces with enough surface area to showcase multiple specimens. A 12-inch diameter allows room for a maidenhair fern, small succulents, and decorative stones. Avoid containers taller than 4 inches – shallow roots need horizontal space more than depth.
Selecting Drainage Materials and Top Dressing
Drainage layers prevent soggy soil while adding textural contrast. While gravel is commonly used, pumice stones reduce weight by 40% compared to traditional rock. Layer 1-2 inches at the base, then add activated charcoal to keep water fresh.
Top dressings like Spanish moss hide pot edges while locking in moisture. Preserved green moss works well around flowering plants, creating a lush backdrop for seasonal blooms. For desert-themed gardens, try crushed quartz sand instead.
Complete your toolkit with narrow-spouted watering cans and long tweezers. These help maintain delicate arrangements without disturbing carefully placed elements. With these materials, you’re ready to craft a living masterpiece that grows more charming each week.
How to Prepare Your Shallow Bowl for Transformation

Proper preparation turns ordinary containers into thriving miniature ecosystems. This crucial stage ensures your living artwork stays healthy while showcasing its full aesthetic potential. Let’s explore the two-step process that creates the perfect foundation.
Cleaning and Prepping the Bowl
Begin by washing your container with mild soap and warm water. For wooden bowls, rub food-grade mineral oil into the surface to prevent cracking. “Always test sealants on a small area first,” advises container gardening expert Marco Ruiz. “What works for ceramic might damage reclaimed materials.”
Check for hairline cracks using a flashlight – even tiny gaps can leak water over time. Let the bowl dry completely before adding any elements. This prevents mold growth and ensures proper adhesion for decorative accents.
Setting Up Your Base and Foundation
Create a drainage layer using materials that balance function and style. While gravel remains commonly used, consider these alternatives:
| Material | Benefits | Best For |
|---|---|---|
| Pumice stones | Lightweight, improves aeration | Hanging displays |
| Activated charcoal | Filters impurities, reduces odors | Closed containers |
| Crushed terracotta | Regulates moisture, rustic look | Mediterranean themes |
Build your base high enough to lift plant roots above potential standing water. A 1:1 mix of potting soil and sand small particles works well for most dish gardens. Pre-moisten this layer before placing your plants – damp soil holds arrangements better than dry mix.
Finish with a top dressing of preserved moss between plants. This living carpet helps retain moisture while hiding soil surfaces. Your prepared foundation now supports both plant health and visual appeal, ready for creative staging.
Transform a Shallow Bowl into a Gorgeous Dish Garden Centerpiece

Seasonal styling turns your wooden container into a chameleon of home decor. Whether you crave earthy warmth or sleek sophistication, these living arrangements adapt to your aesthetic vision. Let’s explore how to craft displays that feel both intentional and effortlessly chic.
Rustic Charm Meets Modern Flair
For countryside vibes, combine trailing ivy with chunky bark pieces. Add moss-covered twigs and stone accents to mimic forest floors. This approach creates miniature landscapes that bring outdoor serenity inside.
Prefer clean-lined elegance? Try symmetrical placements of snake plants beside smooth river rocks. Monochromatic schemes with varying leaf textures work beautifully. Designer Lauren Hartmann suggests: “Odd numbers create balance – use three matching succulents as anchors.”
| Style | Key Elements | Plant Pairings |
|---|---|---|
| Rustic | Weathered wood, terracotta, wild herbs | Sedum, thyme, air plants |
| Modern | Geometric shapes, neutral tones | ZZ plants, echeveria, pebbles |
The Art of Layered Planting
Master the Thrillers, Fillers, Spillers method for pro-level results. Start with a tall focal plant like dracaena. Surround it with colorful peperomia, then let string-of-pearls cascade over edges. This technique adds drama while keeping maintenance simple.
Mix leaf shapes and heights for dynamic contrast. Pair spiky haworthia with round crassula leaves. Add red-tinged plants for pops of color against green backdrops. Your creation becomes living art that evolves with each new growth spurt.
Remember: your centerpiece should reflect personal style while enhancing room flow. Swap elements seasonally – tiny pumpkins in fall, pinecones in winter. With endless possibilities, every refresh feels like starting anew.
Creative Planting and Arrangement Techniques
Crafting a living masterpiece in your home starts with playful experimentation. Discover how simple materials become design tools when layered thoughtfully. These methods turn ordinary containers into conversation-starting displays that evolve with your creativity.
Layering Textures With Moss, Stone, and Sand
Start with a base of preserved moss to add softness and contrast. Tuck polished river stones between plants for natural accents. Sprinkle sand small around succulents to mimic desert landscapes while improving drainage.
Crinkle sheet moss around taller specimens like maidenhair fern stems. This creates visual depth while locking moisture at the roots. “Textures guide the eye through your arrangement,” notes floral designer Elena Torres. “Rough stones balance smooth leaves beautifully.”
Mixing Foliage, Fresh Flowers, and Evergreens
Pair trailing ivy with spring blooms like mini roses for seasonal flair. Place fresh flowers near the bowl’s edge where their colors pop. Use evergreen sprigs as natural filler between flowering plants.
Rotate elements quarterly – swap pansies for poinsettias while keeping structural greens. This keeps your display fresh without full replanting. Remember: odd numbers of plants create harmony, while varied heights add movement.
Your finished art piece becomes a living postcard of nature’s beauty. With these techniques, you’ll craft visually appealing dish gardens that delight year-round. What story will your next arrangement tell?


