
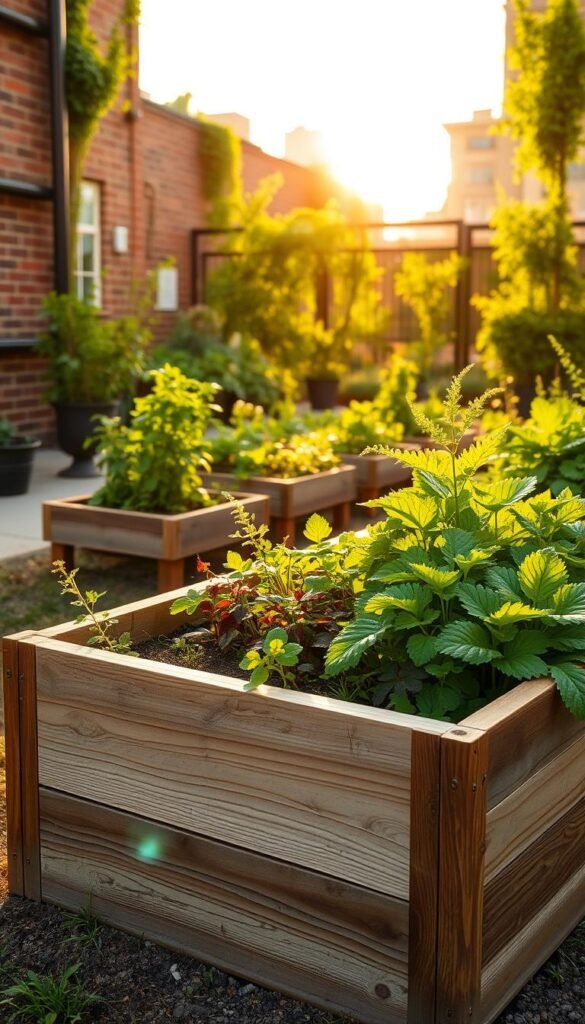
Growing fresh food in small spaces just got easier. Many gardeners swear by elevated planters, claiming they’re like hitting the easy button for growing veggies. These structured plots solve common problems like rocky dirt, tight yards, and sore backs – all while giving plants room to thrive.
Imagine turning a concrete patio or tiny backyard into a lush green oasis. Raised beds let you control soil quality from day one, which means healthier roots and bigger harvests. They warm up faster in spring, extend your growing season, and keep weeds from taking over. Plus, you’ll spend less time bending over – a game-changer for anyone with mobility concerns.
This method isn’t just about stacking dirt in a box. It’s a smart system that works with nature. You’ll learn how to pair plants that help each other grow, manage water efficiently, and create the perfect home for your crops. Ready to start? We’ll walk you through everything from choosing materials to how to build a raised bed that lasts for years.
Whether you’re growing juicy tomatoes or crisp lettuce, these techniques turn limited space into abundant possibility. Let’s dig into the secrets that make raised beds the favorite tool for city farmers and balcony growers alike.
Introduction to Urban Gardening in Raised Beds

City dwellers face unique challenges when growing food – but structured planters turn concrete jungles into edible paradises. Unlike traditional plots, these contained systems let you skip soil battles with urban ground conditions. Compacted clay? Contaminants? Just build up instead of digging down.
- Custom soil blends boost plant health from day one
- Drainage issues vanish with proper bed construction
- Warmer root zones mean earlier spring planting
No-dig methods aren’t just trendy – they’re practical. One gardener notes: “My yields doubled when I stopped fighting my backyard’s clay and built up instead.” This approach aligns perfectly with organic growing methods, letting you control every input.
Accessibility shines in elevated systems. Kneeling becomes optional when beds sit at waist height. You’ll spend less time weeding thanks to concentrated growing areas. Even polluted air affects plants less when their roots develop in clean, nutrient-rich soil.
Microclimates form naturally in these contained spaces. Brick walls radiate warmth at night, while strategic placement shields tender greens from harsh winds. It’s like giving each plant its personalized weather system.
The Benefits of Raising Your Garden Beds

Transform your growing space instantly with raised beds. Say goodbye to poor dirt and hello to thriving plants in days, not years. One grower harvested zucchini and kale just six weeks after building six structured planters on barren land.
Why fight nature when you can design perfection? Fill your raised bed garden with custom soil blends that give roots exactly what they need. No digging. No tilling. Just results. As one enthusiast puts it:
“My back thanks me every time I water – these beds do the heavy lifting.”
See how elevated growing solves common problems:
| Challenge | Traditional Garden | Raised Beds |
|---|---|---|
| Soil Quality | Years to improve | Instant control |
| Accessibility | Kneeling required | Seated gardening |
| Drainage | Flooded roots | Perfect moisture |
| Season Length | Weather-dependent | 2-3 week head start |
Warmer soil means earlier planting. Tighter spaces mean less weeding. Custom heights mean no sore knees. You’ll spend 40% less time maintaining while harvesting 30% more food, according to recent studies.
These systems aren’t just convenient – they’re revolutionary. Create microclimates for heat-loving tomatoes or moisture-craving lettuce. Turn problem areas into productive zones. Your garden adapts to you, not the other way around.
The Ultimate Guide to Raised Bed Materials

Your garden’s success starts with what you build it from. The right choices protect plants, last decades, and keep your harvest safe. Let’s break down what works – and what doesn’t.
Choosing Durable and Non-Toxic Wood
Cedar reigns supreme for wooden beds. Its natural oils fight rot, letting frames last 10-15 years without chemical treatments. One grower shared: “My cedar beds still look new after eight seasons – worth every penny.”
Always pick untreated wood. Pressure-treated lumber contains copper and arsenic that leach into soil. Use galvanized metal brackets at corners to prevent warping. Pro tip: Look for FSC-certified cedar to ensure sustainable sourcing.
Exploring Alternative Materials
Not a fan of wood? Try these options:
- Bricks: Build sturdy 50-foot beds that retain heat
- Recycled composite: Lasts 20+ years with zero maintenance
- Stone walls: Perfect for sloped yards needing erosion control
Each material affects your garden differently. Metal beds warm soil faster for early crops, while concrete blocks create ideal microclimates for herbs. Make sure any recycled materials (like old pallets) haven’t been treated with toxic paints.
Durability matters most. A well-built brick bed can outlive wooden ones by decades. Pair materials with your climate – galvanized steel excels in rainy areas, while natural stone thrives in dry regions. Your plants will thank you.
Designing Your Raised Bed Garden for Optimal Sunlight

Sunlight transforms your garden from surviving to thriving. Position your beds where rays linger longest – typically south-facing spots capture 6+ hours daily. Observe shadows from buildings or trees at different times to map “sun zones” in your space.
Layout Considerations for Urban Spaces
Work with what you’ve got. Place beds near reflective surfaces like white walls to bounce light onto leafy greens. If space allows, leave 18-inch walkways between planters for easy access. One gardener maximized a 10×10 patio by using how to plan a square foot techniques in three stacked beds.
Urban obstacles? Get creative. Use mirrors on fences to redirect sun or grow shade-tolerant herbs under taller crops. Rotate plant positions seasonally as sun angles shift – tomatoes might need relocation from spring to summer.
Orientation and Plant Arrangement
Tall plants like corn or trellised beans belong on the bed’s east side. This prevents afternoon shadows on shorter neighbors. But flip this rule for cool-weather crops: lettuces appreciate afternoon shade from west-placed sunflowers during heat waves.
| Crop Type | Ideal Position | Light Needs |
|---|---|---|
| Tomatoes | South-facing center | 8+ hours |
| Spinach | North edge | 4-6 hours |
| Peppers | West side | 6-8 hours |
Soil depth matters too. Place deep-rooted veggies where beds are tallest. Remember: well-draining soil prevents waterlogged roots even in sun-drenched spots. Test different layouts using sun-tracking apps before committing to a design.
Building Raised Beds: Step-by-Step Strategies
Assembling your growing space doesn’t require professional skills. One determined grower constructed six raised beds in five days using recycled lumber and bulk compost. This proves you can create productive systems faster than preparing traditional plots.
Start by clearing grass and leveling your site. Use stakes and string to outline dimensions – most beginners find 4×4-foot beds easiest to manage. Secure corners with galvanized brackets instead of nails for added stability. “Pre-drilling holes prevents wood splitting,” advises a seasoned DIY gardener.
You’ll need basic tools:
- Circular saw for precise cuts
- Impact driver for sturdy joints
- Shovel for soil mixing
Fill your new garden structure with layered materials. Start with cardboard to suppress weeds, then add equal parts compost and topsoil. Compact gently to eliminate air pockets without crushing beneficial microbes.
| Construction Stage | Time Saved | Result |
|---|---|---|
| Frame Assembly | 2 hours/bed | Rock-solid structure |
| Soil Preparation | 3 days | Ready-to-plant beds |
| Final Adjustments | 30 minutes | Perfect drainage |
Sloped yard? Terrace raised beds using retaining wall blocks. Tight spaces thrive with vertical designs – attach trellises during initial build raised projects. Always check for squareness with a carpenter’s level before filling with soil.
Spot warped boards? Replace them immediately to prevent structural issues. A quick coat of natural linseed oil protects wooden frames without harming plants. Your efforts now guarantee years of bountiful harvests.
Determining the Ideal Bed Size and Height

Getting your bed size right makes all the difference between backaches and bountiful harvests. The magic formula? Most growers find 4 feet wide by 8 feet long works best. This lets you reach every plant without stepping into the bed, keeping soil fluffy for happy roots.
Optimizing Dimensions for Accessibility
Your arm length decides the perfect width. If you’re under 5’3″, shrink the bed to 3 feet wide. One gardener shared: “I can finally weed my entire plot without doing yoga poses!” Height matters too – 6 inches suits most greens, but 12 inches gives carrots room to stretch.
| Width | Ideal For | Accessibility |
|---|---|---|
| 3 feet | Small spaces | Easy reach from both sides |
| 4 feet | Average users | No stepping required |
| 5 feet | Wheelchair access | Knee clearance + reach |
Adjusting for Different Crops and Needs
Taller beds (18-24 inches) let you garden seated – perfect for herbs and strawberries. But they need 30% more soil. Deep-rooted tomatoes? Go for 12 inches minimum. Shallow lettuces thrive in 6 inches.
Watch out for long runs. Beds over 8 feet often sag without cross-braces. Pro tip: Use pressure-treated 2x4s every 4 feet to prevent bowing. Your garden stays tidy, and soil stays put.
Soil Health and Organic Matter in Raised Beds
Your plants’ secret weapon lies beneath the surface. Healthy soil teems with life – bacteria, fungi, and worms working together like a well-oiled machine. These tiny allies break down organic matter into plant food while locking carbon underground. It’s nature’s perfect recycling program.
Synthetic fertilizers act like fast food for plants. They deliver quick meals but starve the soil’s workforce. As one gardener observed: “My tomatoes grew faster with chemicals, but the soil turned lifeless within months.” Organic options feed both crops and microbes, creating lasting partnerships.
Build your soil’s vitality with these essentials:
- Compost – nature’s multivitamin for beds
- Cover crops like clover that protect and nourish
- Mulch to retain moisture and suppress weeds
Spot thriving soil by its crumbly texture and earthy smell. Earthworms wriggling through dark, rich humus signal a balanced ecosystem. Well-structured dirt drains quickly after storms yet holds moisture during droughts.
Strong microbial networks boost plant immunity naturally. Studies show crops grown in healthy soil resist pests 50% better than those in sterile dirt. You’ll harvest tastier veggies while giving back to the planet – a win-win for your garden and the environment.
Watering Techniques and Irrigation Best Practices
Proper hydration transforms your plants from surviving to thriving. Unlike traditional methods, structured growing spaces demand smart water management. Let’s explore systems that deliver moisture precisely while saving time and resources.
Drip Irrigation and Soaker Hoses
Targeted watering systems outperform sprinklers every time. Drip lines release water slowly through emitters, while porous hoses seep moisture along their length. One gardener reports: “My water bill dropped 40% after switching to drip lines – plants grew stronger too!”
| Method | Water Delivery | Efficiency | Best For |
|---|---|---|---|
| Drip Irrigation | Precise root zone drops | 90% effective | Tomatoes, peppers |
| Soaker Hoses | Even soil penetration | 85% effective | Leafy greens, herbs |
Establishing a Consistent Watering Schedule
Water at dawn when plants drink deepest. Check soil moisture by pushing a finger 2 inches down – if dry, it’s time to hydrate. Raised beds typically need watering every 2-3 days in summer, adjusting for rainfall.
Organic matter acts like a sponge in your soil. Mix in compost to help dirt retain 30% more moisture. Mulch with straw or wood chips to reduce evaporation by half. Your plants will develop drought-resistant roots that tap into hidden water reserves.
Urban Gardening in Raised Beds: Best Practices for Healthy Crops
Thriving crops in compact spaces require tailored techniques. Start by choosing heat-tolerant vegetables like tomatoes and peppers that handle summer’s intensity. Plant these champions in early spring—their roots establish faster in raised beds’ warm soil, beating the heat before it peaks.
Pack plants closely to create living mulch. Leafy greens shade soil between taller crops, locking in moisture naturally. This strategy cuts watering needs while boosting harvests—one gardener reported 30% more peppers using this approach.
Rotate companion plants seasonally. Basil repels pests near tomatoes, while marigolds protect squash roots. These partnerships reduce chemical use and keep your garden thriving. Time successive plantings every 3 weeks for non-stop yields.
Adapt watering to your setup. Drip systems target roots directly, especially useful when transforming tight city spaces. Mix compost into soil monthly to maintain nutrients without synthetic fertilizers.
Seasonal tweaks make all the difference. Add shade cloth during heatwaves, then switch to row covers when frost threatens. Your raised bed garden becomes a year-round powerhouse with these smart adjustments.


