
Your outdoor area holds endless potential to become a personal sanctuary. Whether you’re starting fresh or reimagining an existing setup, thoughtful preparation helps craft a space that feels uniquely yours. Studies show time spent in nature reduces stress, making every moment you invest in this project a gift to your well-being.
Great results begin with observation. Notice how sunlight dances across your patio or where shadows linger longest. Track wind patterns and soil quality – these details shape plant choices and seating arrangements. For inspiration on blending beauty with practicality, explore our guide to elevating your space through intentional styling.
This approach works for cozy balconies and expansive lawns alike. Focus on creating distinct zones – maybe a reading nook under that maple tree or a dining spot near the kitchen door. Smart layouts consider traffic flow while leaving room for plants to thrive.
You’ll discover how matching greenery to your local climate saves water and maintenance time. We’ll walk through selecting materials that age gracefully and arranging focal points that pull everything together. With careful planning, your retreat will grow more inviting each season.
Understanding Your Garden Space
Every corner of your yard tells a unique environmental story. Spend a week noticing subtle changes – where morning light lingers or afternoon shadows stretch. These observations become your roadmap for creating a thriving, functional space.
Observing Sun, Shade, and Wind Patterns
Your phone’s compass app reveals key insights. Face your house from the property’s far end – this shows your garden’s aspect. South-facing spaces soak up sun, while north-facing areas suit shade-loving plants. Track light patterns hourly using sticky notes or a simple diagram.
Wind direction matters too. Notice where breezes funnel through gaps in fences or where walls create calm pockets. Sheltered spots become perfect dining nooks, while windy zones need tough shrubs as natural buffers.
Mapping Fixed Elements and Garden Zones
Grab graph paper and sketch permanent features first – patios, trees, utility boxes. Circle areas with specific purposes: herb beds near kitchens, play zones on soft grass. Even tiny yards benefit from zoning. A 6×6 ft sunny patch could host tomatoes, while a shaded corner might become a fern oasis.
Update your map seasonally. That bare maple tree in July casts surprising winter shadows when leafless. These details help pick plants that thrive year-round and place furniture where it stays usable through changing weather.
Establishing Garden Functions and Priorities

A well-planned garden serves your life, not just looks pretty. Start by asking: “What experiences do I want here?” Maybe you crave morning coffee spots or need safe play zones for kids. This clarity turns random plantings into intentional living spaces.
Defining the Purpose of Each Garden Area
First, list activities your space must support. Hosting summer barbecues? Growing herbs? Birdwatching? Write down every possibility. One family might need three zones: dining, play, and composting. Another might prioritize meditation corners with water features.
Next, match functions to locations. Sunny patches become vegetable plots, while shaded areas work for seating nooks. Think about dual purposes too. A stone patio could host yoga mats at dawn and dinner parties at dusk.
Finally, plan for all seasons. Add evergreen shrubs for winter structure or fire pits for chilly evenings. Remember capacity needs – measure how much room six dining chairs actually require before placing that pergola.
Your home’s outdoor areas evolve with your life. Start with essentials, then expand as needs change. A flexible approach lets your garden grow alongside your family’s story.
Sketching Your Garden Layout

Putting pencil to paper unlocks creative solutions you might not see digitally. Start with basic tools – a spiral notebook and tracing paper work better than expensive apps for brainstorming. Let your hand move freely, making messy lines that capture possibilities rather than perfect blueprints.
Quick Sketching Techniques for Beginners
Layer tracing paper over satellite images from free mapping tools. Trace property lines first, then play with curved vs. angular bed shapes. Use different colored pencils for plants, hardscapes, and furniture. Stick figures work fine for trees – focus on spacing rather than botanical accuracy.
Rotate your paper to view the space from new angles. Try flipping elements – what if the seating area moved north? Sketch three versions in 15 minutes, then circle features you love. This rapid iteration helps spot winning combinations.
Identifying Must-Have Features and Fixtures
Mark immovable elements with bold X’s – that oak tree stays, so build around it. Note water spigots and power outlets in red pen. Use star symbols for priority items like compost bins or kid-friendly zones.
Leave blank areas labeled “future expansion” for flexibility. If you stall on connecting pathways, sketch that section separately. Remember – these drawings are idea catchers, not contracts. The best designs often emerge from crossed-out attempts!
Choosing the Right Layouts for Small and Large Spaces

Transforming limited areas requires clever strategies, while expansive plots demand bold vision. Your layout choices determine how every square foot serves your needs and delights your senses.
Tailoring Design to Available Space
Even a 6m x 16m L-shaped plot like mine holds surprises. Sunny corners host tomatoes, while shaded nooks nurture ferns. Vertical solutions triple growing potential – try trellised beans or wall-mounted strawberry planters.
Compact areas thrive with dual-purpose features:
- Bench seats hiding garden tools
- Raised beds framing seating zones
- Pergolas supporting grapes and creating privacy
Bigger spaces shine when divided into “rooms”. Use hedges to separate dining zones from play areas. Match plant groupings to your plot’s shape – flowing curves soften angular lots, while straight paths elongate narrow ones.
Remember scale: dwarf lemon trees suit petite beds, while sweeping hydrangea borders anchor sprawling lawns. One client transformed their oversized yard by planting 50 lavender shrubs – now their summer breeze carries purple waves and honey scent.
Backyard Garden Design Basics: Choosing Layouts for Small or Large Spaces

Smart planning transforms ordinary yards into personalized retreats. By focusing on how you experience your environment, this method builds landscapes that feel intentional and alive. Let’s explore why structured planning leads to better results than impulsive planting.
Why This Approach Makes a Difference
Mapping your space before planting prevents costly mistakes. You’ll match greenery to sunlight patterns and soil types, ensuring plants thrive instead of just surviving. This saves time and money by reducing replacements.
Thoughtful layouts blend beauty with purpose. Evergreen shrubs add winter structure, while flowering perennials bring seasonal bursts. Materials like stone paths or wooden benches age gracefully, needing less upkeep over time.
Zoning creates natural flow between areas. A dining spot near the kitchen connects indoor and outdoor living. Play zones stay safely visible, while quiet corners offer relaxation. This balance makes your entire property feel larger.
Budget-friendly phases let you grow your vision gradually. Start with native plants suited to your climate, then add features like water elements or unique decor ideas. Each addition builds toward a cohesive look.
By working with nature’s rhythms, you craft spaces that evolve beautifully. Your efforts today become tomorrow’s sanctuary – a living extension of your home that delights through every season.
Incorporating Focal Points and Garden Rooms

Visual anchors transform ordinary plots into engaging experiences. Strategic placement of eye-catching elements guides movement through your space while creating natural gathering spots. Let’s explore how to balance showstoppers with functional zones.
Selecting a Standout Focal Point
Your home’s architecture holds design clues. Extend window lines and doorways into your landscape using the “Lines of Force” method. This invisible grid helps position features where they feel connected to your house. A front door sightline might end at a sculptural Japanese maple, while kitchen windows could frame a bubbling fountain.
Choose elements that spark joy year-round. A fire pit surrounded by evergreen shrubs works in snowy months, while a weeping cherry tree dazzles in spring. Scale matters – petite courtyards shine with vertical wall art, while sprawling lawns handle statement pergolas.
Creating Distinct Garden Zones
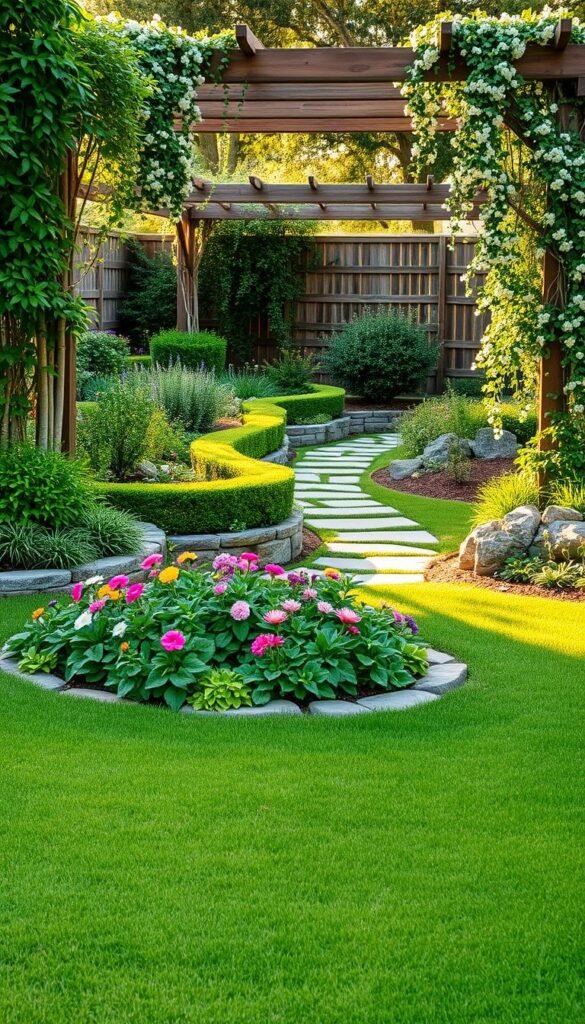
Divide your area into purposeful “rooms” using plants or structures. Low hedges make cozy reading nooks, while arched trellises signal entry to dining spaces. Keep sightlines open between zones using pathways that invite exploration.
| Element | Best For | Placement Tip | Seasonal Interest |
|---|---|---|---|
| Fire Pit | Entertaining | Align with patio doors | Year-round |
| Water Feature | Relaxation | Visible from main windows | Spring-Fall |
| Specimen Tree | Visual anchor | End of sightlines | Seasonal changes |
| Stone Bench | Transition areas | Between garden rooms | All weather |
Connect zones with materials repeating your home’s palette. Brick paths might echo chimney details, while cedar arbors complement wooden trim. This subtle repetition makes the whole space feel intentional yet effortless.
Smart Material and Element Choices for Lasting Beauty
The foundation of every inviting outdoor room begins beneath your feet. Start by sketching the “floor” shape for each zone – circular patios foster conversation, while rectangular decks streamline dining areas. These ground-level canvases determine how you’ll move through and use your space daily.
Selecting Hardscape Materials and Finishes
Match your home’s character with materials that tell a cohesive story. Brick pavers complement traditional architecture, while sleek concrete suits modern lines. Consider local weather patterns – porous stones prevent icy slips in northern climates, while UV-resistant composites keep southern surfaces cool.
Limit your palette to two primary materials for visual harmony. Blend textures instead: pair smooth flagstones with pebble borders. Use color echoes from your house trim or favorite plants to create subtle connections between areas.
Durable choices save time and money long-term. Crushed granite paths withstand heavy foot traffic, while powder-coated steel furniture resists rust. Always leave space for greenery to soften edges – creeping thyme between stepping stones adds life to even the most structured layouts.
Your material selections become the stage where memories unfold. Choose elements that age gracefully, developing character as your space evolves with your family’s story.


