
Transforming your personal oasis doesn’t have to drain your savings. With a little ingenuity and elbow grease, you can turn even modest spaces into inviting retreats. The secret? Focusing on creativity over cash.
Many homeowners achieve stunning results with budgets between $300 and $1,000. These projects often deliver the biggest visual punch – think vibrant container arrangements or upcycled furniture. The key is choosing updates that multitask, enhancing both beauty and practicality.
This guide shows you how to prioritize changes that make your area feel fresh and functional. Discover clever ways to use lighting, textures, and plant groupings. Learn which upgrades offer the best return on effort and investment.
You’ll find practical strategies for maximizing what you already own while adding affordable new elements. From vertical gardening hacks to smart seating solutions, every tip helps create cohesion without overspending. Your revitalized zone will become the spot where memories happen – all while keeping your wallet happy.
Setting Your Budget and Prioritizing Your Projects
Smart planning turns vision into reality without financial stress. Start by mapping your resources – time, skills, and funds – to create a roadmap for success. Nearly 68% of DIYers overspend when they skip this crucial step, according to recent surveys.
Understanding Financial Limits for Your DIY Makeover
Set clear boundaries before buying materials. The $300-$1,000 range works well for most garden ideas that transform spaces. Ask yourself: “What’s the maximum I can invest without regret?” This number becomes your north star.
Break costs into categories – plants, hardscape materials, tools. Always leave 10-15% for surprises like soil amendments or extra pavers. Remember, borrowing tools from neighbors cuts expenses dramatically.
Identifying High-Impact Projects
Focus on changes that solve problems and boost curb appeal. A weathered patio becomes inviting with $50 worth of stain. Overgrown corners gain purpose with DIY stepping stones from concrete mix.
Prioritize projects that meet your family’s needs. Love hosting? Allocate funds to seating. Prefer privacy? Invest in fast-growing vines. These home gardening projects deliver satisfaction faster than scattered upgrades.
Track progress visually. Before-and-after photos keep motivation high when tackling multi-step transformations. Your yard’s glow-up starts with one smart decision today.
Choosing Affordable Garden Designs and Layouts

Great outdoor areas begin with smart design choices that work with what you have. Whether refreshing a small corner or reimagining your entire layout, clever planning helps create inviting spaces without overspending. Start by evaluating how you want to use your area – dining, relaxing, or growing plants – then build your plan around those needs.
Planning Your Space Effectively
Grab graph paper or use free apps to sketch your yard’s dimensions. Identify zones for different activities:
- Sunny spots for vegetable patches
- Shaded areas for seating
- Natural pathways between features
Track sunlight patterns through the day. Place taller plants where they won’t block views or shade smaller varieties. This prevents costly replanting later.
Mixing Hardscaping with Lush Greenery
Combine practical materials with vibrant growth for balanced appeal. Use pea gravel paths between flower beds or recycled brick borders around trees. Stone benches surrounded by lavender create instant charm without breaking the bank.
Layer textures for depth – feathery grasses behind smooth river rocks, or climbing vines on wooden trellises. These pairings add year-round interest while keeping maintenance manageable.
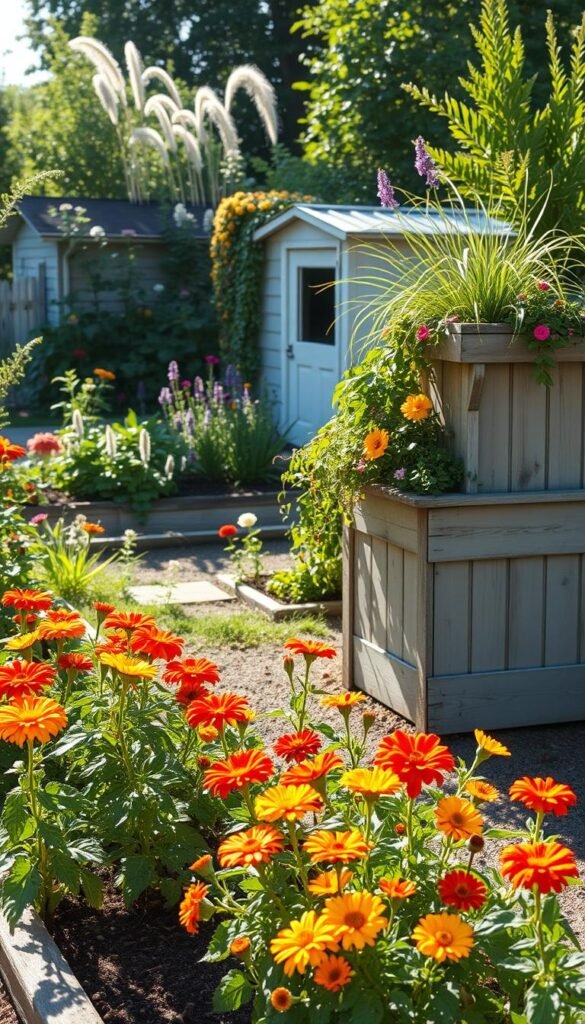
DIY Planters and Raised Garden Beds

Elevate your growing game with simple structures that boost both plant health and visual appeal. Raised garden beds solve stubborn soil problems while letting you customize your setup. Unlike traditional plots, these elevated spaces warm faster in spring and prevent waterlogging – perfect for fussy plants.
Repurposing Materials for Custom Planters
Old containers become treasures with a little imagination. Turn wooden pallets into vertical herb towers or paint chipped buckets for vibrant flower displays. Concrete blocks stacked in geometric patterns create instant modern planters with built-in drainage.
Check local listings for free materials – construction sites often discard usable lumber. Even broken dressers can transform into quirky cascading planters. “The best projects start with seeing potential where others see waste,” says a seasoned gardener on building raised beds for square-foot gardening.
Building Raised Beds on a Budget
Untreated pine costs half the price of cedar and lasts 5-7 years. For quick assembly, use cinder blocks as both frame and decorative elements. Line the bottom with cardboard to suppress weeds without chemicals.
Mix your soil using 60% topsoil, 30% compost, and 10% sand for optimal drainage. This blend saves money compared to pre-mixed bags while giving plants premium growing conditions. Your greens will reward you with vigorous growth all season.
Budget-Friendly Backyard Garden Ideas to Spruce Up Your Outdoor Space

Revitalizing your exterior doesn’t require endless funds. Our curated solutions blend smart resource management with creative flair, helping you achieve maximum impact per dollar. Strategic project selection proves crucial – prioritize updates that solve multiple challenges at once.
Consider these proven approaches:
| Project Type | Average Cost | Time Investment | Visual Impact |
|---|---|---|---|
| Vertical Planters | $40-$120 | 3-5 hours | High |
| Painted Furniture | $25-$75 | Weekend | Medium-High |
| Gravel Pathways | $100-$300 | 6-8 hours | Medium |
Start with quick wins like refreshing worn surfaces with outdoor-grade paint. These instant upgrades build momentum for larger projects. Pair functional elements like storage benches with decorative touches – think solar lanterns hung from repurposed ladders.
Your success lies in layering improvements that complement each other. A vibrant container garden gains drama when flanked by DIY mosaic stepping stones. Remember to match projects to your schedule – some transformations unfold over multiple weekends.
Ready for more inspiration? Continue reading to discover vertical gardening techniques and furniture makeover secrets that complete your revitalized space.
Creating Stunning Vertical and Container Gardens

Expand your greenery without expanding your footprint. Vertical installations and portable container gardens let you grow more in limited areas while adding artistic flair. These solutions work equally well for urban balconies and sprawling yards.
Vertical Garden Installation Tips
Turn blank walls into living art with smart mounting strategies. Existing fences or shed exteriors make perfect foundations – simply attach wooden pallets or modular planters. For renters, freestanding structures like ladder shelves offer non-permanent options.
Choose trailing plants like ivy or creeping thyme for cascading effects. Herbs and succulents thrive in vertical setups with proper drainage. Install drip irrigation lines or use self-watering planters to simplify maintenance.
Designing Dynamic Container Arrangements
Mix and match pots to create movable masterpieces. Cluster container garden ideas using three rules: vary heights, combine textures, and repeat colors. Tall grasses in ceramic urns complement low-growing begonias in vintage tins.
Rotate flowers seasonally for year-round interest. Spring pansies make way for summer geraniums, then autumn mums. For winter, evergreens in painted buckets add structure. Colorful combinations attract pollinators while brightening your space.
Remember: Group pots with similar water needs. Place thirsty ferns together and drought-tolerant sedums in separate arrangements. Your plants will thrive when their care requirements align.
Refreshing Outdoor Furniture with a DIY Paint Makeover

Breathe new life into weathered chairs and tables using simple painting techniques. A fresh coat transforms tired pieces into statement-making yard accents for less than $50. Start by assessing which items have solid frames but faded finishes – these make perfect candidates for revival.
Preparation is your secret weapon. Scrub surfaces with a mix of warm water and dish soap, then sand rough edges using 120-grit paper. “Skipping this step causes peeling within months,” warns a professional furniture restorer. Let pieces dry completely before priming – this crucial layer helps paint stick better and lasts twice as long.
Choose paints specifically formulated for exterior use. For metal, opt for rust-inhibiting enamel. Wood thrives with acrylic-latex blends, while wicker requires flexible spray formulas. Neutral tones create cohesive looks, but don’t shy away from bold teal or sunflower yellow for playful pops of color.
“Always work in thin, even coats – three light layers outperform one thick application every time.”
Elevate basic paint jobs with creative touches. Try these eye-catching ideas:
- Stencil geometric patterns on table tops
- Dip chair legs in contrasting hues
- Create ombre effects on bench slats
Seal your masterpiece with clear outdoor polyurethane. This protective topcoat prevents weather damage while adding subtle shine. Your revived seating area now invites relaxation without the cost of new furniture. Continue reading to discover how fire pits and swings can complete your transformed space.
Adding Focal Points with Porch Swings and Fire Pits
Elevate your yard’s charm with features that pull double duty – offering relaxation while defining your space. A well-placed swing or fire pit becomes more than decoration; it shapes how you experience your outdoor area.
Constructing a Cozy Porch Swing
Transform spare lumber into a hanging sanctuary. Reclaimed wood or pallets make sturdy frames when treated with weatherproof sealant. Space-saving designs work best – aim for 4-5 feet wide to fit most porch areas comfortably.
Use marine-grade ropes or chains for suspension. Test weight capacity with sandbags before first use. Add outdoor cushions in fade-resistant fabrics for instant comfort. Your new swing becomes a natural focal point that invites leisurely afternoons.
Building a Safe, Stylish Fire Pit
Create warmth without risking your backyard’s safety. Choose a flat area at least 10 feet from structures. Stack concrete pavers in circular patterns or use a steel ring insert for contained flames.
Line the base with gravel for drainage and heat dispersion. Surround with flat stones for seating that blends into your design. Pro tip: Add built-in ledges for drink placement to keep gatherings flowing smoothly. This social hub becomes the backyard’s heart after sunset.


