
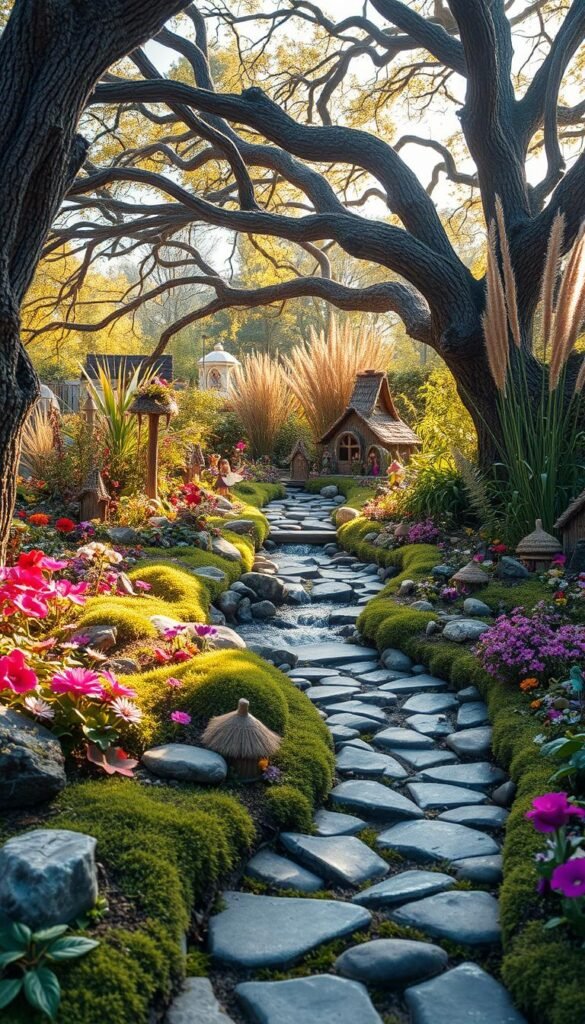
Picture turning your outdoor area into a living storybook where miniature pathways wind through mossy hills and tiny cottages peek from under ferns. This is the joy of creating spaces that blend nature with playful design – a trend that’s swept across neighborhoods from California to Maine.
You don’t need fancy supplies to start. A weathered pot, some pebbles, and a dash of creativity can become a thriving scene for enchanted creatures. These projects let you experiment with scale and texture while sparking curiosity in young minds.
Many find this hobby surprisingly calming. Arranging tiny details helps you slow down and focus, offering a break from screens and schedules. Parents often report it’s one activity where all ages collaborate equally – grandparents share gardening tips while kids position miniature fairy lights.
Whether you build a simple succulent display or a multi-level wonder with water features, these gardens remind us that magic lives in the ordinary. They transform neglected corners into conversation starters and turn routine yard work into adventures.
Transforming Your Outdoor Space with Enchanting Fairy Garden Concepts

Your yard holds hidden potential to become a realm of wonder. Start by walking your space at different times of day. Notice where sunlight dances through leaves or where shadows create mysterious corners. These natural patterns help pinpoint spots that already whisper magic.
Even cramped areas work beautifully. A forgotten tree stump becomes a mossy throne. A rocky outcrop turns into a miniature mountain range. For inspiration, explore creative fairy garden concepts that blend seamlessly with nature’s contours.
Consider practical magic too. Ferns thrive in damp shade, while succulents love sunny patches. Match plants to your space’s conditions – dry slopes make perfect desert scenes, while moist soil near downspouts could host a tiny rainforest.
Pathways invite exploration. Use pebbles to guide the eye toward hidden details. Position seating areas where visitors can crouch to discover tiny doors in brick walls or miniature markets beneath hydrangeas. Every angle should reveal new charm.
Drainage matters as much as dreams. Elevate delicate structures on stones to prevent rot. Let rain become part of the story – create tiny streams with gravel beds that channel water away from your fairy garden centerpieces.
Your final scene should feel discovered, not built. Let ivy creep over cottage roofs. Allow mushrooms to colonize log bridges. With thoughtful placement, your outdoor fairy realm becomes a living world that grows more captivating each season.
Getting Started with DIY Fairy Gardens

Building your first miniature landscape feels like unlocking a secret world. Let’s explore how simple items transform into durable displays that withstand rain and shine. The key lies in smart material choices and logical assembly.
Choosing the Right Materials
Terracotta pots shine as versatile starters. Paint them with acrylics or wrap them in moss using non-toxic glue. For outdoor durability, polymer clay pieces bake into waterproof treasures – think tiny mailboxes or mushroom stools.
| Container Type | Best For | Durability | Cost |
|---|---|---|---|
| Terracotta Pots | Beginner Projects | 2-3 Seasons | $ |
| Polymer Clay | Outdoor Decor | 5+ Years | $$ |
| Repurposed Items | Unique Designs | Varies | $ |
Step-by-Step Setup Guide
Start with drainage – layer pebbles at your container’s base. Add potting soil mixed with sand for stability. Position hardscape elements first: miniature fences, stone paths, then plants.
- Clean and prep your container
- Create drainage layer (1″ gravel)
- Add soil mix, leaving space for decor
- Secure structures with landscape pins
- Plant slow-growing species like sedum
Dollar stores offer affordable gems: tiny tools, glass beads as ponds. Let kids arrange pebble paths while adults handle hot glue for delicate pieces. Your collaborative project grows best when everyone contributes their strengths.
Fairy Garden Backyard: Fun and Imaginative Ideas for Kids and Adults

Crafting a miniature wonderland bridges generations through shared creativity. Start by mixing practical features with playful touches. Use smooth river stones as stepping pads for tiny feet, while elegant ceramic mushrooms add artistic flair adults love.
Engage young minds with hidden surprises. Bury painted acorns for treasure hunts or install a mini weather station using a thimble-sized rain gauge. These elements teach seasons and ecosystems without feeling like a classroom lesson.
Seasonal swaps keep the magic fresh. Swap summer’s blooming thyme for autumn’s golden sedum. Add cotton-ball snowdrifts in winter or seed-packet flags celebrating spring. This rotation maintains interest while demonstrating nature’s cycles.
Balance delicate details with sturdy materials:
- Secure fragile bridges with waterproof glue
- Use artificial moss near high-traffic areas
- Label plants with child-friendly facts on weatherproof tags
Create storytelling corners where families invent adventures. A tiny campfire made from twigs and orange beads becomes a gathering spot. Add movable pieces like wooden animals or seasonal props to spark new narratives weekly.
Pro tip: Let kids design temporary features using sticks and leaves, while adults handle permanent structures. This collaboration builds responsibility and pride in your evolving enchanted nook.
Whimsical DIY Fairy House Towers & Creative Miniature Cottages

Tiny architecture brings big character to your outdoor stories. Whether crafting towering pot villages or sculpted clay cottages, these projects turn simple materials into lasting fantasy scenes. Let’s explore two techniques that balance whimsy with weather resistance.
Stacked Terra Cotta Pot Towers
Start with three graduated pots – largest at the base. Offset each layer 45 degrees for a spiraling effect. Fill the bottom pot halfway with gravel for stability, then secure layers with outdoor-grade adhesive.
Paint arched windows and round doors using acrylics mixed with weatherproof sealant. Pro tip: Add “ivy” by gluing preserved sheet moss along seams. These towers withstand rain when sealed properly, but bring delicate pieces indoors during hail.
Polymer Clay Cottage Creations
Shape oven-bake clay around soup cans to form curved walls. Roll clay sheets into shingles, pressing texture lines with a toothpick. Bake according to package instructions – this creates waterproof structures that survive frost.
- Prevent cracks by conditioning clay thoroughly before shaping
- Use nail art gems as stained glass windows
- Attach chimneys with liquid clay before baking
These cottages gain charm over time – lichen naturally forms on roofs, while sun exposure gives clay a weathered patina.
Magical Mason Jar and Window Box Fairy Gardens

Clear glass jars and weathered window boxes become portals to miniature worlds when you apply creative vision. Transform basic containers into charming habitats using decoupage techniques – mod podge transforms jar surfaces into storybook settings with pressed flowers or vintage illustrations.
These dual-purpose creations serve as decorative displays and functional homes for small plants. Line mason jar bases with gravel for drainage, then add slow-growing succulents like hens-and-chicks. Top the soil with moss scraps and twig “trees” to complete the scene.
Window boxes offer more space for storytelling. Attach a salvaged wooden birdhouse to one end as a cottage. Create winding paths using flat pebbles and sliced branches. For vertical interest, glue birch bark pieces as faux fences or trellises.
Choose compact greenery that thrives in tight quarters:
- Irish moss forms velvety carpets
- Miniature ferns add woodland texture
- Trailing sedum spills over edges naturally
Maintenance keeps your tiny ecosystems vibrant. Water sparingly using an eyedropper to prevent soil displacement. Rotate containers weekly for even sun exposure. In winter, move delicate arrangements indoors near bright windows.
Pro tip: Add seasonal flair with holiday-themed accents. Tiny pumpkins in fall or miniature snowshoes in January keep the magic alive year-round without major redesigns.
Incorporating Natural Elements: Moss, Pebbles, and Flowers
Nature’s tiny treasures transform your space into a living ecosystem. Moss works overtime here – it locks moisture into soil while softening surfaces for delicate chairs or benches. But balance is key: too much water turns its velvety green into slimy patches. Prop up furniture on flat stones to improve airflow underneath.
Your choice of pebbles shapes both looks and function. Larger stones create stable drainage layers, while petite gravel crafts winding trails. Mix angular slate chips with smooth river rocks for visual contrast. This combo stops soil erosion and adds texture to miniature landscapes.
For pops of color, purple lobelia and sweet alyssum thrive in tight spaces. These flowers stay petite, blending scale without overwhelming scenes. Cluster them near miniature structures or let them spill over container edges like living confetti.
- Harvest moss responsibly: take small patches from fallen logs
- Use pea gravel for pathways that mimic fairy footpaths
- Rotate seasonal blooms to maintain year-round interest
Layer materials to mimic natural environments. Start with moss as a base, add pebbles for structure, then tuck flowering plants into gaps. Swap elements with the seasons – dried seed pods in fall, frost-resistant sedum in winter. This approach keeps your design fresh and teaches ecological awareness through hands-on creativity.
Upcycling Everyday Items into Fairy Garden Masterpieces
Your attic’s forgotten treasures hold magic waiting to bloom. With clever tweaks, ordinary objects become extraordinary stages for miniature adventures. Let’s explore how to breathe new life into overlooked items while solving common design challenges.
Repurposing Vintage Suitcases and Wheelbarrows
Old suitcases make whimsical portable displays. Line them with plastic sheeting and drill drainage holes before adding soil. Though charming, their weight increases when watered – place them on sturdy surfaces or casters.
Retired wheelbarrows shine as mobile planters. Their metal bodies withstand rain, while wheels let you chase sunlight across your yard. Add a layer of landscape fabric to prevent soil loss through cracks.
Broken Pot Spiral Ideas
Cracked terracotta pieces become artful elevation. Stack shards in concentric circles, securing each layer with outdoor adhesive. Fill gaps with soil to create planting pockets for sedum or creeping thyme.
| Item | Best Use | Weatherproofing | Weight Consideration |
|---|---|---|---|
| Vintage Suitcase | Indoor/Protected Areas | Waterproof Liner Required | Heavy When Planted |
| Wheelbarrow | Mobile Outdoor Displays | Rust-Resistant Paint | Easy to Relocate |
| Broken Pot Shards | Vertical Gardens | Natural Weathering | Secure Heavy Bases |
Safety first when working with ceramics. Sand sharp edges and secure unstable stacks. For child-friendly areas, glue pieces together firmly and avoid precarious balancing acts.
Indoor Fairy Gardens and Magnetic Fridge Setups
Who says fairy magic can’t thrive indoors? Discover fridge-friendly displays that turn meal prep into a whimsical escape. Magnetic setups let you craft tiny worlds without sacrificing counter space or worrying about weather damage.
Start with a wooden pencil box – its shallow depth creates perfect scenes. Line it with preserved sheet moss using strong adhesive. Secure rare-earth magnets to the back, ensuring they can hold the weight when placed vertically on appliances.
Choose accessories wisely indoors. Miniature resin food carts or tiny cookbooks add kitchen charm. Avoid delicate items that collect dust – sealed clay pieces and plastic ferns stay cleaner longer. Pro tip: Use LED string lights with adhesive backs for twilight ambiance without sunlight.
Maintenance keeps your magnetic masterpiece fresh. Wipe surfaces weekly with a soft brush to prevent grease buildup. Rotate decor monthly – swap blooming flowers for autumn leaves cut from felt. In dry homes, mist moss lightly to maintain its lush appearance.
These compact creations prove magic lives everywhere. Your fridge becomes a conversation starter, blending daily routines with imaginative spark. Best part? No muddy shoes or sunburn required.
Playful Themes: Farmyard, Broken Pot, and Wheelbarrow Designs
Transform ordinary objects into storybook settings that spark daily wonder. A painted birdhouse becomes a farmyard barn when paired with mossy roofs and miniature hay bales. Add tiny pitchforks and resin animals to complete the rural scene.
Mobility meets magic with wheelbarrow designs. Their compact size lets you shift locations with sunlight changes or weather patterns. Line them with landscape fabric before adding soil – this protects surfaces while allowing drainage.
| Theme | Key Features | Best For | Mobility |
|---|---|---|---|
| Farmyard | Animal figurines, split-rail fences | Interactive play areas | Low |
| Broken Pot | Spiral layouts, cascading plants | Sloped surfaces | Fixed |
| Wheelbarrow | Seasonal rotations, herbs | Small patios | High |
Crumbled terracotta pieces find new life as elevation features. Stack shards into spirals filled with creeping thyme – the cracks become perfect planting pockets. Secure layers with outdoor adhesive for stability.
Kids love arranging movable elements like wooden tractors or vegetable carts. Keep themes cohesive by repeating materials – use twine accents in both fences and tool handles. Seasonal updates maintain excitement: swap summer’s sunflowers for autumn’s mini pumpkins.
Every scene tells a story. Position your fairy garden elements to guide the eye from barn to fields to market stall. This visual flow creates depth while inviting closer inspection of delightful details.
Crafting Enchanted Fairy Villages with Stone Patios and Paths
Stone pathways become enchanted trails when you blend natural textures with playful design. Start by sketching your layout using flour or chalk – curved paths feel more mystical than straight lines. Mix flat flagstones with irregular pebbles to mimic ancient walkways worn by tiny feet.
Build durable patios with slate pieces set in sand. This base prevents shifting while allowing rainwater to drain. Edge them with smaller stones or glass beads for a touch of charm. Add “age” by tucking moss fragments between cracks or rubbing yogurt on surfaces to encourage lichen growth.
Elevate villages with tiered stone platforms. Stack flat rocks into miniature cliffs, securing them with outdoor adhesive. These levels create visual interest and protect delicate fairy homes from puddles during storms.
Kids love arranging pebble mosaics as welcome mats. Use contrasting colors to spell secret messages or mark trailheads. Adults appreciate how stone features withstand weather – your garden stays magical through seasons without constant repairs.
Complete the scene with a central gathering space. A circular stone patio becomes a dance floor under twinkling lights. Surround it with tiny benches carved from driftwood or repurposed tile pieces. These touches transform basic materials into places where stories unfold naturally.


