
Transforming your outdoor area into a thriving green oasis just got easier. This guide shows you how to craft a custom planting box using accessible materials like reclaimed pallets or new lumber. Whether you’re growing fresh veggies, aromatic herbs, or colorful blooms, this solution adapts to your needs.
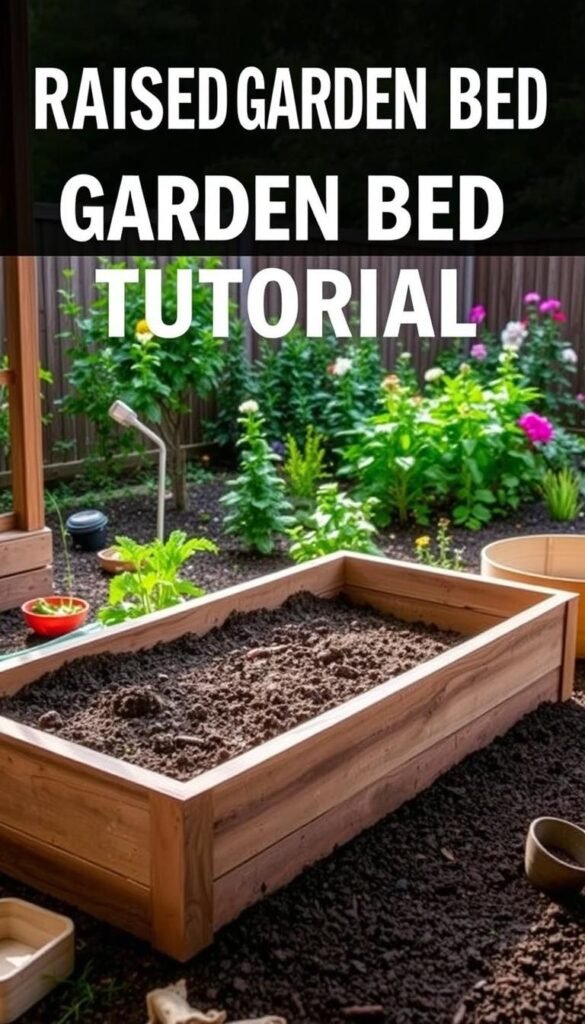
You’ll learn two approaches: a classic rectangular design and a clever angled version that reduces soil use. Both methods create durable structures measuring approximately 21″ tall – ideal for easy access while standing. The larger 36″ x 48″ size offers ample room for various plants while maintaining a manageable footprint.
Safety comes first when working with recycled materials. We’ll share essential tips for preparing pallet wood properly, ensuring your finished planter remains safe for edible crops. For those preferring new materials, our detailed construction guide covers everything from board selection to weatherproofing techniques.
No special skills are required – just basic tools and enthusiasm. By following our clear instructions, you’ll create a functional yet attractive centerpiece for your yard. Imagine harvesting homegrown produce or cutting fresh flowers from your own handcrafted planter all season long!
Gather Your Materials and Tools

Starting your project begins with smart preparation. Focus on collecting quality materials first – this sets the foundation for a sturdy, lasting structure.
Essential Supplies from Wood and Pallet Sources
Look for three to five standard-sized pallets from warehouses or shipping centers. Stringer-style pallets work best because they’re easier to take apart and rebuild. You’ll also need treated boards from a hardware store if you want extra reinforcement.
Grab these key tools: a pry bar for dismantling, power drill for assembly, and a miter saw for angled cuts. Three screw lengths (1″, 1¼”, and 1¾”) handle different connection points. Don’t forget landscaping fabric – it keeps soil in place while letting water drain through.
Safety Gear and Preparation Tips
Working with reclaimed materials means taking precautions. Thick gloves protect your hands from splinters, while safety glasses shield your eyes during disassembly. Wear long sleeves to avoid scratches when pulling out nails.
Inspect each pallet carefully before using it. Check for broken slats or chemical stains that might affect plants. Matching sizes between pallets makes assembly smoother later. Spending time here ensures your finished piece stays level and secure for years.
DIY Garden Bed Raised: Step-by-Step Tutorials for Wood and Pallet Options

Let’s explore two smart ways to build your plant-growing space. The first design uses classic right angles for simplicity and maximum room. Perfect for new builders, this style gives your veggies and flowers plenty of soil depth to spread their roots.
The second option uses clever 45-degree angles on the sides. This shape cuts material needs by 30% compared to standard boxes. You’ll use less dirt while keeping plants happy – great for smaller yards or movable setups.
Both designs keep your greens elevated for better water flow and fewer weeds. The angled version weighs less, making it simpler to shift locations if needed. For stability, each corner gets reinforced with double screws during assembly.
Clear photos show exactly where to place each board. You’ll master measuring tricks like marking cut lines with painter’s tape. Even tricky parts like connecting side panels become easy with our visual guides.
Want extra durability? Add cross-braces along the base before filling with soil. These hidden supports help your creation last through harsh weather and heavy harvests. Soon, you’ll have a thriving spot for tomatoes, basil, or zinnias!
Preparing and Disassembling Your Pallets

Working with reclaimed materials requires smart handling from the start. Proper preparation ensures your planter stays safe for plants and lasts through seasons. Let’s walk through the safest ways to break down these versatile shipping platforms.
Smart Breakdown Techniques
Always wear thick gloves and safety glasses before touching pallets. Look for the stamped letters “HT” near the edges – this confirms heat-treated wood free of harmful chemicals. If you spot “MB” markings or strange odors, leave those pallets behind immediately.
Position your tools between the deck boards (top slats) and stringers (support beams). A pry bar works well for lifting boards gradually. For stubborn connections, slide a reciprocating saw blade through gaps to slice through hidden fasteners.
Cleaning Up Components
Remove every nail and staple from both boards and stringers. Bent fasteners can ruin saw blades later, so hammer them flat or mark their locations with bright paint. If a board splits during removal, set it aside – you’ll trim damaged sections when cutting pieces to size.
Stack cleaned materials neatly once you’ve taken the pallet apart. This keeps your workspace organized and makes assembly smoother. With these precautions, you’ll transform shipping materials into a thriving growing space without risking your plants’ health.
Cutting and Assembling the Planter Components

Now comes the exciting part – shaping your materials into functional pieces. Precision here ensures your structure stays square and stable through seasons of growth.
Precision Cutting Techniques
Grab your circular saw and cut deck boards exactly in half. Each full board becomes two 20-inch pieces – these form your main building blocks. Keep edges straight by clamping a guide board along cut lines.
For stringers, measure carefully before trimming. Remove 9 inches from both ends of four supports to create 30-inch pieces. These shorter beams will form your planter’s ends.
Building Sturdy Panels
Lay two stringers parallel, 20 inches apart with grooved edges facing inward. Place deck boards horizontally across them, ensuring top and bottom edges align perfectly. If the last board overhangs, trim it flush.
Secure each connection with two 1½-inch screws. Drill pilot holes first using a 3/32-inch bit – this prevents splitting and ensures tight joints. Completed side panels should measure 20″ tall by 48″ long.
Repeat the process for end panels using your 30-inch stringers. Double-check measurements before fastening – consistent sizing makes final assembly much simpler. Soon you’ll have all four walls ready for joining!
Constructing the Garden Bed Structure and Supports

Bringing your planting space to life starts with smart assembly techniques. This phase turns prepared components into a durable framework ready for growing. Follow these methods to ensure stability and longevity for your project.
Building the Box and Securing Corners
Slide the 30-inch end panels inside the 48-inch side panels to form your box. Ensure all smooth surfaces face inward – this protects plant roots and simplifies soil maintenance. Secure each corner with two 3½-inch screws through pre-drilled holes in the stringers.
Double down on stability by stacking 9-inch stringer scraps vertically in every corner. These reinforcements prevent walls from shifting under pressure. Drive 1½-inch screws through both layers to lock them in place permanently.
Installing Garden Bed Legs and Angled Supports
Cut eight 2x4s to 36 inches for sturdy legs. Pair boards to create 4×4 posts that handle heavy loads without bending. Center these supports beneath your box for even weight distribution.
For slanted designs, slice 2x4s into 21-inch segments. Create 45-degree cuts at both ends using a miter saw. These angled pieces reduce material use while maintaining structural integrity – perfect for efficient planting layouts.
| Support Type | Materials Needed | Installation Time | Strength Rating |
|---|---|---|---|
| Corner Reinforcement | Stringer scraps, 1½” screws | 15 minutes | High (bottom stability) |
| Angled Supports | 21″ 2x4s, 3½” screws | 25 minutes | Medium (space-saving) |
Pair these techniques with detailed wood construction methods for maximum durability. Your reinforced structure will handle years of seasonal changes and bountiful harvests.
Finishing Touches and Added Functionality
Perfecting your planter’s final details transforms it from functional to fabulous. These last steps protect your work and prepare it for years of growth. Let’s make your creation both practical and eye-catching.
Sanding, Sealing, and Applying a Protective Liner
Run your hands along every edge after assembly. Use 100-grit paper on a detail sander to smooth rough spots, especially where pallet wood slats meet. This prevents splinters and gives a polished look.
Line the interior with heavy-duty cloth cut 2″ larger than your measurements. Fold excess material up the sides and secure with staples. Triangular end caps fill corner gaps neatly, keeping soil contained while allowing drainage.
Enhancing Drainage and Customizing Your Garden Bed
Start filling by laying river rocks at the bottom. Cover them with extra liner to prevent soil from washing through. This setup stops waterlogging while letting roots breathe.
Attach rubber feet to leg bases to protect surfaces and reduce rot. For personal flair, consider painting exterior slats or adding hanging hooks. These tweaks make your raised garden beds uniquely yours while boosting their lifespan.


