
Your garden thrives when shielded from unpredictable storms, hungry critters, and sudden temperature drops. Protective covers act as armor for delicate seedlings and mature crops alike, creating a stable environment where your plants can flourish. By filtering sunlight and regulating moisture levels, these barriers help prevent common issues like frost damage or sun-scorched leaves.
Lightweight mesh fabrics let air circulate freely while blocking pests that target vulnerable greens. Heavier options made from durable polyethylene offer robust defense during hailstorms or heavy rains. Many gardeners find that leaving covers in place throughout the growing season minimizes stress on vegetables and flowers.
Properly installed barriers extend your harvest window by weeks—sometimes months. Imagine picking fresh kale after the first frost or enjoying tomatoes long past summer’s end. This approach reduces reliance on chemical pesticides and lets nature work with your green thumb efforts.
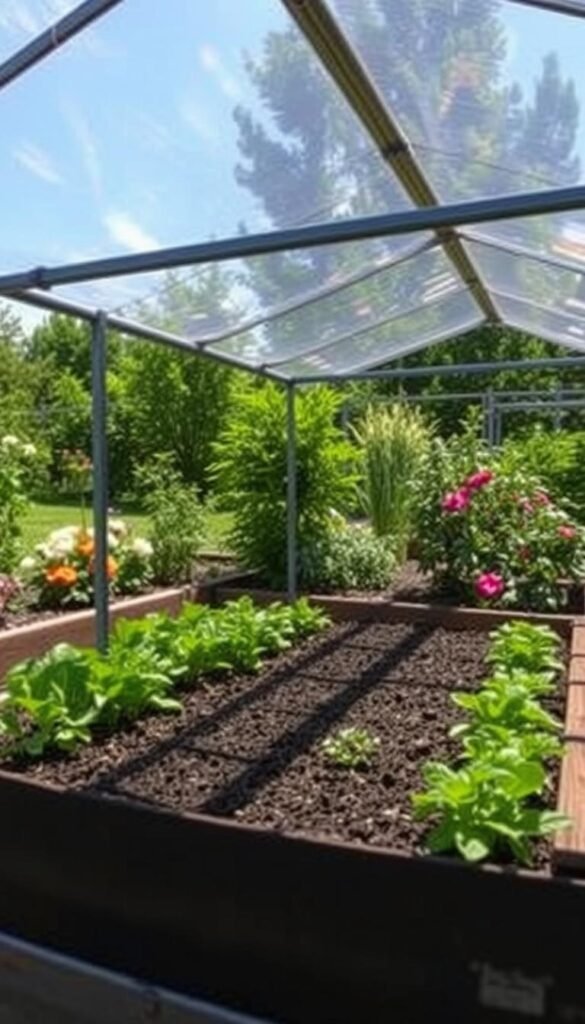
Choosing the right material depends on your local climate and specific plant needs. Some fabrics allow 85% light transmission while others provide thermal insulation. Pairing covers with raised beds creates a powerhouse combination for year-round cultivation success.
Understanding the Role of Raised Garden Bed Covers in Weather Protection
Gardening success often hinges on creating safe spaces where plants can grow without constant threats. Protective barriers act like invisible guardians, filtering sunlight and rainwater while keeping unwanted visitors at bay. These tools create microclimates that balance temperature and humidity, giving your greens exactly what they need to thrive.
Benefits for Your Garden and Plants
Young seedlings face countless dangers, from hungry insects to sudden frosts. Lightweight mesh fabrics let air flow freely while blocking pests like aphids and cabbage moths. For tougher conditions, polyethylene options from trusted brands like durable raised bed covers shield against hailstorms and heavy rains.
Three key advantages emerge:
- Reduced plant stress from temperature swings
- Consistent moisture levels in soil
- Extended harvest periods for cold-sensitive crops
Shielding Against Pests and Harsh Weather
Birds peck at tender shoots, while rabbits nibble leaves overnight. A well-fitted barrier stops these invaders without chemicals. Modern designs even deter smaller pests like slugs through tight-weave materials.
When harsh weather conditions strike, your garden stays protected. Wind-resistant fabrics prevent soil erosion, while UV-stable covers filter intense sunlight. Gardeners in cooler regions can extend your growing season by pairing covers with simple hoop structures.
Preparing Your Garden Bed for Cover Installation

Setting up protective barriers starts with a solid foundation. Proper groundwork ensures your plants receive consistent protection while allowing easy access for maintenance. Let’s break down the essentials for creating a tailored shield.
Assessing Bed Dimensions and Soil Condition
Measure your garden bed’s length, width, and height directly on-site. Outdoor elements like rain or heat can warp wooden frames, altering their original dimensions. Always double-check these numbers before cutting any material.
Next, evaluate your soil’s drainage and texture. Compacted ground prevents roots from breathing, while overly loose dirt might shift under cover weight. Use a simple squeeze test: healthy soil holds its shape briefly before crumbling.
Selecting the Right Materials for Your Cover
Lightweight mesh works well for pest control but struggles against heavy storms. Polyethylene sheets offer durability but limit airflow. Match your choice to local challenges—like deer-resistant netting for wooded areas or UV-stable fabric for sunny regions.
Pro tip: Leave extra space around edges when cutting covers. This allows adjustments as temperatures expand or contract materials. For uneven bed shapes, flexible PVC hoops create stable arches that support various material types.
Always make sure your final size accommodates plant growth. A too-tight fit damages leaves, while excess fabric flaps in wind. Balance protection with practicality to keep greens thriving all season.
Designing a Versatile Cover for Year-Round Protection

Transform your growing space into an all-season powerhouse with smart cover designs. Whether battling summer heat waves or winter frosts, adaptable barriers let you grow crunchy carrots in December and fresh spinach through spring rains. The secret lies in balancing material flexibility with smart structural features.
Tailoring Protection to Your Needs
Start by matching your cover‘s size to bed dimensions—leave room for plants to reach maturity. Modular systems shine here, letting you swap mesh panels for clear plastic as temperatures drop. Many gardeners add sliding vents that regulate airflow during sudden weather shifts.
Consider these essential elements:
- Adjustable hoops that lift covers as plants grow taller
- Removable end panels for easy harvesting access
- Layered materials that block pests while trapping warmth
Cold frames work wonders for root vegetables when paired with heavyweight fabrics. In warmer zones, shade cloth combined with drip irrigation prevents soil from drying out. One Midwest grower reported harvesting kale 11 months straight using rotating cover combinations.
Smart designs simplify maintenance—hinged roofs let you check plants without dismantling entire structures. For windy areas, secure anchor systems keep barriers firmly in place while allowing quick removal during calm days. Your garden becomes a dynamic ecosystem where protection adapts to nature’s rhythms.
Best Ways to Use a Raised Garden Bed Cover for Weather Protection

Timing your protective measures can make or break your harvest. Watch local weather forecasts closely—install barriers 24 hours before expected frosts or storms. This gives plants time to adjust while preventing last-minute scrambles.
Position covers to block prevailing winds while maximizing sunlight exposure. Use stakes or weights along edges in gusty areas. A southeast-facing slope? Angle barriers slightly to capture morning warmth without overheating afternoon greens.
Three essential techniques:
- Open vents during sunny days to prevent humidity buildup
- Secure edges with rocks during heavy rains to stop soil erosion
- Remove plastic sheets entirely when temperatures exceed 80°F
Rotate covers seasonally—lightweight mesh for summer insects, insulated fabric for winter chill. For fruiting plants like tomatoes, remove barriers during flowering hours to welcome pollinators. Replace them at dusk when pests become active.
Pro tip: Place a thermometer under your cover to monitor microclimate changes. This helps you decide when to adjust ventilation or switch materials entirely. Your garden becomes a responsive ecosystem rather than a static setup.
Building and Installing a Hinged Cover for Enhanced Security

Crafting a custom hinged barrier transforms your growing space into a fortress against pests and storms. This design combines sturdy construction with easy-access convenience, letting you check plants without dismantling defenses.
Step-by-Step Assembly Instructions
Start by cutting wood pieces to match your bed’s dimensions. For a 4×6-foot setup:
| Material | Quantity | Purpose |
|---|---|---|
| 1x2x72″ boards | 4 | Long frame sides |
| 1x2x47″ boards | 4 | Short frame sides |
| 1x2x36″ boards | 4 | Support legs |
Create pocket holes using a Kreg jig for invisible joints. Apply wood glue before securing with 1¼” screws. Pro tip: Clamp pieces while drying to prevent shifting.
Attaching Plastic Fencing and Installing Hinges
Stretch plastic mesh across the frame’s bottom side. Use a staple gun every 6 inches, keeping tension even. Fold excess material at the ends for double-layer protection against burrowing pests.
- Position hinges 12″ from each end
- Pre-drill holes to prevent wood splitting
- Check clearance between cover and bed edges
Test the hinge action before final tightening. Leave ½-inch space between the cover and ground for ventilation. For windy areas, add a simple latch system using hook-and-eye hardware.
“A well-built hinged system lasts 5-7 seasons with proper care. Sand edges annually and re-seal joints every two years.”
Seasonal Care: Maintenance and Winterizing Your Garden Bed Cover

Seasonal shifts demand smart strategies to keep your growing space productive. As temperatures drop, focus shifts to protecting soil health and preparing for next year’s bounty. A well-maintained system ensures robust growth when spring arrives.
Revitalizing Soil and Adding Mulch
Start by clearing spent plants that might shelter pests. Spread 1-2 inches of compost across beds—this feeds microorganisms through winter while improving drainage. Top with straw or shredded leaves as insulation against freeze-thaw cycles.
Consider this nutrient-boosting routine:
| Material | Application | Benefit |
|---|---|---|
| Compost | 1″ layer | Replenishes nitrogen |
| Leaf mold | 2″ blanket | Prevents soil compaction |
| Wood chips | Edges only | Discourages weeds |
Utilizing Cold Frames and Planting Cover Crops
Extend your harvest with cold frames—these mini greenhouses shield hardy greens like kale and spinach. For empty beds, sow cover crops like crimson clover. Their roots aerate soil while adding organic matter.
Three winter-ready options:
- Winter rye: suppresses weeds until spring planting
- Hairy vetch: fixes nitrogen for heavy feeders
- Buckwheat: quick growth for late-season gaps
When preparing beds for cold months, balance protection with preparation. Remove covers gradually in early spring to harden off seedlings without shocking them.
Troubleshooting and Fine-Tuning Your Cover’s Performance
Even the most carefully installed barriers can develop quirks over time. Regular checks help spot issues before they impact your plants. Let’s explore practical fixes for common challenges.
Addressing Measurement Challenges and Adjustments
Wooden frames often warp after rain or snow, creating gaps at the bed’s corners. Always measure directly on-site rather than trusting original dimensions. For uneven edges, cut a custom-fit piece of plastic fencing to bridge the space.
Three quick fixes for persistent gaps:
- Staple overlapping material along warped boards
- Add sandbags to weigh down lifted covers
- Install weatherstripping between frame joints
Rodent-prone areas need extra attention. Chipmunks squeeze through openings smaller than a quarter. Reinforce the cover’s end panels with hardware cloth, burying it 6 inches deep around the garden bed.
“I check my barriers weekly – a five-minute inspection prevents months of frustration.”
Seasonal changes demand adjustments. Swap torn mesh before spring insect surges, and reinforce covers before winter storms. Keep spare fasteners nearby for quick repairs during sudden weather shifts.
| Issue | Quick Fix | Long-Term Solution |
|---|---|---|
| Wind lift | Bungee cords | Ground anchors |
| Condensation | Vent propping | Adjustable louvers |
| Material tears | Duct tape patch | Reinforced edging |
Final Tips for a Secure and Weather-Resistant Garden Setup
Locking in year-round protection for your raised garden beds means thinking beyond basic covers. Start by reinforcing anchor points with ground stakes or sandbags – these prevent lift-offs during summer storms. For extra security at the bottom edges, bury hardware cloth 6 inches deep to stop burrowing rodents.
Choose materials that withstand local weather conditions. Polycarbonate panels outlast flimsy plastics in hail-prone areas, while UV-treated mesh resists sun damage. Rotate covers seasonally: heavy insulation for winter greens, breathable fabric for summer seedlings.
Pair your barrier system with smart monitoring. Use wireless thermometers to track microclimates under covers, adjusting ventilation as needed. Integrate companion planting – marigolds deter pests naturally, reducing chemical use.
Create a maintenance calendar. Clean garden bed frames each spring, check fastener integrity monthly, and replace worn hinges before winter. With these strategies, your raised garden becomes a resilient oasis that thrives through every season’s challenges.


