
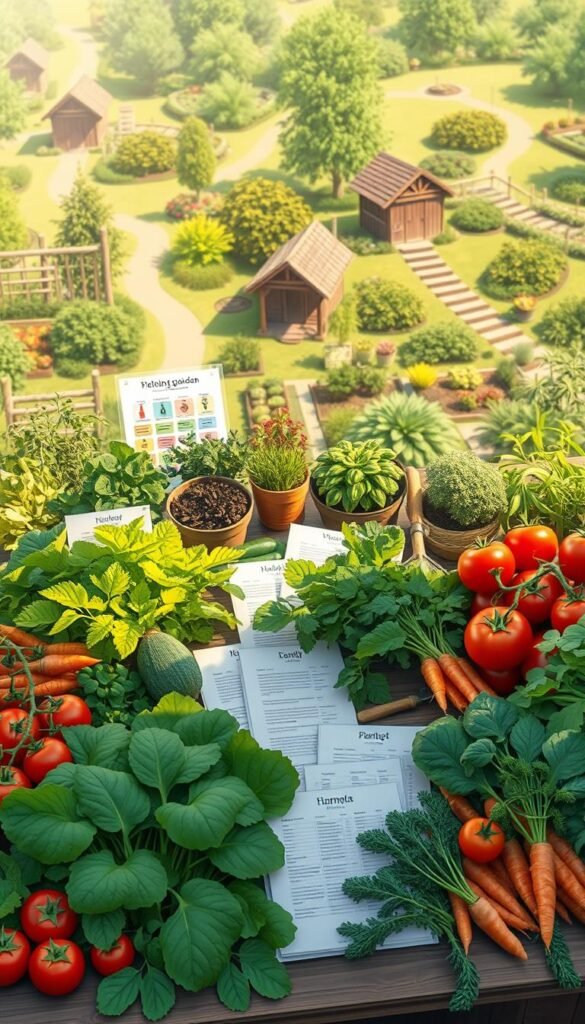
Nothing beats biting into a sun-warmed tomato bursting with flavor or crunching a carrot pulled straight from the earth. Growing your own food means enjoying sweeter, juicier produce that grocery stores simply can’t match. With a little know-how, you’ll transform your backyard into a thriving source of fresh meals.
New growers often feel overwhelmed, but success comes down to smart preparation. A 3-inch layer of compost can triple your harvests by improving soil texture – just one example of how small steps make big differences. Focus on quality over quantity: a well-planned 10’x10’ plot often outperforms a sprawling, unmanaged space.
This guide walks through every critical step. You’ll discover how to pick crops suited to your USDA growing zone, maximize yields with vertical trellises, and naturally deter pests. We’ll also cover seed shopping strategies – because choosing disease-resistant varieties can slash crop losses by 70%.
Ready to taste the difference? Let’s dig into the essentials for creating a productive, low-stress garden that keeps your kitchen stocked all season.
Picking the Perfect Spot for Your Vegetable Garden

The secret to a thriving harvest begins long before seeds touch soil—it starts with strategic site selection. Three factors determine success: sun exposure, ground conditions, and practical access. Get these right, and your plants will reward you with vigorous growth.
Sunlight and Drainage Considerations
Most crops need 6-8 hours of direct sunlight daily to produce well. Leafy greens like spinach tolerate partial shade, but tomatoes and peppers demand full sun. Watch how shadows move across your yard—tall trees or buildings might block essential rays.
Drainage matters just as much. Squishy ground drowns roots and invites rot. Test your soil after rain: puddles lasting over 4 hours signal trouble. Raised beds fix drainage issues in low-lying areas.
| Vegetable | Sunlight Hours | Drainage Needs |
|---|---|---|
| Tomatoes | 8+ | Well-drained |
| Lettuce | 4-6 | Moderate |
| Carrots | 6-8 | Sandy |
| Kale | 5-7 | Moist |
Accessibility and Convenient Water Sources
Choose a space near your home—you’ll weed and harvest more often if it’s steps away. Windbreaks like fences protect seedlings while letting pollinators work. Keep hoses or irrigation within 25 feet; hauling watering cans gets old fast.
Mark paths to avoid trampling plants. A central location with quick water access makes maintenance effortless. Remember: convenience today means a thriving garden tomorrow.
Testing and Amending Your Garden Soil

Healthy plants begin with what’s beneath your feet. Most edible crops thrive in earth that’s slightly acidic to neutral. Testing reveals exactly what your garden soil needs to support robust growth.
Soil pH and Nutrient Requirements
Vegetables crave a pH sweet spot between 6.5-6.8. Many natural soils sit far below this range. New Hampshire’s acidic ground often measures 4.5-4.8 pH – ideal for blueberries but terrible for tomatoes.
Two solutions balance acidity: lime and wood ash. Apply pelletized lime in fall for gradual pH adjustment. Wood ash works faster – sprinkle it in spring planting beds. Always test six months ahead for precise measurements.
| Amendment | Best Application Time | Speed | Key Benefits |
|---|---|---|---|
| Lime | Fall | Slow (6+ months) | Adds calcium/magnesium |
| Wood Ash | Spring | Fast (4-8 weeks) | Quick pH boost |
| Compost | Any season | Continuous | Improves structure |
| Leaf Mold | Fall | Slow | Retains moisture |
Organic Amendments and Compost Integration
Compost acts like a multivitamin for your garden. Mix 2-3 inches into topsoil to boost organic matter. This creates air pockets for roots and releases nutrients slowly.
Layer amendments without deep tilling. Gentle incorporation preserves earthworm tunnels and microbial life. Your plants will reward you with stronger growth and natural pest resistance.
Seedbed Preparation: Clearing and Leveling the Ground
Your garden’s success hinges on creating the perfect canvas for seeds to thrive. With the right tools and techniques, you’ll craft a welcoming environment for roots to spread and sprouts to emerge. Focus on surface-level refinement rather than deep disruption.
Removing Weeds and Breaking Up Clods
Arm yourself with four essential tools: a hoe for slicing surface weeds, a hard rake for smoothing, a garden fork for gentle aeration, and your hands for precision work. Target only the top inch of soil to preserve earthworm highways and microbial communities.
Crush large clods between your palms to create pea-sized granules. This creates ideal seed-to-soil contact without compacting the ground. For established beds, skip tilling – simply clear debris and refresh the surface layer.
| Tool | Purpose | Best Use Case |
|---|---|---|
| Hoe | Slice weed roots | Established beds |
| Hard Rake | Level soil surface | Pre-planting |
| Garden Fork | Aerate compacted areas | Clay-heavy soils |
| Hands | Remove stubborn weeds | Small patches |
Timing Your Prep for Optimal Germination
Strike when weeds are vulnerable. Early spring frosts weaken perennial grasses, making them easier to remove. For existing lawns, mow short before converting to a productive vegetable garden.
Water beds the night before sowing – moist soil holds seeds in place better than dry dirt. Rake mulch aside temporarily to let sunlight warm the seed zone. Your careful timing rewards you with faster sprouting and stronger seedlings.
How to Start a Vegetable Garden: From Soil Prep to Seed Selection

Unlocking your garden’s potential starts with the seeds you choose and how you prepare them. Premium genetics combined with simple pre-treatment methods can boost germination rates by 40% compared to untreated options. Let’s explore techniques that turn tiny specks into vigorous plants.
Selecting Quality Seeds and Preparing Them with Soaking
Always source from suppliers with germination rate guarantees. Look for packets dated for the current year – older stock loses viability rapidly. For best results, soak seeds in room-temperature water for 6-12 hours.
Enhance your soak with these additives:
| Additive | Amount per Quart | Key Benefit |
|---|---|---|
| Sea Minerals | 1/4 tsp | Provides trace elements |
| Liquid Kelp | 1 tsp | Boosts early growth |
| EM Solution | 1/4 tsp | Adds beneficial microbes |
This mineral-rich bath softens seed coats and activates enzymes. Drain seeds thoroughly after soaking – excess moisture causes rot.
Utilizing Mycorrhizal Fungi and Beneficial Microbes
Dust soaked seeds with mycorrhizal powder before planting. These fungi create living bridges between roots and soil nutrients. Plants gain access to 100x more water and minerals through these partnerships.
Effective microorganisms (EM) in your soak solution continue working underground. They suppress harmful bacteria while breaking down organic matter. Your seedlings get a protective microbiome from day one.
These methods require minimal effort but deliver maximum impact. You’ll see faster sprouting times and sturdier plants that handle weather fluctuations better. Remember: strong starts lead to abundant harvests.
Sowing Seeds and Planting Techniques

Getting your seeds into the ground at the right depth and spacing sets the stage for a flourishing garden. Smart placement and timing determine whether your plants struggle or thrive. Let’s explore practical methods to maximize your success with both direct sowing and transplants.
Direct Sowing Versus Transplanting: What to Choose
Leafy greens and root vegetables like lettuce and carrots grow best when seeds go straight into garden beds. These crops develop strong taproots that dislike disturbance. Warm-season plants like tomatoes and peppers benefit from indoor seed starting, giving them a head start before summer heat.
| Direct-Sow Vegetables | Transplant Vegetables | Seed Depth Guide |
|---|---|---|
| Radishes | Tomatoes | 1/4 inch |
| Beans | Peppers | 1 inch |
| Carrots | Zucchini | 1/2 inch |
| Peas | Kale | 1/2 inch |
Match seed size to planting depth. Tiny carrot seeds need just 1/4 inch of soil cover, while bean seeds require 1-inch holes. Overcrowd rows initially – thin seedlings once they grow two true leaves. This compensates for uneven germination.
Beginner tip: Focus on fast-growing vegetables like radishes (3 weeks) and bush beans (50 days). These forgiving crops build confidence while you wait for slower growers like peppers. Always check seed packets for zone-specific planting dates.
Transplanting Your Vegetables with Care

The journey from nursery pots to garden beds requires finesse. Proper technique ensures your plants transition smoothly, establishing strong roots in their new home. Let’s explore how to handle delicate transplants and set them up for success.
Selecting and Preparing Nursery Stock
Inspect roots before buying. Avoid specimens with thick, circular patterns at the container’s edge – these root-bound plants struggle to spread. Gently squeeze plastic pots to release the root ball, always lifting by the container base.
| Healthy Roots | Problematic Roots |
|---|---|
| White flexible strands | Brown brittle threads |
| Even distribution | Dense outer circling |
| Moist soil smell | Sour or moldy odor |
Root Revival Strategies
Use clean shears to make 4 vertical slices in tight root balls. Soak them in a solution containing:
- 1 tsp liquid kelp per gallon
- 1/4 tsp sea minerals
- 2 tbsp EM microbial inoculant
Dust exposed roots with mycorrhizal powder before planting. Dig holes twice as wide as the root system, keeping the top level with surrounding soil. Water deeply to eliminate air pockets.
This attentive approach helps plants focus energy on new growth rather than recovery. You’ll see vibrant leaves and steady development within days.
Seasonal Considerations and Gardening Timelines
Mastering the calendar transforms your garden from sporadic to abundant. Your location’s frost dates and temperature patterns dictate when to plant each crop. Work with these natural rhythms to enjoy fresh produce through three growing seasons – spring, summer, and fall.
Planting Schedules for Success
Cool-season stars like spinach and peas thrive when soil hits 40°F. Get these in ground 4-6 weeks before your last spring frost. Warm-season tomatoes and peppers need consistent 60°F nights – wait until apple trees bloom in your area.
Check seed packets for days to maturity. A 70-day broccoli variety planted August 1st beats your first fall frost if it arrives October 10th. Stagger plantings every 14 days for non-stop lettuce all season.
Climate-Smart Adjustments
Your local extension office provides frost date maps – game-changers for planning. Coastal gardeners might grow kale through winter, while mountain growers focus on quick 50-day radishes before snow.
Use row covers to add 4-6 weeks to your growing season. Start fall carrots in late summer’s heat – they sweeten as nights cool. Track soil temps with a $10 probe thermometer for perfect timing every year.


