
Planning a productive growing area for your favorite crops starts with smart design. Whether you’re working with a cozy backyard or a sprawling property, strategic arrangement ensures every plant thrives. This guide focuses on balancing natural elements to boost health and harvests.
Modern techniques like high-density planting let you grow more varieties in small spaces. By using compact rootstocks, even urban growers can enjoy abundant yields. Proper spacing isn’t just about fitting plants—it’s about giving each one enough light and air to flourish.
Disease prevention starts with airflow. Crowded branches trap moisture, creating perfect conditions for fungi. A thoughtful setup keeps leaves dry and roots strong, reducing the need for chemicals.
You’ll learn how to position plants for optimal sun exposure throughout the day. Southern-facing slopes, staggered rows, and seasonal adjustments all play a role. These methods work whether you’re nurturing apples, peaches, or citrus varieties.
Ready to transform your space? Let’s explore how simple tweaks can lead to sweeter, juicier results.
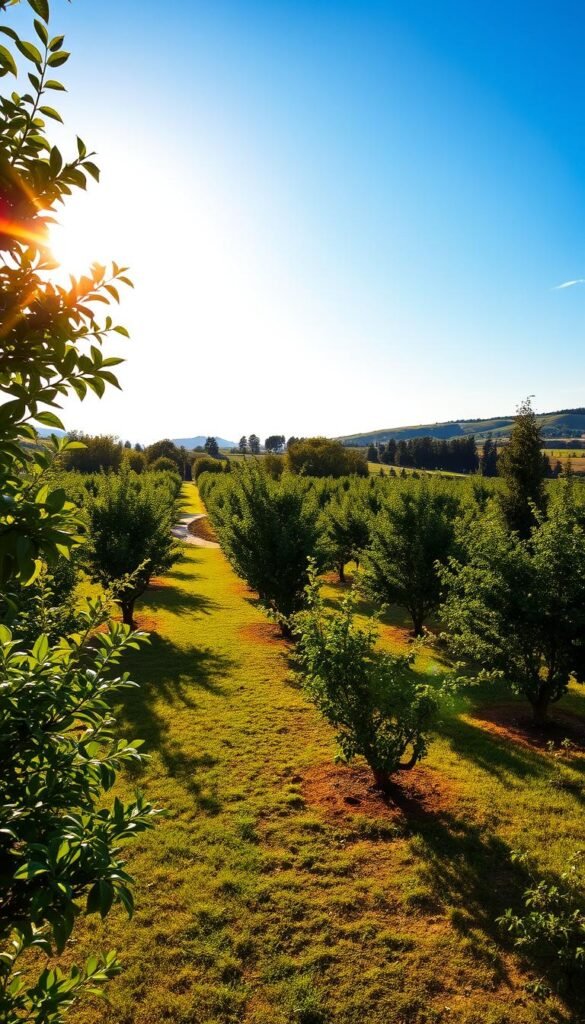
Introduction to a Thriving Orchard Garden

Creating a productive edible landscape starts with understanding your environment. Imagine stepping outside to pick ripe fruit from your own trees—a reality within reach when you balance practical knowledge with nature’s rhythms. This approach transforms ordinary yards into vibrant food sources while boosting curb appeal.
| Key Factor | Purpose | Result |
|---|---|---|
| Local Climate Match | Aligns with tree needs | Healthier growth |
| Smart Spacing | Prevents overcrowding | Better disease resistance |
| Diverse Varieties | Extends harvest seasons | Year-round yields |
Start by mapping your available space. Dwarf trees fit snugly against fences, while standard-sized options create shade corridors. Mix early and late-bearing fruit types to enjoy apples from July through October or peaches from spring to fall.
Remember: every thriving home orchard begins with patience. It takes 3-5 years for most trees to reach full production. But once established, they’ll reward you with bushels of fresh fruit—and memories made under their branches.
Understanding High-Density Planting in Home Orchards
Revolutionize your backyard harvest by embracing space-smart growing methods. High-density systems let you cultivate 12-15 trees where traditional setups might fit just three. This approach works particularly well with semi-dwarf varieties that naturally stay compact.
Why Tight Spacing Works Wonders
Close planting (4-5 feet apart) creates a living fence of productivity. You’ll enjoy:
- Ladder-free harvesting at eye level
- Faster maturity – some trees bear fruit in 2 years
- Simplified pest control with better visibility
“Summer pruning becomes your secret weapon in high-density systems. It directs energy to fruit production rather than excessive growth.” – Urban Horticulture Specialist
Keeping Your Green Giants in Check
Manage tree size effectively with these proven strategies:
| Technique | Frequency | Result |
|---|---|---|
| Root pruning | Every 3 years | Controls spread |
| Espalier training | Monthly | Flat growth pattern |
| Bud rubbing | Spring | Prevents unwanted branches |
Pair dwarfing rootstocks with vertical training systems like the tall spindle method. This combo ensures each fruit tree gets ample light without shading neighbors. Remember: proper planting depth during establishment prevents future growth issues.
With smart size management, you’ll create a mini food forest that’s both productive and picturesque. Your morning coffee stroll might just become a breakfast-picking session!
Orchard Garden Layout with Fruit Trees: Maximizing Sunlight and Airflow

Crafting an efficient growing space requires balancing natural elements with smart techniques. Position your fruit trees to catch morning rays while allowing breezes to sweep through their branches. This setup reduces moisture buildup and energizes photosynthesis for sweeter harvests.
The tall spindle system keeps trees under 9 feet tall, perfect for small yards. Summer pruning trims vertical shoots, redirecting energy to fruit-bearing branches. Pair this method with wire trellises for support—they’ll help maintain shape without blocking light.
| Pruning Technique | Best Season | Key Benefit |
|---|---|---|
| Thinning cuts | Winter | Opens canopy |
| Heading cuts | Summer | Controls height |
| Suckering | Spring | Reduces crowding |
Space dwarf varieties 6-8 feet apart in north-south rows. This alignment ensures even light distribution as the sun moves. For larger trees, leave 15 feet between trunks to prevent root competition.
“Proper planting angles matter more than people realize. A 10-degree tilt toward the south maximizes leaf exposure.”
Monitor shadow patterns through the seasons. Adjust companion planting to protect younger saplings from harsh afternoon sun. With these strategies, you’ll create a vibrant ecosystem where every tree thrives.
Selecting the Ideal Site for Maximum Sunlight and Airflow

Your trees’ future productivity begins with choosing the right location. Scout your property to identify areas that combine bright conditions with natural protection. Look for spots where morning sun dries dew quickly while afternoon breezes keep leaves rustling.
Evaluating Soil Quality and Drainage
Dig test holes 18″ deep across potential planting zones. Healthy soil crumbles like chocolate cake—not sticky or sandy. Watch how water drains after rainstorms. Puddles lasting over 24 hours signal trouble.
| Soil Type | Drainage Speed | Best For |
|---|---|---|
| Sandy Loam | Fast | Stone Fruits |
| Clay Mix | Moderate | Apples/Pears |
| Rocky Soil | Variable | Figs/Olives |
“Aim for earth that holds moisture without drowning roots. Add compost to heavy clay, but avoid over-amending—trees need to adapt to native conditions.”
The Role of Full Sun Exposure
Position your fruit trees where they’ll bask in 6+ hours of direct light daily. Morning rays boost flower development, while midday sun fuels sugar production. Use smartphone apps to track shade patterns through seasons.
Watch out for “sun stealers”—future building projects or maturing shade trees that might block light in coming years. South-facing slopes often offer the brightest conditions, but ensure proper water access in these warmer zones.
Planning Your Layout: Rows, Clusters, and Espalier Configurations

Your tree arrangement determines both beauty and bounty in edible landscapes. Three approaches dominate modern designs—straight rows for efficiency, clustered groups for pollination, and flat espaliers for tight spaces. Each method shapes how sunlight reaches branches and air moves through leaves.
Traditional rows work best when planting 8-10 feet apart. This setup lets equipment navigate easily while creating wind channels. Stagger plants in adjacent rows to prevent “shadow tunnels” where lower branches get shaded.
| Configuration | Spacing | Training Needs |
|---|---|---|
| Rows | 10-12 feet between | Annual pruning |
| Clusters | 6-8 feet apart | Cross-branch support |
| Espalier | 4 feet from wall | Weekly shaping |
Cluster planting shines with self-sterile varieties like sweet cherries. Group three trees in a triangle pattern (12 feet total width) to ensure pollen sharing. This method turns functional areas into eye-catching garden features.
“Espalier isn’t just space-saving—it’s an art form. Horizontal cordons produce 80% of a full-sized tree’s yield in 30% of the space.”
For vertical training, install trellises before planting. Tie young branches to wires using soft twine, adjusting tension as they thicken. Leave 18-inch pathways between structures for easy access during harvests.
Choosing the Right Fruit Tree Varieties for Your Space

Your fruit selection shapes both your harvest and landscape. Compact varieties like Golden Delicious apples thrive in tight areas, while larger options need thoughtful placement. Start by measuring your available space—this determines which tree size works best.
Growth Patterns and Productivity
Three main categories guide your selection:
| Type | Height | First Harvest |
|---|---|---|
| Dwarf | 8-10 ft | 2-3 years |
| Semi-Dwarf | 12-15 ft | 4-5 years |
| Standard | 20-30 ft | 6+ years |
Early-bearing fruit trees on dwarf rootstocks let you enjoy peaches or plums quickly. Pair them with late-season varieties for continuous picking. This strategy prevents overwhelming harvests while keeping your kitchen stocked.
“Mix self-pollinating types with cross-compatible partners. A Honeycrisp apple needs a Fuji neighbor, while most citrus varieties work solo.”
Consider these factors when choosing:
- Pollination needs (some require partners)
- Fruit storage longevity
- Local pest resistance
Space-saving columnar apples yield full-sized fruit in just 2 feet of width. For warmer zones, try ‘Improved Meyer’ lemons that fruit year-round. Your perfect variety exists—it’s about matching nature’s offerings with your lifestyle.
Selecting Optimal Rootstocks and Training Methods
Your success with compact growing starts below ground. Rootstocks act as nature’s blueprint, determining your tree’s ultimate size and productivity. Think of them as biological dimmer switches—they control vigor while influencing disease resistance and fruiting timelines.
| Rootstock Type | Mature Height | First Fruit | Best For |
|---|---|---|---|
| M.9 (Dwarf) | 7-8 ft | 2 years | Container growing |
| M.7 (Semi-Dwarf) | 12-15 ft | 4 years | Backyard rows |
| MM.111 (Standard) | 16-18 ft | 6+ years | Large properties |
Dwarf varieties excel in tight spaces but need support stakes. Semi-dwarf types offer the sweet spot for most home growers—manageable growth with hearty yields. Pair your rootstock choice with smart training systems like the central leader method. This approach builds strong scaffolds that handle heavy crops without breaking.
“Start shaping branches in year one—waiting until maturity limits your options. Gentle guidance beats aggressive corrections later.”
Open-center training works wonders for peaches and plums, allowing sunlight to reach inner branches. Modified leader systems adapt well to apples and pears. Remember: consistent summer pruning keeps your trees focused on fruit production rather than excessive growth.
Effective Planting Techniques and Spacing Strategies
Getting your plants off to a strong start begins below the surface. Proper groundwork prevents future struggles while letting roots breathe and spread. Let’s explore how to set up your green investments for decades of productivity.
Preparing the Planting Hole and Establishing Correct Depth
Dig a hole twice as wide as the roots but no deeper than the root ball. This gives tender roots room to expand without sinking over time. For bare root specimens, create a small mound in the center to drape roots over naturally.
| Rootstock Type | Spacing | Mature Height |
|---|---|---|
| Dwarf | 4-5 feet | 8 ft |
| Semi-Dwarf | 8-12 feet | 15 ft |
| Standard | 20+ feet | 25 ft |
Keep the graft union 2-4 inches above soil level when backfilling. Mix native earth with compost (30% ratio) for better nutrient access. Water deeply after planting—this settles the soil and removes air pockets.
“Bare root trees need extra TLC. Soak roots overnight, then spread them like octopus tentacles in the hole.”
Time your efforts with the seasons. Early spring planting lets roots establish before summer heat. Fall installations work best in mild climates where frost comes late. Either way, mulch lightly to retain moisture without smothering trunks.
Pruning Essentials for Healthy and Manageable Trees
Sharp shears and smart timing transform overgrown branches into productive shapes. Mastering two fundamental techniques helps you control growth patterns while boosting harvests. Let’s break down how strategic cuts keep your green investments thriving.
Understanding Heading Cuts vs. Thinning Cuts
Heading cuts remove branch tips to encourage bushier growth. Imagine trimming a hedge—each snip prompts new shoots below the cut. Use this method sparingly on young specimens to build sturdy frameworks.
Thinning cuts eliminate entire branches back to their origin point. This opens the canopy like window blinds, letting sunlight reach inner wood. Mature plants benefit most from this approach—it reduces disease risks while maintaining natural forms.
Timing Your Pruning: Winter Dormancy and Summer Maintenance
Late winter is prime time for major reshaping. Bare branches reveal problem areas, and cuts heal fast as spring growth begins. Focus on removing dead wood and crossing limbs during this dormant phase.
Summer trims manage size without triggering excessive regrowth. Snip water sprouts in June to direct energy toward fruit development. Always disinfect tools between trees—a quick alcohol wipe prevents spreading pathogens.
Pair these methods with seasonal observation. Notice how each cut impacts next year’s growth. With practice, you’ll create balanced structures that yield abundant harvests while fitting neatly into your space.


