
Transforming your outdoor area into a thriving edible paradise doesn’t require deep pockets or expert skills. With simple design strategies, you can grow juicy berries, crisp apples, and plump grapes right outside your door. Elevated planters let you customize soil mixes for each crop while keeping weeds and digging animals at bay.
Say goodbye to sore knees and muddy shoes! Working at waist height means less bending and better access to your plants. These structures also solve drainage issues in heavy rain areas – no more drowning tomato roots or swampy pathways.
You’ll learn how to:
• Choose materials that last for seasons
• Position supports for maximum sunlight
• Mix soils that boost plant health
We’ll walk through planning layouts that make watering and harvesting a breeze. Discover how to build sturdy supports for climbing vines using affordable supplies from local stores. Whether you’re growing blueberries or table grapes, these techniques help you enjoy nature’s candy without breaking a sweat – or the bank.
Setting the Stage: Planning Your Backyard Fruit Garden

Your journey to homegrown snacks starts with thoughtful layout decisions. Before breaking ground, grab a notebook and walk your yard at different times of day. Notice where shadows fall and how sunlight dances across your property.
Assessing Your Space and Resources
Sketch your available area, marking permanent features like trees or slopes. South-facing zones often make prime planting spots in the U.S., capturing maximum daylight. Check soil drainage by digging test holes – standing water after rain signals needed adjustments.
Determining Ideal Locations and Sunlight Exposure
Most edible plants demand 6-8 hours of direct sun daily. Track light patterns through seasons – winter shadows differ from summer’s. Leave 3-foot pathways between planting zones for easy access. One homeowner discovered their “sunniest spot” became shaded by maple leaves by July!
Watch for underground utilities before digging. Contact 811 for free utility marking services. Remember: Morning sun dries dew faster, reducing mold risks. Afternoon shade protects delicate berries in hotter climates.
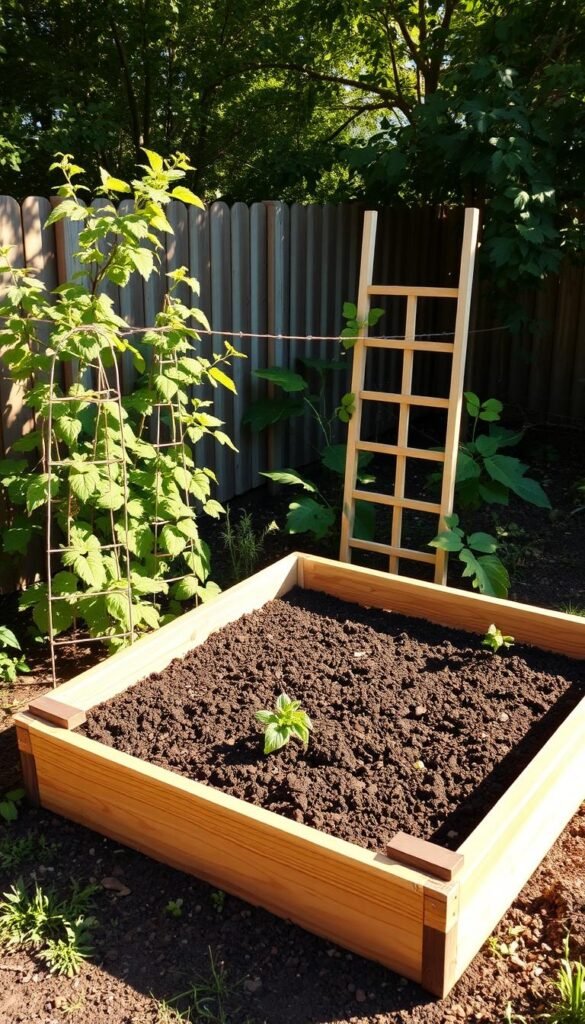
DIY Backyard Fruit Garden: Building Raised Beds, Fences, and Trellises

Creating lasting growing spaces requires knowing what you’re signing up for before grabbing your tools. Most first-timers complete their initial planting area in 6-8 hours, though adding protective barriers or vertical supports extends the timeline. Basic woodworking abilities like measuring 4×4 posts and driving deck screws become essential here.
Breaking Down the Workload
Intermediate skills separate smooth projects from frustrating ones. You’ll need confidence with:
- Precision cutting using circular saws
- Drilling pilot holes to prevent wood splitting
- Assembling square frames with corner braces
Material costs typically land between $100-$300 per unit depending on local lumber prices. Cedar lasts longer than pine but costs more upfront. One Midwest gardener spent $217 on a 4’x8′ structure using rot-resistant boards and galvanized hardware.
Phasing your work prevents overwhelm. Start with simple rectangular designs before attempting angled trellises. Complete soil preparation while waiting for helper availability. Many spread tasks across three weekends:
- Week 1: Buy supplies and cut lumber
- Week 2: Assemble frames and install barriers
- Week 3: Fill with soil mix and plant starters
Exploring the Benefits of Raised Beds and Elevated Gardening
Growing your favorite snacks just got easier with smart gardening solutions. Elevated planters offer five-star treatment for your crops by letting you craft the perfect environment. Unlike ground-level plots, these structures put soil quality control in your hands—mix nutrient-rich compost and organic matter to match your plants’ needs.
Say goodbye to swampy roots! The improved drainage in these systems prevents water from pooling around delicate roots. One study found crops in elevated setups experience 42% fewer fungal issues compared to traditional methods.
Comfort meets practicality in these designs. Working at waist height means less bending and kneeling—your back will thank you during harvest season. A recent survey showed 78% of gardeners reported reduced joint pain after switching to elevated setups.
| Feature | Traditional | Raised Setup |
|---|---|---|
| Soil Control | Limited | Full customization |
| Weed Prevention | Weekly maintenance | 90% reduction |
| Accessibility | Ground-level work | Waist-high access |
| Season Extension | 2-3 weeks | 6-8 weeks |
Protection comes built-in with these systems. Hardware cloth barriers stop burrowers like voles, while landscape fabric blocks weeds before they start. You’ll spend more time enjoying fresh picks than battling invaders.
Smart temperature management gives your plants a head start. The soil in elevated setups warms faster in spring, letting you plant strawberries weeks earlier. Come fall, the contained environment keeps roots cozy as temperatures drop.
Gathering Essential Tools and Materials

Successful edible plant setups begin with quality components. Let’s explore the key items that’ll transform your space into a productive growing zone. Proper preparation here ensures smooth assembly and lasting results.
Wood & Lumber Essentials
Redwood and cedar top the list for durable, attractive options. These naturally rot-resistant woods withstand moisture and pests for 10-20 years. Use 2×6-inch boards stacked three high for walls – this creates an 18-inch depth that supports deep root systems.
Four-by-four posts anchor corners securely. You’ll need a circular saw for precise cuts and a power drill for assembly. Always measure twice – uneven boards create wobbly structures.
Hardware, Fasteners, and Protective Materials
Galvanized deck screws (2.5-3 inches) resist rust while gripping tight. Pair them with mending braces for extra support on long sides. Don’t skip the hardware cloth – staple this metal mesh to bed bottoms to foil digging pests.
| Material | Purpose | Benefit |
|---|---|---|
| Redwood/Cedar Boards | Frame construction | Natural decay resistance |
| Galvanized Screws | Structural assembly | Corrosion protection |
| Hardware Cloth | Pest barrier | Root protection |
| Landscape Fabric | Weed suppression | Reduces maintenance |
| Wood Sealer | Surface protection | Extends lifespan |
Landscape fabric forms a breathable base that blocks weeds. For extra protection, apply food-grade wood sealant annually. Optional galvanized braces add rigidity to larger setups – perfect for heavy clay soils.
Designing Your Raised Garden Bed Layout

Smart layout design turns your growing space into an efficient, productive system. Let’s explore how strategic sizing and arrangement can simplify maintenance while boosting plant health.
Choosing Bed Dimensions and Shapes
Four-foot width reigns supreme for good reason. This measurement lets you reach every plant without stepping into the soil – crucial for preserving its loose structure. Against walls or fences, shrink this to three feet for single-side access.
Length matters more than you think. While eight-foot sections work best, some stretch to ten feet. One gardener learned the hard way: “My twelve-foot beds warped within two seasons from soil pressure.”
Height plays dual roles:
- 16-18 inches accommodates deep-rooted plants
- Reduces bending during planting and pruning
Leave 36-48 inches between structures. This golden zone allows wheelbarrow navigation while preventing shade battles between neighboring plants.
Sketching Your Garden Plan
Graph paper becomes your best friend here. Use a 1:48 scale (1/4” = 1 foot) to map possibilities. Pro tip: Outline existing trees and slopes first – they’ll impact sunlight patterns.
Creative configurations maximize yield:
- U-shapes create cozy work zones
- Parallel rows suit formal spaces
- L-shapes wrap around obstacles
“Drawing five layout versions helped me spot wasted space I’d never noticed before,” shares Oregon grower Marissa T.
When planning your how to build raised garden beds, remember that paper revisions cost nothing – dig once by perfecting your blueprint first.
Step-by-Step Guide to Building Your Raised Garden Beds

Constructing your planters becomes straightforward when following precise assembly steps. Let’s break down the process into manageable phases, starting with material preparation and moving through structural reinforcement.
Cutting and Assembling Boards
Begin by measuring twice and cutting once. 2×6-inch boards actually measure 5.5 inches tall – factor this into your height calculations. Cut four corner posts from 4×4 lumber to match your desired structure height (three stacked boards create 16.5-inch walls).
Assemble short sides first on flat ground. Position corner posts so their outer edges align with board ends. Drive two 3-inch deck screws through each board end, keeping fasteners 1 inch from edges to prevent splitting. This creates rock-solid joints that handle soil pressure.
Securing Corner Supports and Reinforcements
Stand completed short sides upright, spacing them to match your bed’s length. Attach long boards using the same screw technique. Pro tip: Check diagonals between corners – equal measurements mean your frame is square.
Add horizontal braces midway along long sides if building beds longer than 6 feet. These prevent outward bowing when filled with soil. One Minnesota grower shares: “Reinforcing my 8-foot beds with extra crossbars eliminated wall flexing completely.”
Finish by lining the bottom with hardware cloth before filling with soil. You’ve now created a durable growing space ready for planting!
Incorporating Drip Irrigation for Efficient Watering
Upgrade your gardening routine with precise moisture delivery systems that save time and resources. For raised setups, install irrigation risers during construction to simplify later upgrades. Drip systems target plant roots directly, cutting water waste while keeping soil consistently moist.
Selecting the Right Irrigation Components
A basic setup needs four key pieces: programmable timers, flexible tubing, adjustable emitters, and sturdy connectors. Digital timers let you schedule watering cycles, while soaker hoses release water slowly along their length. Match emitter flow rates to your plants’ needs – tomatoes crave more than herbs.
Proper Installation Techniques for Soaker Hoses
Lay the groundwork before adding soil. Snake hoses through planting areas, securing them with landscape staples. Connect lines to main tubing using brass fittings – they outlast plastic in sun exposure. One Colorado gardener reported 30% less water use after positioning emitters 6 inches from strawberry crowns.
Complete your system by attaching a pressure regulator. Test with a short cycle at dawn, when plants absorb moisture best. You’ll soon enjoy more free mornings while your garden thrives on autopilot.


