
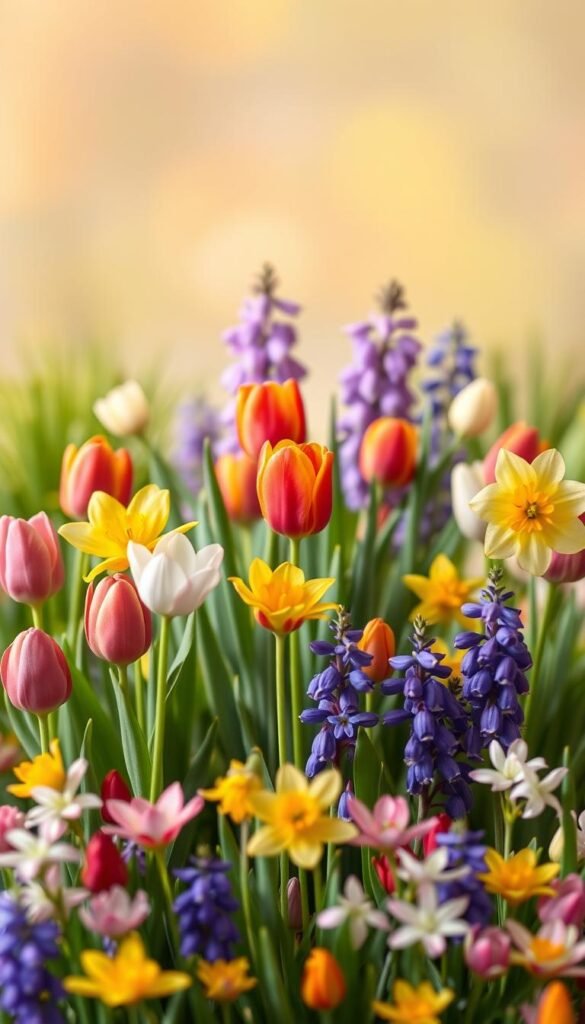
Imagine stepping outside on a crisp morning to find your yard bursting with life. Vibrant hues of yellow, purple, and pink greet you—a reward for planning ahead. Fall-planted treasures like tulips, daffodils, and crocus work magic underground during winter, transforming into dazzling displays when warmer days return.
Getting the timing right matters. These hardy varieties need weeks of chilly soil to wake up properly. If you’re in colder zones, aim for October or November. Warmer regions? Wait until December. This ensures roots develop without sprouting too soon.
Soil prep is simple but critical. Most bulbs thrive in well-draining spots with plenty of sunlight. Mix in compost or peat moss to keep them happy. Plant at the right depth—usually three times their height—and watch nature handle the rest.
Why go through the effort? Because nothing beats that first pop of color after months of gray. With a little patience, you’ll create a staggered spectacle that keeps your space lively from March through May. Ready to turn your yard into a seasonal masterpiece?
Planning Your Garden for a Vibrant Spring Display

Unlock your garden’s potential by mapping out the perfect spots for growth. Smart preparation now ensures bold colors later. Let’s explore how to set the stage for success.
Assessing Your Garden Space and Soil
Start with a simple drainage test. Dig a 12-inch hole, fill it with water, and time how fast it empties. If water stays longer than 6 hours, mix in compost or coarse sand. This prevents bulbs from sitting in soggy ground.
| Soil Type | Drainage Speed | Amendments |
|---|---|---|
| Clay | Slow | Add 3″ compost |
| Sandy | Fast | Mix peat moss |
| Loamy | Ideal | None needed |
Choosing the Ideal Location for Sun and Drainage
Most bulbs crave morning light. Try placing them near fences or under trees that lose leaves in winter. These spots get early sun before summer shade arrives. South-facing slopes work best for avoiding water buildup.
Check your soil’s pH with a $7 test kit from any garden store. Aim for 6.0–7.0 for brightest hues. A quick lime application can balance acidity if needed. Your efforts today mean fewer surprises next season!
Understanding Bulbs and Their Role in Your Garden

Your garden’s spring show starts with the bulbs you choose. These underground powerhouses store energy to push through frost and soil, delivering bursts of color when most plants are still asleep. Let’s dig into what makes them tick.
Different Types of Spring-Flowering Bulbs
Tulips steal the spotlight with their vivid petals, ranging from classic reds to striped varieties. Daffodils bring sunshine-yellow cheer and multiply effortlessly—perfect for low-maintenance flowers. Don’t overlook petite crocus bulbs. They’re winter’s farewell gift, often blooming through snowdrifts.
Hyacinths pack fragrance into tight clusters, while alliums add whimsy with spherical purple blooms. Each type thrives in specific conditions. Irises prefer drier soil, whereas snowdrops handle shade gracefully.
How Bulb Selection Impacts Future Blooms
Cold requirements vary widely. Tulips need 12-14 weeks below 50°F, while crocus bulbs manage with just 8-10. Planting dates matter too—early varieties go in ground first, followed by late-season picks.
Mix early bloomers like grape hyacinth with mid-spring stars such as fritillaria. This strategy stretches your display from February’s thaw to May’s warmth. Remember: healthier bulbs mean bolder colors next year!
Planting a Spring Flower Garden: Bulbs, Timing, and Early Blooms
Transform your space into a living calendar where blooms take turns shining. By mixing early, mid, and late-season varieties, you’ll maintain vibrant hues for months. Layered planting lets you pack more beauty into limited areas while creating depth.
Start with a bloom timetable. Pair snowdrops (February-March) with mid-season tulips (April) and alliums (May). This staggered approach ensures fresh surprises every few weeks. Deeper-planted bulbs emerge later, while shallow ones appear first.
| Bloom Period | Bulb Examples | Planting Depth |
|---|---|---|
| Early | Crocus, Snowdrop | 3-4 inches |
| Mid | Tulip, Daffodil | 6-8 inches |
| Late | Allium, Fritillaria | 8-10 inches |
Group bulbs in odd-numbered clusters for natural appeal. Leave 2-3 inches between each to prevent overcrowding. South-facing slopes extend display time by delaying early sprouting.
Soil temperature below 55°F triggers root growth without premature shoots. Use mulch as a thermostat—add it after cold snaps to maintain consistent conditions. Your careful planning now means effortless beauty when winter finally retreats.
Timing is Everything: When to Plant Your Bulbs

Crack the code of perfect bulb timing to unlock next year’s floral fireworks. Getting this right means your underground treasures sync perfectly with nature’s rhythms.
Timing Guidelines by USDA Zones
Your location dictates the calendar. Northern gardeners (zones 4-5) should tuck bulbs into soil from September through October. Mid-range regions (zones 6-7) hit their sweet spot in October or early November.
| Zone Range | Planting Window |
|---|---|
| 8-9 | November – Early December |
| 10 | Late December – January |
Warmer areas need later starts. Always aim for 6-8 weeks before your first hard frost. Evening temps around 40-50°F signal prime root-building conditions.
Preparing for Fall Planting and Chilling Requirements
Fall isn’t just a season—it’s your bulbs’ wake-up call. Cool soil triggers root growth without premature sprouting. Southern growers face a twist: refrigerate bulbs for 6-10 weeks to mimic winter’s chill.
Track your local frost dates like a hawk. Miss the window, and you’ll get foliage without flowers. Pre-chilled bulbs go in ground once nighttime temps drop below 60°F consistently.
Remember: bulbs planted fall need that cold period to fuel their spring spectacle. Get the timing right, and you’ll watch magic unfold when winter finally loosens its grip.
Essential Planting Techniques and Best Practices

Your soil is prepped and bulbs selected—now let’s dig into the secrets of perfect placement. Proper technique turns hopeful digging into guaranteed results.
Determining the Right Depth and Spacing
Size matters when burying your underground treasures. A simple rule: dig holes three times deeper than the bulb’s height. For a 2-inch daffodil, aim for 6 inches down. Spacing works similarly—allow 2-3 times their width between each.
| Bulb Type | Typical Height | Ideal Depth |
|---|---|---|
| Crocus | 1.5″ | 4-5″ |
| Tulip | 2.5″ | 7-8″ |
| Allium | 3″ | 9-10″ |
Step-by-Step Planting Instructions
- Loosen soil 2 inches deeper than required depth
- Place bulbs pointy-side up (roots face downward)
- Cover with soil, pressing gently to remove air pockets
- Water thoroughly—about 1 inch of moisture
Can’t tell top from bottom? Lay bulbs sideways. They’ll orient themselves upward. Always make sure soil drains well—soggy conditions rot roots before they establish.
Group bulbs in clusters of 5-7 for impact. Mix early and late varieties in the same hole using the “lasagna method”—deep planters bloom last. One final tip: sprinkle cinnamon in planting holes to deter curious squirrels!
Storing and Caring for Bulbs Before Planting

Your dormant bulbs hold next year’s colorful potential—if you protect them properly. Let’s explore how to keep these sleeping beauties healthy until their moment arrives.
Proper Storage Methods to Maintain Bulb Health
Breathable containers make all the difference. Use paper bags or mesh baskets instead of plastic. These materials prevent moisture buildup while letting air circulate freely.
Find a cool, dark spot with steady temperatures between 50-60°F. Attics or basements often work well. Avoid garages where summer heat spikes could trigger early growth.
Check stored bulbs monthly. Discard any showing mold or soft spots. Healthy ones feel firm like onions—squishy textures mean trouble. Never store them near apples or tomatoes. These fruits release ethylene gas that damages developing plants.
| Storage Mistake | Consequence | Solution |
|---|---|---|
| Plastic bags | Rot/mold | Switch to paper |
| Fridge with produce | Ethylene damage | Use separate drawer |
| Direct sunlight | Premature sprouting | Keep in darkness |
Most varieties stay viable for 2-3 months in storage. Time purchases carefully—you want them going into ground before roots start forming. A little care now ensures your bulbs wake up strong when their season begins.
Wrapping Up Your Garden Journey and Next Steps
Your garden’s success continues long after the last petal falls. Resist the urge to trim fading leaves—let them yellow naturally to fuel next year’s show. This solar-powered process strengthens bulbs for repeat performances.
Climate dictates your next move. In zones 7-10, dig up chill-dependent varieties after foliage dies. Store them in paper bags until fall replanting. Northern gardeners (zones 3-6) can leave most bulbs underground, where they’ll multiply like enthusiastic volunteers.
Boost future blooms with slow-release fertilizer applied as shoots emerge. Early feeding supports root development without forcing premature growth. Naturalizing varieties like daffodils and crocus spread over time, creating ever-expanding carpets of color.
Notice sparse flowers or weak stems? Check soil drainage and sun exposure. Rotate planting spots every 3-4 years to prevent disease buildup. With these simple steps, your garden becomes a self-renewing spectacle that greets each spring with fresh enthusiasm.


