
Imagine growing vibrant vegetables and flowers in a space that boosts plant health while making maintenance easier. Elevated planters offer this advantage by lifting your growing area above common ground-level challenges. Whether you’re dealing with compacted dirt or limited mobility, these structures adapt to your needs.
Why choose this method? Structured growing spaces let you customize soil quality, ensuring roots get the perfect mix of nutrients and oxygen. You’ll avoid waterlogged plants thanks to improved drainage, and weeds become far less problematic. Even better, they extend your growing season by warming faster in spring.
New to the concept? Don’t worry. This guide breaks down the essentials, from selecting materials to maximizing harvests. You’ll see how simple it is to create a thriving ecosystem, whether you’re planting herbs on a patio or veggies in a backyard.
Ready to solve issues like rocky terrain or back strain? Let’s explore how elevated planters empower you to grow smarter—not harder—while yielding impressive results.
Understanding What Raised Garden Beds Are

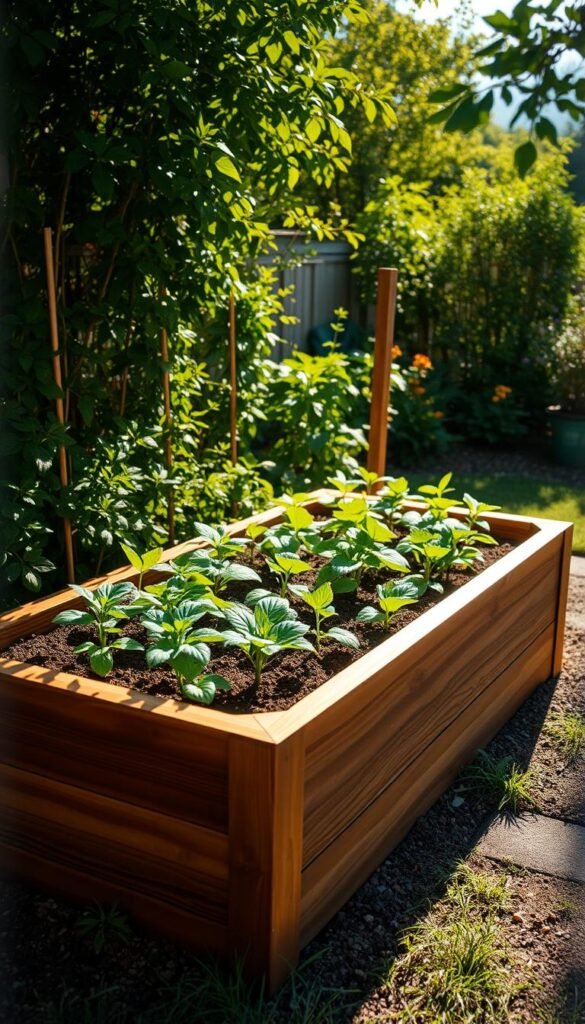
Ever wondered how to give plants deeper roots and healthier growth? These bottomless growing zones sit higher than your lawn, creating a hybrid environment where roots access both custom soil and native earth. Unlike pots or planters, they’re open below—like a framed window into the ground.
Here’s why this design works: Your veggies get premium soil you add, while their roots can dive deeper into natural earth if needed. This combo prevents water pooling and lets plants grow stronger. Build them 6 inches tall for flowers or waist-high for easy access—your back will thank you later.
| Feature | Raised Beds | Traditional Planters |
|---|---|---|
| Root Expansion | Unlimited depth | Limited by container |
| Soil Control | Custom blends | Pre-filled mixes |
| Drainage | Natural flow | Dependent on holes |
You control the soil quality completely—no more guessing what’s in your yard’s dirt. Since these setups warm faster in spring, you’ll start planting earlier. Plus, fewer weeds sneak in compared to ground-level plots.
Whether you’re growing herbs or tomatoes, this method adapts. Choose cedar boards for durability or recycled bricks for charm. The key? Let those roots roam free while keeping your favorite plants right at eye level.
Benefits of Raised Bed Gardening

Curious how to give your greens a VIP treatment? Elevated growing spaces solve multiple challenges at once. You’re not just building a planter—you’re crafting a tailored environment where every carrot and tomato gets star-level care.
Tailored Earth and Water Flow
Forget struggling with clay or sandy dirt. Here, you mix the perfect nutrient-rich blend—compost, peat moss, and vermiculite become your recipe for success. This custom mix lets roots breathe while holding moisture evenly. No more drowning your basil during rainy weeks!
Sloped yards or compacted ground? Not an issue. Elevated setups let excess water escape naturally, protecting roots from rot. Plus, soil warms faster in spring—your lettuce gets a 3-week head start compared to in-ground plots.
Fewer Uninvited Guests
Weeds hate tight spaces. When you pack plants closely, sunlight can’t reach stray seeds trying to sprout. Built-up walls also block invasive grasses from creeping in sideways. One gardener reported 75% fewer dandelions after switching methods.
Pests meet their match too. Bury hardware cloth under your step-by-step guide to building raised beds to stop moles. Drape lightweight covers over hoops to shield kale from aphids. Suddenly, organic gardening feels achievable!
Spot a sickly leaf? With everything at arm’s reach, you’ll catch issues before they spread. Healthy plants mean more harvests—and fewer headaches.
Getting Started: Planning Your Raised Bed Garden

Your plants’ performance begins long before you sow seeds—it starts with smart positioning. Most vegetables demand 6-8 hours of direct sunlight daily, so scout your yard like a detective. Watch how shadows move across your space from morning to evening.
Assessing Your Space and Sunlight
Pick the sunniest spot you can find, ideally with minimal shade from trees or buildings. If your garden sits near a water source, you’ll thank yourself during dry spells. Avoid low-lying zones where puddles linger after rain—roots hate soggy feet.
Here’s a pro tip: align beds east to west. This lets taller plants (like tomatoes) face north, preventing them from shading shorter greens. Use a free sun-tracking app or old-fashioned stakes to map light patterns over 24 hours.
| Site Factor | Ideal Conditions | Poor Choices |
|---|---|---|
| Sun Exposure | 8+ hours direct light | Areas near evergreens |
| Drainage | Sloped or level ground | Valleys or compacted clay |
| Accessibility | Within 15 ft of water | Behind sheds or fences |
Even tricky spaces can work. Got a sloped area? Terrace it with stacked beds. Limited room? Build narrow designs against south-facing walls. Always make sure your chosen place allows room to kneel or wheel a cart nearby.
Raised Garden Beds 101: Top Benefits and Basic Setup

Discover how structured growing areas boost efficiency while nurturing healthier crops. By lifting your planting zone, you create a personalized ecosystem that tackles common gardening headaches. Let’s explore why this approach works so well.
Start by choosing a sunny spot with easy water access. Depth matters—most vegetables thrive in 12-18 inches of nutrient-rich earth. This depth lets roots spread while preventing waterlogging. Mix compost and perlite for optimal drainage and root support.
| Feature | Traditional Plots | Elevated Systems |
|---|---|---|
| Weed Control | Weekly maintenance | Minimal invasion |
| Accessibility | Bending required | Waist-high options |
| Season Extension | Ground warms slowly | Earlier spring starts |
Notice how pests struggle to reach your greens? Slugs avoid climbing walls, while rabbits can’t jump into tall frames. You’ll spend less time battling critters and more enjoying harvests.
Customize each bed’s soil blend for specific crops—acidic mixes for blueberries, sandy textures for carrots. Group plants by water needs to simplify care. Even small patios become productive spaces with compact designs.
Maintenance becomes effortless when everything’s within reach. No more sore knees from crouching! Build narrow beds (3-4 feet wide) so you can tend plants from both sides without stepping on soil.
Choosing the Right Materials for Your Raised Beds

Building a thriving vegetable patch starts with picking materials that balance durability and safety. Your choices directly impact plant health, soil quality, and how long your setup lasts. Let’s break down popular options to help you create a safe, productive space.
Wood, Concrete, Metal, and Other Options
Natural woods like cedar and juniper resist rot without harmful chemicals—ideal for edible plants. Pressure-treated lumber might seem cost-effective, but it can leak toxins into your soil over time. Metal beds offer modern style but may overheat roots in sunny climates.
| Material | Pros | Cons |
|---|---|---|
| Cedar | Rot-resistant, non-toxic | Higher upfront cost |
| Galvanized Steel | Durable, sleek look | Heat retention issues |
| Cinder Blocks | Affordable, sturdy | Heavy, poor insulation |
Concrete beds last decades but require professional installation. For small spaces, fabric pots provide portability and excellent drainage. Always avoid recycled railroad ties or tires—their toxic compounds can leach into your veggies.
Ensuring Chemical-Free and Safe Materials
Stick to untreated, natural resources when growing food. One gardener shared: “Switching to cedar eliminated my worries about contaminants in tomatoes.” Research material safety data sheets if using industrial products like coated metals.
Consider your climate too. Metal beds work well in cooler regions but may bake soil in hot areas. Wood expands in humidity, while concrete cracks during freeze-thaw cycles. Match your bed materials to local weather patterns for best results.
Soil and Irrigation Best Practices
What if your plants could thrive with half the effort? The secret lies in balancing two essentials: nutrient-rich earth and smart watering. Get this duo right, and you’ll see healthier growth with fewer headaches.
Creating the Perfect Soil Mix
Start with a 2:1 blend of topsoil and compost—this combo feeds roots while letting excess water drain. Add perlite for air pockets and sand for heavy clay areas. One gardener swears: “My tomatoes doubled in size after adding worm castings to the mix.”
Test your soil’s pH using a $10 kit from any garden store. Most veggies prefer 6.0-7.0. Too acidic? Sprinkle lime. Too alkaline? Mix in peat moss. Custom blends let you grow fussy plants like blueberries or carrots side by side.
Drip Irrigation and Water Management Tips
Ditch the sprinkler. A drip system saves 50% more water by targeting roots directly. Lay tubing along each row, then set a timer for early morning watering. Roots drink deeply before the sun steals moisture.
Check soil dampness with your finger—if the top inch feels dry, it’s time to water. Mulch with straw or wood chips to lock in humidity. During heat waves, add shade cloth to prevent evaporation.
Optimal Dimensions and Layout Considerations
Getting the proportions right transforms your growing space from functional to exceptional. Tailor your setup to match both plant needs and your comfort—no more guessing games.
Achieving the Ideal Depth, Width, and Height
Most veggies thrive in 10-12 inches of soil depth, but ambitious roots demand more. Tomatoes stretch down 24 inches, while watermelon vines need 36 inches to spread. Match your bed’s height to your crops’ underground ambitions.
| Plant | Minimum Depth | Ideal Depth |
|---|---|---|
| Peppers | 10 inches | 12-14 inches |
| Carrots | 12 inches | 16-18 inches |
| Rhubarb | 18 inches | 24+ inches |
Keep width under 4 feet—this lets you reach the center without compacting soil. One gardener noted: “Narrow beds cut my weeding time in half.” For multiple units, leave 2-3 foot pathways for kneeling or wheelbarrow access.
Height impacts more than roots. Taller frames (24+ inches) reduce bending, while shallow 6-inch designs work for herbs. Pair deeper beds with quality soil mixes to prevent settling. Balance your space—group deep-rooted plants together and save shallower areas for greens.
Planning a budget-friendly layout? Stackable designs maximize yield in small areas. Remember: proper sizing means happier plants and less backache!
Maintenance and Seasonal Upkeep
Keeping your growing space thriving requires simple, seasonal adjustments. By working with nature’s rhythms, you’ll protect plants and boost yields without constant effort.
Easy Maintenance Strategies for Every Season
When frost arrives, shield your bed with 3-4 inches of shredded leaves or straw. These insulate roots and break down into nutrients by spring. For extra weed control, plant winter rye—its dense roots choke out invaders while improving soil structure.
As temperatures climb, mix 2 inches of compost into the top layer. This replenishes nutrients lost during winter. One gardener shared: “My spinach sprouts two weeks earlier now that I prep beds in late March.” Use cold frames or row covers to extend the growing window.
| Season | Key Task | Benefit |
|---|---|---|
| Winter | Mulch with leaves | Prevents erosion |
| Spring | Add compost | Warms soil faster |
| Summer | Water deeply | Encourages strong roots |
| Fall | Plant cover crops | Boosts nutrients |
Summer demands consistent moisture. Install a square-foot gardening layout to group plants by water needs. Check soil dampness daily—dry topsoil means it’s time to water. In fall, remove spent plants and sow clover to fix nitrogen naturally.
Adjust your approach based on local climate. Sandy soils need more mulch, while clay areas benefit from added perlite. With smart timing, your garden becomes a low-maintenance powerhouse.
Innovative Features to Enhance Your Garden Experience
What if your growing space could adapt to your life instead of the other way around? Modern designs now offer smart solutions that blend convenience with productivity. From mobile planters to modular systems, these upgrades make cultivating easier and more efficient.
Portable and Accessible Designs
Add casters to your setup, and suddenly your plants chase sunlight like sunflowers. One gardener reported: “Moving my herbs to shaded areas during heatwaves saved my basil crop.” For those with limited mobility, 24-inch-high frames with 3-foot widths allow comfortable wheelchair access.
| Feature | Benefit | Best For |
|---|---|---|
| Locking wheels | Secure placement | Patios/decks |
| Adjustable legs | Custom heights | Multi-user spaces |
| Modular panels | Expandable layout | Small yards |
Customizing for Maximum Yield
Attach trellises to grow beans vertically, freeing ground space for low-maintenance flowers. Snap-on greenhouse covers protect seedlings from frost while letting rain through. Built-in tool racks keep pruners handy, and corner shelves hold watering cans.
Stock tanks transformed into instant planters prove versatility matters. Drill drainage holes, fill with soil, and you’ve got a durable system for under $100. Pair these options with timed irrigation for a nearly self-sufficient setup.
Integrating Raised Beds into Your Vegetable Garden
Transform your backyard into a powerhouse of fresh flavors by blending structured growing spaces with traditional plots. These systems let you grow more in less room while keeping your favorite veggies thriving. You’ll notice how smart layouts create harmony between different planting zones.
Maximizing Space and Plant Health
Dense planting works here because roots spread freely in loose, fertile earth. Try placing 16 carrot seeds per square foot or nine spinach plants—their shallow roots won’t compete. For tomatoes, give determinate varieties 18-24 inches to stretch without crowding neighbors.
Pair this strategy with a square-foot garden plan to organize crops by size and harvest time. Tall plants like pole beans go northward, while low-growing herbs border sunny edges. This approach uses vertical space and sunlight efficiently.
Healthy soil means healthier yields. Refresh earth annually with compost to maintain nutrients. Rotate crops each season to prevent disease buildup. Soon, you’ll harvest baskets of peppers and greens from the same spot year after year.


