
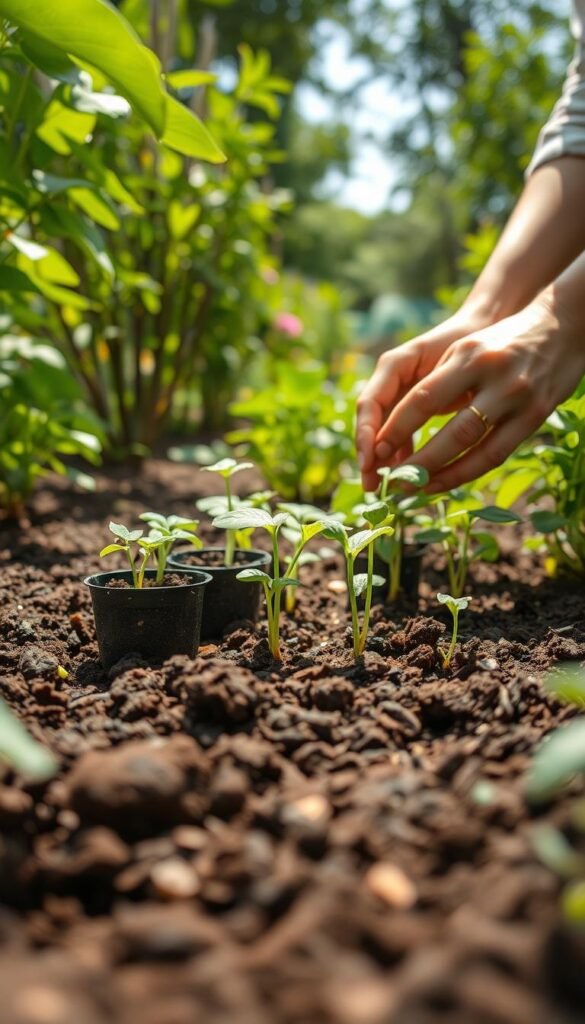
Moving young plants from pots to your garden is a delicate process. Proper care ensures they grow strong and healthy. Skipping key steps or rushing can lead to stunted growth or even plant loss.
Timing matters. Planting too early risks cold damage, while waiting too long may stress roots. A Utah gardener learned this the hard way when a late frost shocked unprotected plants.
Success comes from two phases: preparing the soil and gradually acclimating plants to outdoor conditions. This prevents shock and encourages deep root development. Techniques vary by climate, so adaptability is key.
Done right, your garden rewards you with lush growth and bountiful harvests. Fewer diseases strike when plants transition smoothly to their new home. Even beginners can master these methods with attention to detail.
What Is Transplanting and Why Is It Important?

Gardening success starts with mastering the art of transplanting. This process moves young plants from small containers to your garden, giving them space to grow stronger roots and flourish. Not all crops handle this transition equally, though.
Understanding the Basics of Transplanting
Transplanting works best for warm-season crops like tomatoes or peppers, which often struggle when grown directly from seed outdoors. These seedlings benefit from controlled indoor starts before moving outside. Cold-hardy crops like spinach, however, adapt better to direct sowing.
Root-sensitive vegetables—carrots, radishes, or beets—dislike transplanting. Disturbing their roots stunts growth. Always check your plant’s preferences before relocating them.
Benefits of Proper Transplanting
Done right, transplanting offers three key advantages:
- Earlier harvests: Start plants indoors to extend short growing seasons.
- Pest protection: Stronger seedlings resist insects better than delicate sprouts.
- Controlled growth: Manage light, water, and temperature during early stages.
| Transplant-Friendly Crops | Direct-Sow Crops |
|---|---|
| Tomatoes, Peppers, Broccoli | Carrots, Radishes, Beans |
| Needs careful timing | Sensitive to root disturbance |
Whether you’re growing herbs or veggies, smart transplanting techniques lead to healthier gardening results. Avoid rushing—patience ensures your seedlings adapt smoothly to their new environment.
When Is the Best Time to Transplant Seedlings?

Transplant success hinges on two factors: soil warmth and your plants’ maturity. Move them too soon, and cold shocks stunt growth. Wait too long, and roots become cramped. Patience pays off with healthier harvests.
Checking Soil and Weather Conditions
Soil temperature matters most. Heat-loving plants like tomatoes need nights above 60°F (15°C). Cool-weather crops tolerate 50°F (10°C). Use a soil thermometer for accuracy.
Check your local frost date using ZIP-code calculators (Old Farmer’s Almanac). Even after the last frost, unexpected cold snaps happen. Keep cloches or row covers handy for protection.
Identifying the Right Growth Stage
Your seedlings should be 2–3 inches tall with 2+ true leaves. Overgrown plants show yellowing leaves or roots circling their pots. These struggle to adapt outdoors.
Track seed-starting dates to predict transplant time. For example, peppers need 8–10 weeks indoors before moving outside. Match their growth stage to your garden’s readiness.
Preparing Your Garden for Transplanting

Your garden’s soil holds the key to thriving plants after relocation. Healthy roots need loose, nutrient-rich earth to spread and absorb water. Skip this step, and even strong seedlings may struggle to grow.
Loosening and Amending the Soil
Aerate the soil to a 12-inch depth using a broadfork. This lets roots penetrate easily and improves drainage. Mix in 2 inches of compost or worm castings—it feeds microbes and retains moisture.
For cold climates, spread black plastic over beds 2 weeks before planting. This warms the soil faster. Test temperatures with a probe; most plants need at least 45°F.
Creating the Ideal Planting Environment
Design garden paths to avoid compacting soil near plants. Pre-water beds 24 hours ahead to reduce shock. When planting, add a ¼-inch layer of soil over the rootball—it prevents drying.
For weed control, use landscape fabric in organic gardens. Mulch with straw or shredded bark to keep roots cool. Learn more about seasonal soil care for year-round success.
| Soil Amendment | Benefit |
|---|---|
| Compost | Boosts nutrients and water retention |
| Worm Castings | Enhances microbial activity |
| Mulch | Regulates temperature and moisture |
Dig each hole slightly larger than the root ball. This gives tender roots space to expand. With patience, your plants will adapt smoothly to their new home.
How to Harden Off Seedlings Before Transplanting

Transitioning seedlings outdoors isn’t instant—it’s a slow dance with nature. Hardening off prepares tender plants for wind, sun, and temperature swings. Skip this step, and leaves may scorch or growth stall.
Gradual Exposure to Outdoor Conditions
Start with 2 hours in shaded spots, like under a tree. Increase time outdoors by 1–2 hours each day. By the end of a week, plants should handle full sun.
Use windbreaks like fences to shield seedlings. Dry spring winds dehydrate leaves fast. Keep soil moist but not soggy to counteract evaporation.
Protecting Seedlings During Hardening Off
Watch for leaf curl or bleaching—signs of too much direct sunlight. If temperatures dip below 50°F, cover plants with frost cloth overnight.
Reduce indoor watering gradually. This mimics outdoor conditions and strengthens roots. Stressed plants adapt faster but avoid wilting.
| Method | Duration | Tips |
|---|---|---|
| Shade Start | Days 1–3 | Use morning light only |
| Partial Sun | Days 4–7 | Monitor for scorching |
| Full Exposure | Week 2+ | Ready for transplant |
Step-by-Step Guide to Transplanting Seedlings Outdoors

The moment your seedlings meet the garden soil determines their future health. Small details—like hole size and planting depth—impact root development and stress levels. Here’s how to get it right.
Digging the Perfect Hole
Use a transplanter trowel to dig holes twice as wide as the rootball. This gives roots room to spread. For tomatoes, try trench planting: lay stems sideways in shallow soil. It encourages stronger root systems.
Handling Seedlings with Care
Squeeze pots gently to release plants without tearing roots. If roots are tangled, use chopsticks to loosen them. Firm soil around stems to eliminate air pockets—this prevents drying.
Planting at the Right Depth
Bury tomato stems up to the first leaves. Most veggies should sit at their original soil level. Exceptions include peppers, which benefit from slightly deeper planting.
| Plant Type | Ideal Depth |
|---|---|
| Tomatoes | Stem buried up to leaves |
| Peppers | 1 inch deeper than pot |
| Lettuce | Same level as pot |
After planting, mix 2 tbsp of 15-30-15 fertilizer per gallon of water. This boosts early growth without overwhelming young plants. Your seedlings are now ready to thrive!
Watering and Fertilizing After Transplanting
Proper hydration and nutrients make all the difference post-transplant. Your plants’ root development depends on consistent moisture and balanced food. Too much or too little of either can trigger transplant shock, stunting growth.
Reducing Transplant Shock
Soak the soil thoroughly right after planting. This settles roots and eliminates air pockets. Use a gentle rose-attachment watering can to avoid compacting soil.
Kelp emulsion or fish hydrolysate added to water reduces stress. These natural solutions boost resilience. Watch for wilted leaves—they signal shock.
Choosing the Right Fertilizer
Start with a phosphorus-rich liquid fertilizer (e.g., 15-30-15). It encourages strong roots without overwhelming plants. Apply every 10–14 days for the first month.
Granular options work too but mix them into soil beforehand. Mulch with straw to lock in moisture and prevent rot. Your plants will thank you with lush growth!
Protecting Your Seedlings from Extreme Weather
Weather can make or break your young plants after moving them outside. Sudden cold snaps or scorching heat stress delicate roots. With smart tactics, your garden thrives despite nature’s curveballs.
Covering Plants During Cold Snaps
Unexpected freezes demand quick action. Use milk-jug cloches or frost blankets secured with bricks. Water soil in the morning—it retains heat better overnight.
For prolonged cold, row covers trap warmth. Remove them daily if temps rise above 50°F. Overheating under covers harms plants as much as frost.
Managing Heat and Wind Exposure
When temperatures soar past 85°F, shade cloths prevent leaf burn. Stretch burlap over PVC frames for temporary relief. Morning sun is gentler than afternoon rays.
Wind snaps tender stems. Stake tall plants and mulch heavily to anchor roots. Re-harden off seedlings if they wilt—they might need more acclimation time.
- Frost blankets: Use weights to keep edges sealed against wind.
- Shade cloths: 30%-50% density works for most veggies.
- Watering: Deep soaks at dawn prevent midday evaporation.
Watch Your Garden Thrive!
A thriving garden rewards patience and thoughtful care. Track progress with weekly photos—it’s inspiring to see healthy plants grow taller each week.
Try companion planting. Basil near tomatoes repels pests, while marigolds protect roots. These pairs boost your garden’s health naturally.
Rotate crops next season to keep soil nutrient-rich. Beans after tomatoes balance nitrogen levels for successful transplanting cycles.
Share tips with local gardening groups. Swap stories and solutions—it’s how communities grow greener together.
When harvests arrive, celebrate! That first ripe tomato or crisp lettuce head makes every effort worth it.


