
Imagine stepping into your backyard to find a stunning outdoor feature that blends natural charm with smart functionality. Built structures using durable materials offer more than just growing space—they create visual depth and year-round interest. Whether you’re growing herbs or colorful flowers, these elements can turn ordinary yards into organized, eye-catching areas.
Why choose stone over other materials? It lasts decades without rotting or warping, surviving harsh weather while maintaining its timeless look. Unlike wooden alternatives, you won’t need to replace it every few seasons. The natural texture also complements any style, from rustic cottages to modern patios.
Poor soil or drainage problems? Elevated planters solve these issues by giving you control over growing conditions. They prevent waterlogging and let you customize soil mixes for healthier plants. Plus, working at waist height means less bending—a relief for your back during long gardening sessions.
This guide walks through designing spaces that balance beauty and practicality. You’ll learn how to position features for maximum impact and pair them with complementary plants. Let’s transform your property into a cohesive, inviting retreat that works as hard as it impresses.
Introduction to Elevated Garden Design

Transforming your outdoor area starts with rethinking how you use vertical space. Elevated layouts let you grow plants above ground level, turning awkward corners or uneven terrain into productive growing zones. This approach works whether you’re nurturing vegetables or arranging ornamental flowers.
One major perk? Accessibility. No more kneeling or bending to tend to your plants—ideal for anyone with mobility challenges. The height also helps protect crops from pests and makes weeding simpler. You’ll spend less time struggling and more time enjoying your green space.
These structures adapt to any aesthetic. Pair sleek, geometric shapes with minimalist patios or use weathered materials for cottage-style charm. Even small yards benefit: tiered designs maximize planting areas without crowding walkways. Every inch becomes purposeful, blending beauty with function.
Struggling with poor soil or drainage? Raised setups let you control the growing environment completely. Fill them with nutrient-rich mixes tailored to your plants’ needs. Sloped sites? Build terraced rows that prevent erosion while creating visual drama.
From urban balconies to sprawling lawns, elevated gardening solves problems you didn’t know you had. It’s not just about growing—it’s about crafting a space that reflects your style and simplifies maintenance. Ready to rethink what your yard can do?
Planning Your Stone Garden Bed Project
Where should your new planting space live? Start by sketching your vision while considering these three essentials: sunlight, drainage, and workflow efficiency. A well-planned layout saves time, money, and frustration down the road.
Selecting the Ideal Location and Layout
Most edible plants demand 6-8 hours of daily sun. Walk your property at different times to identify bright zones that meet this need. Avoid low-lying areas where water pools after rain—this can drown plant roots.
Use wooden stakes and twine to outline potential spots. This helps visualize bed sizes and walking paths. Keep these tips in mind:
- Position within easy reach of water sources
- Leave 2-3 feet between beds for maintenance access
- Check underground utility lines before digging
Gathering Materials and Accurate Measurements
Calculate stone quantities using this simple formula: (Length x Height x 2) + (Width x Height x 2). Always add 10% extra material for cutting waste. For a 4’x8’x1′ bed:
- Length stones: 8 feet x 1 foot x 2 sides = 16 sq. ft.
- Width stones: 4 feet x 1 foot x 2 sides = 8 sq. ft.
Record measurements in a notebook or phone app. Double-check numbers before ordering—errors here lead to delays or budget overruns. Pro tip: Snap photos of your staked area for reference when shopping.
Consider future expansion when planning. Will you add compost bins? More planting space? Leave room for these possibilities to create a flexible growing area that evolves with your needs.
Stone Raised Garden Beds: Elevating Your Landscape Design

What if your planting area worked smarter, not harder? Built structures using natural rock materials deliver lasting performance while solving common growing challenges. Let’s break down why these durable planting solutions outperform other options.
Natural stone offers built-in temperature control. It absorbs daytime heat, releasing it slowly at night—a game-changer for tomatoes and peppers. In cooler months, this thermal mass protects roots from frost damage. You’ll harvest crops weeks longer than neighbors using wooden beds.
Struggle with clay or sandy earth? These structures let you start fresh with custom soil blends. Mix compost, peat moss, and perlite for perfect drainage and nutrients. Your plants get exactly what they need, no guesswork required.
| Material | Lifespan | Maintenance | Aesthetics |
|---|---|---|---|
| Wood | 5-7 years | Annual sealing | Rustic charm |
| Metal | 10-15 years | Rust prevention | Modern look |
| Stone | 25+ years | None | Timeless appeal |
Pests hate climbing stone walls. Slugs and rodents often bypass these barriers, protecting your lettuce and strawberries. The defined edges also stop grass from creeping into your pristine growing zones.
For best results, layer your soil like a pro:
- 6″ gravel base for drainage
- Landscape fabric to block weeds
- 12″ quality topsoil mix
These organized spaces make crop rotation simple. Track what grew where using modular layouts—no more forgotten planting spots. Your backyard becomes both productive and polished, blending smart growing with eye-catching design.
Exploring the Benefits of Raised Garden Beds

Transform your outdoor space into a thriving oasis by understanding how elevated planters tackle common gardening challenges. These structures offer practical solutions while adding aesthetic value to your yard.
Improved Drainage and Enhanced Soil Quality
Traditional gardens often struggle with soggy roots during rainy seasons. Raised beds lift your plants above compacted or clay-heavy earth, letting excess water flow freely. A 4-inch layer of gravel or sand at the base creates a natural drainage system, preventing root rot.
You control the soil quality from day one. Mix compost, peat moss, and perlite for a fluffy texture that holds moisture without drowning plants. This tailored approach gives vegetables and herbs exactly what they need to flourish. For detailed guidance, explore our soil preparation strategies.
Creating a Focal Point and Accessible Space
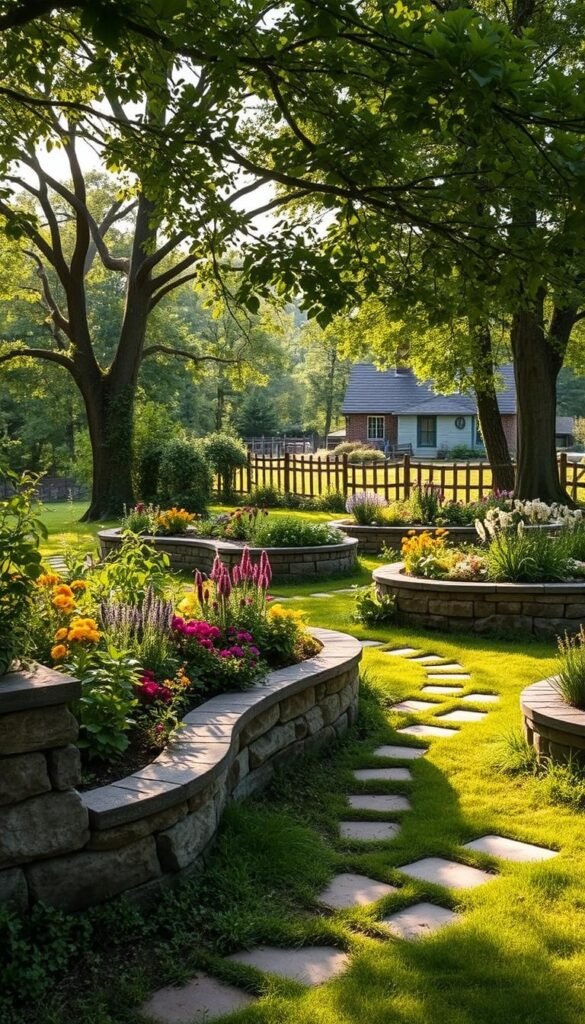
Elevated planters double as design statements. Arrange them in geometric patterns or curved lines to draw attention to specific areas. Add flowering borders or trailing vines to soften edges and boost visual appeal.
Comfort meets function with these features:
- 18-inch height reduces bending for gardeners with back pain
- 30-inch options deter rabbits and groundhogs
- 3-foot width ensures easy access from both sides
Keep paths between beds at least 2.5 feet wide for comfortable movement. Pair functional layouts with decorative stones or trellises to merge productivity with personality.
Step-by-Step Guide to Building Your Raised Stone Garden Beds

Creating lasting garden structures begins with proper groundwork. This hands-on process requires patience but rewards you with sturdy, eye-catching features that serve for decades. Let’s break down the two most critical phases of construction.
Establishing a Level Base and Laying the First Course
Start by marking an area with undisturbed soil—avoid spots where digging or tilling occurred recently. Spread a 2-inch layer of crushed stone screening across the entire base. Use a 4-foot level to check for flatness in all directions, adjusting until no gaps exist.
| Step | Tool | Key Checkpoint |
|---|---|---|
| Compact base | Plate tamper | No footprint impressions |
| Lay first stones | Rubber mallet | Level reads 0° bubble |
| Verify alignment | Mason’s line | Straight edge on all sides |
Rent a plate compactor from local hardware stores for about $75/day. Make three passes over the screening—this prevents shifting under the stone’s weight. Position your first layer carefully; even a ¼-inch tilt here multiplies with each added row.
Staggering Stones and Maintaining Even Rows
Build like a bricklayer: offset each new stone’s center over the joint below. This interlocking pattern strengthens walls and prevents vertical cracks. Check every layer with your level, adjusting stones by tapping with a mallet.
Keep these tips in mind:
- Place largest stones at corners for stability
- Use shims sparingly—only for minor adjustments
- Snap chalk lines between stakes to guide straight rows
Complete three courses before filling with soil. This prevents inward pressure from warping your structure during assembly. Remember: precise beginnings make the entire project smoother.
DIY Tips for Ordering Materials and Essential Tools

Smart material planning separates successful projects from costly do-overs. Getting your supplies right saves money and prevents mid-build headaches. Let’s explore how to order wisely and choose tools that make construction smoother.
Budgeting for Extra Material and Shipping Considerations
Always order 10% more stone than your calculations show. Broken pieces or uneven cuts happen—extra stock keeps your project moving. Heavy items like rocks often ship by freight, so consolidate orders to avoid multiple delivery fees. One forklift drop-off beats paying $200+ for additional trips.
Consider these cost-saving strategies:
- Group materials with neighbors for bulk discounts
- Store surplus stone for future repairs or expansions
- Verify delivery truck access before scheduling
Using the Right Tools for a Smooth Build
Proper equipment turns challenging tasks into simple steps. A diamond-blade gas saw slices through thick stone effortlessly, while a plate tamper creates rock-solid foundations. Rent specialty tools if you’ll only use them once—it’s cheaper than buying.
| Tool | Purpose | Rent/Buy? |
|---|---|---|
| Rubber mallet | Adjusting stone alignment | Buy ($15) |
| Plate tamper | Compacting base layers | Rent ($40/day) |
| Gas quick-cut saw | Precision stone cutting | Rent ($65/day) |
Keep essentials like levels and shovels handy. They’ll help you maintain straight walls and move materials efficiently. With smart prep and the right gear, you’ll build like a pro—even on your first try.
Incorporating Design Elements into Your Raised Garden Beds
Turn functional features into stylish solutions that enhance both beauty and privacy. Thoughtful layouts do more than grow plants—they shape how you experience your outdoor area. Let’s explore how to merge practicality with creative flair.
Creating Privacy Screens and Natural Enclosures
Need to block an eyesore or shield your patio? Position taller planters where they’ll act as living walls. Fill them with bamboo, ornamental grasses, or climbing vines for layered coverage. These green barriers soften harsh lines while adding texture to your space.
For year-round screening, mix evergreen shrubs with seasonal bloomers. Place raised beds 3-4 feet apart along property lines or seating zones. This creates intimate nooks without feeling closed off. Add trellises between structures for vertical interest—perfect for roses or clematis.
Boost your gardening aesthetic by choosing materials that complement your home’s exterior. Stacked slate or fieldstone pairs well with modern and rustic themes. Use curved edges to guide foot traffic subtly, keeping the focus on your lush plantings.
Remember: smart design solves problems while sparking joy. Your outdoor area becomes a retreat that works as hard as it looks good—no compromise required.


