
Transforming empty planting containers into productive growing spaces can feel overwhelming at first glance. The secret lies in strategic material layering that nourishes plants while keeping costs low. Many gardeners don’t realize their backyard holds free resources perfect for building fertile foundations.
Organic matter like autumn leaves and kitchen scraps becomes black gold when given time to break down. While store-bought mixes work for instant planting, natural alternatives create self-sustaining ecosystems. These methods mimic forest floor decomposition, where fallen debris feeds the soil year after year.
Timing plays a crucial role – some techniques let you start growing immediately, while others demand patience. For those building your own raised bed garden, understanding these timelines helps match methods to your schedule. Certain approaches even improve soil quality over multiple seasons, reducing long-term maintenance.
You’ll find five practical strategies that turn yard waste into plant paradise. From European-inspired mound gardening to simple composting tricks, each method balances cost and effectiveness. The right combination can slash expenses by 60% compared to pre-mixed soils while boosting biodiversity.
Smart layering does more than save money – it creates ideal root environments. Proper aeration and moisture retention come from mixing coarse and fine materials. This balance prevents compaction, letting plants access nutrients and water effortlessly throughout their growth cycles.
Understanding Raised Garden Beds and Their Benefits

Urban growers face unique challenges, but elevated planting spaces solve many common issues. These structures act like custom ecosystems where you decide what nutrients reach your crops. Let’s explore why they’re becoming essential for city-based green thumbs.
City Soil Solutions Made Simple
Traditional plots often struggle with concrete-heavy environments. Elevated designs let you bypass poor native earth entirely. You’ll notice three key improvements:
- Custom drainage: Prevent root rot in rainy areas
- Faster warming: Jumpstart spring planting by weeks
- Accessibility: Tend greens without bending painfully
City soils often contain lead or other contaminants. With contained spaces, you control every scoop of earth. This protection matters most for edibles like herbs and vegetables.
Nature’s Recycling System at Work
Organic matter transforms these spaces into living systems. Fallen leaves and food scraps feed microbial armies that nourish roots. A study by Cornell University found compost-enriched beds host 40% more beneficial fungi than conventional gardens.
Mixing materials creates air pockets for strong root growth. Try alternating layers of:
- Twigs for drainage
- Grass clippings for nitrogen
- Shredded paper for carbon
These elements work together like a natural battery, slowly releasing nutrients. For those exploring organic gardening methods, this approach builds fertility without chemicals. Your plants get steady nourishment while you reduce landfill waste.
Planning Your Garden Bed Filling Strategy

Creating thriving plant environments starts with smart preparation. Your approach should balance available resources with what your greens demand. Let’s break down the essentials for crafting a personalized blueprint.
Assessing Your Garden’s Needs
Bed depth dictates your foundation. Structures over 24″ tall can handle logs and branches at their base, while shallow versions need quicker-decomposing elements. Match these proportions:
- Deep containers: 50% woody material + 50% organic matter
- Standard depth: 30% twigs/leaves + 70% nutrient-rich mix
Local weather patterns matter too. Humid regions benefit from extra drainage layers like gravel, while arid zones need moisture-retaining coconut coir. Track your seasonal rainfall averages before finalizing materials.
Selecting the Right Materials
Start with what’s already around you. Fallen branches become natural aerators, while coffee grounds add nitrogen. Follow this priority list:
- Free local resources (tree trimmings, municipal compost)
- Repurposed household waste (egg cartons, tea bags)
- Budget-friendly store-bought amendments
Remember: Root vegetables like carrots need loose, stone-free earth. Leafy greens thrive in denser mixes. Always leave 4-6″ of planting-friendly medium at the top, regardless of your base layers.
How to Fill Raised Garden Beds Cheap: Layering Soil, Compost, and Mulch

Maximizing your garden’s potential doesn’t require breaking the bank. With clever material management, you can build fertile environments while keeping expenses minimal. The secret lies in viewing everyday waste as valuable growing resources.
Cost-Saving Tips and Budget Considerations
Bagged growing mediums quickly drain wallets, especially for deep containers. Instead, use this three-part approach:
- Base layer: Logs and branches from tree trimmings
- Middle section: Grass clippings mixed with coffee grounds
- Top 6 inches: Quality topsoil blended with compost
This layering technique cuts costs by using free organic matter for 70% of your bed’s depth. Your plants only need nutrient-rich earth near their roots – the lower layers gradually break down to feed future crops.
Seasonal timing boosts savings further. Autumn leaves make perfect filler material when crushed, while spring grass clippings add nitrogen. Many municipalities offer free wood chips or compost – check local recycling programs before purchasing amendments.
Remember: The topsoil layer acts as your immediate growing zone. Invest in this critical upper section while using recycled materials below. Over time, earthworms and microbes will transform the lower layers into rich humus, creating self-renewing fertility.
Introduction to the Hugelkultur Method and Alternatives

Ancient gardening techniques often hold surprising solutions for modern growers. One European approach turns fallen branches into underground reservoirs, while another uses kitchen scraps like nature’s building blocks. These methods transform your planting space into a living system that works while you sleep.
What Is Hugelkultur?
Hugelkultur (pronounced HOO-gul-culture) uses decaying wood as its foundation. By stacking logs at the bottom of your bed, you create a sponge-like base that stores moisture for dry spells. As University of Vermont researchers note, “This technique mimics forest ecosystems where fallen trees nourish new growth for decades.”
The decomposition process feeds plants gradually – large logs can take 3-5 years to break down fully. This slow release means your raised garden bed becomes more fertile over time. You’ll use 60% less water in summer months thanks to the wood’s natural hydration properties.
Comparing Hugelkultur with Lasagna Layering
While both methods layer materials, their focus differs. Hugelkultur prioritizes long-term structure using chunky wood, whereas lasagna layering relies on thinner sheets like newspaper or cardboard. Consider these key differences:
- Materials: Fallen trees vs shredded leaves/paper
- Timeline: Years of decomposition vs single-season readiness
- Best for: Sloped yards needing erosion control vs quick urban setups
Hugelkultur shines in areas with uneven rainfall, while lasagna works better for rapid backyard transformations. Both approaches reduce waste, but your choice depends on whether you’re building for next season or the next decade.
Remember: The wood layer acts like a battery, storing nutrients and water. As it breaks down, it creates air pockets that prevent soil compaction – a common issue in traditional beds. This natural aeration means stronger roots and happier plants.
Exploring Budget-Friendly Soil and Compost Options

Smart gardeners know that fertile earth doesn’t require premium price tags. Your local landscape suppliers and kitchen scraps hold untapped potential for creating rich planting environments. Let’s uncover practical ways to source quality materials without overspending.
Sourcing Affordable Bulk Soil
Nurseries and landscape centers offer bulk bins that slash costs dramatically. Unlike pre-packaged bags, these loose options let you purchase exact quantities. A cubic yard of bulk mix typically costs 50% less than equivalent bagged products.
| Feature | Bulk Soil | Bagged Soil |
|---|---|---|
| Cost per cubic yard | $25-$40 | $50-$80 |
| Packaging | Bring your own containers | Plastic bags included |
| Customization | Mix amendments on-site | Pre-blended formulas |
| Organic options | Available at specialty suppliers | Limited selections |
When selecting bulk materials, look for these signs of quality:
- Dark color indicating organic matter content
- Earthworm activity in storage bins
- Absence of synthetic fertilizer pellets
Using Kitchen Scraps and Yard Waste Effectively
Your trash can become next season’s treasure. Coffee grounds add nitrogen, while crushed eggshells provide calcium. Layer these directly into planting areas or compost them separately.
“Home compost can replace 30% of commercial fertilizers in vegetable gardens,” notes a University of Maryland study.
Create a free compost system using:
- Alternating green (vegetable scraps) and brown (fallen leaves) layers
- A simple wire bin for aeration
- Monthly turning with a garden fork
For those building raised beds on a budget, combining bulk materials with homemade compost creates thriving ecosystems. Remember: partially decomposed mixes work best when given 4-6 weeks to settle before planting.
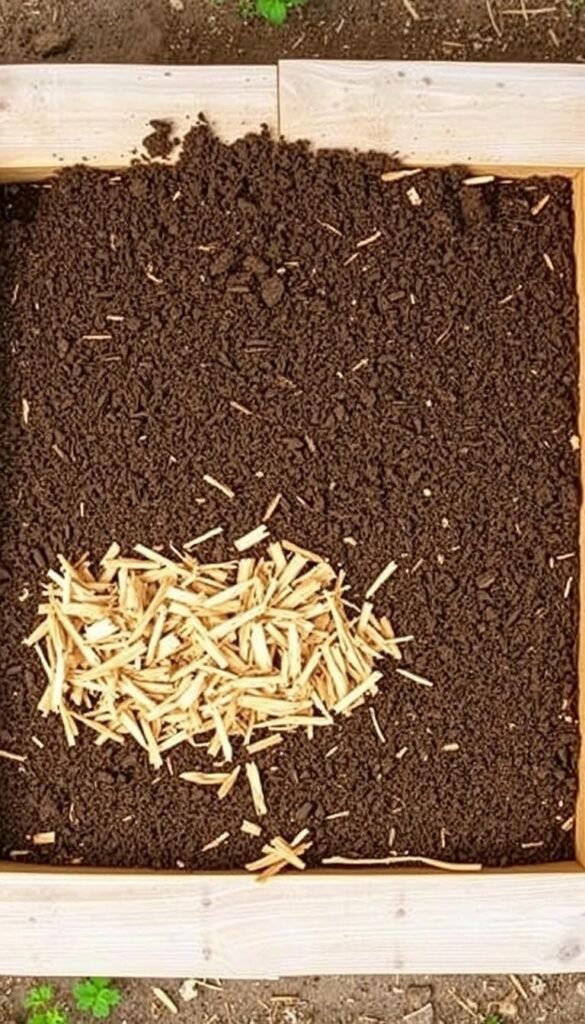
Preparing Your Materials: Wood, Mulch, and Organic Matter
Selecting the perfect building blocks for your planting space sets the stage for long-term success. What goes into your structure determines how well plants thrive and how often you’ll need to refresh materials. Let’s break down smart choices that balance durability with natural nourishment.
Wood Selection Wisdom
Hardwoods like birch or oak last longer in moist environments, slowly releasing nutrients as they decompose. These dense options create stable foundations that retain moisture effectively. Softwoods work too but break down faster – ideal if you want quicker soil enrichment.
Steer clear of black walnut and red oak, which release natural chemicals that hinder plant growth. Instead, opt for maple, cottonwood, or willow logs. These rot-resistant choices support healthy microbial activity while maintaining structure for years.
For those exploring budget-friendly filling methods, mixing wood types optimizes cost and performance. Use larger logs at the base with smaller branches layered above. This approach maximizes airflow while creating gradual nutrient release as materials break down.


