
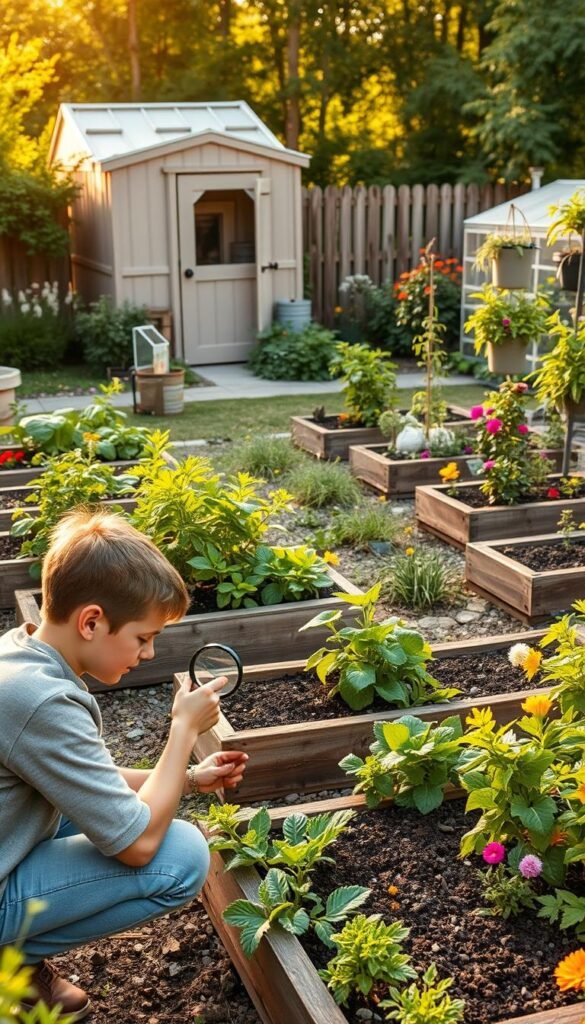
Starting a garden can feel overwhelming, but simple hacks make it easier. Whether you’re planting seeds or tending mature plants, these methods save time and money. Best of all, they work all year long.
You don’t need fancy tools to get started. Many supplies are already in your home. Upcycled containers and basic soil amendments can yield impressive results. Even small spaces can thrive with the right approach.
Safety matters too. Always call 811 before digging to avoid utility lines. Pet owners should check the ASPCA’s plant safety list. Proper gardening posture and tool care prevent injuries.
For more space-saving ideas, explore these affordable DIY hydroponic projects. They’re perfect for beginners and require minimal supplies.
Why Gardening Hacks Make All the Difference

Ever struggled with limited space or tight budgets? There’s a better way. Smart gardening tips help you work around common challenges, whether you’re growing on a balcony or in a backyard.
In cities like NYC, where the average growing season lasts 222 days, maximizing every inch matters. Repurposing household items—like yogurt containers for seedlings—saves money and reduces waste. Even plants need less than you think to thrive.
Seed saving is another game-changer. By preserving open-pollinated varieties, you protect genetic diversity and ensure future harvests. Bri Books’ USDA zone cheat sheet simplifies planning for major cities, so you’ll always plant at the right time.
Community gardens offer shared tools, but security matters. Lockable storage bins keep supplies safe. For strawberries, aim for 35–85°F temperatures—ideal for fruiting. Avoid double-flowered cultivars; they’re pretty but useless for pollinators.
With these ideas, your home garden can flourish. Start small, think creatively, and watch your efforts bloom.
1. Winter Sowing: Start Seeds Outdoors Like a Pro

Milk jugs and salad containers become mini greenhouses in cold months. This method, called winter sowing, lets nature handle stratification—a cold period some seeds need to sprout. No grow lights or indoor space required!
How Winter Sowing Works
Native plants like milkweed and coneflower require frost to break dormancy. By sowing them in vented containers outdoors, they germinate when conditions are perfect. Trudi Davidoff’s Facebook group offers step-by-step support.
Best Seeds for Winter Sowing
- Cold-hardy annuals: Calendula, sweet peas, and spinach thrive.
- Frost-tolerant perennials: Echinacea and lupine adapt well.
- Avoid warm-weather crops: Tomatoes and peppers need indoor starts.
Step-by-Step Setup with Recycled Containers
- Cut a milk jug horizontally, leaving a hinge. Poke drainage holes with a heated screwdriver.
- Fill with 3″ of potting mix, sow seeds, and label with waterproof markers.
- Close the container, tape the edges, and place outside. Open vents on warm days.
Transplant seedlings when they reach 2″ tall—usually after 6–8 weeks. Stagger planting from December to March for continuous spring growth.
2. Save Seeds Like a Frugal Gardener

Growing your own plants from saved seeds cuts costs and preserves your favorite varieties. A single $2–$5 seed packet can yield harvests for years when handled correctly. Learn which types work best and how to store them properly.
Open-Pollinated vs. Hybrid: Know the Difference
Open-pollinated seeds produce plants identical to their parents, making them ideal for saving. Brands like Botanical Interests offer reliable options. Hybrid seeds (labeled F1) often won’t grow true to type if replanted.
Heirloom varieties, a type of open-pollinated seed, have higher viability rates—up to 90% when stored well. For flowers and vegetables, stick with these for consistent results. The paper bag pollination method helps maintain purity by preventing cross-pollination.
Harvesting and Storage Tips
Timing matters. Collect seeds when pods turn brown but before they split open. For biennials like carrots, wait until their second season. Always check the ASPCA’s toxic plant list if you have pets—some seeds can be harmful.
- Label immediately: Use waterproof markers on envelopes to note the plant type and date.
- Dry thoroughly: Spread seeds on paper towels for 1–2 weeks before storage.
- Cool and dark: Store in airtight containers in a basement or fridge (32–41°F).
For colorful varieties like rainbow chard, separate seeds by color to preserve traits. CaliKim’s YouTube channel demonstrates advanced techniques. Discover more budget-friendly gardening strategies here to maximize your harvests.
3. Optimize Your Garden Layout with Rope and Sunspots

A well-planned garden layout maximizes your harvest with less effort. Whether you’re working with raised beds or small spaces, simple tools like rope and flour help create clean edges. Start by marking shapes on the ground before digging—this prevents costly mistakes.
Using Rope to Design Professional-Looking Beds
Flour or sand makes temporary outlines. Sprinkle it along ropes stretched between stakes for curved or straight lines. For depth, match bed height to nearby fences: 12″ beds suit 3′ fences, while 18″ beds need 4′ barriers. This keeps plants from shading each other.
Finding Your Garden’s Sun Exposure
Use the arm-positioning method to track sunlight. Face north at noon; your shadow points south. Areas with 6+ hours of sun suit tomatoes, while 3–4 hours work for lettuce. Bri Books’ method calculates exact sun spots by season.
Identify microclimates too. South-facing walls radiate heat, while low spots stay frosty. Avoid 1980s permaculture curves—they waste space. Instead, check designs from above using free apps like Google Earth.
- Shade-tolerant picks: Spinach, kale, and Swiss chard thrive with less light.
- Soil tip: Never work wet soil—it ruins structure. Wait until it crumbles lightly.
With these ideas, your garden will balance beauty and productivity effortlessly.
4. Protect Plants with Pantyhose and Pantry Items

Household items can double as powerful plant protectors. From stretchy fabric to empty cans, these solutions are cheap and effective. They shield delicate plants from pests and weather without fancy tools.
Tying Vines with Stretchy Fabric
Old pantyhose gently secure climbing plants like clematis. Unlike zip-ties, they won’t cut into stems as they grow. Cut strips 1–2 inches wide for flexible support.
| Material | Pros | Cons |
|---|---|---|
| Pantyhose | Stretchy, gentle on roots | Degrades in 1–2 seasons |
| Zip-ties | Durable | Can damage stems |
Shielding Seedlings from Cutworms Using Cans
Cutworms chew through tender stems at night. Push tuna cans or toilet paper tubes 1″ into the soil around seedlings. This creates a barrier they can’t cross.
For extra protection, remove can bottoms for drainage. Hardening off seedlings? Gradually expose them to outdoor conditions over 7–10 days.
Watch for green potatoes—their solanine content harms plants and pets. Stick to pantry items like cans and fabric for safety.
5. Master Tiny Seed Planting with Household Hacks
Tiny seeds like poppies or carrots need special care when planting. Dropping them evenly saves time and prevents overcrowding. With a few household items, you can nail precision every time.
The Sticky Note Trick for Precision Planting
Fold a sticky note to create a crease. Pour seeds into the fold, then tap lightly to space them out. This works wonders for breadseed poppies or Kitazawa’s Asian heirlooms.
For carrot seeds, skip expensive tape. Use toilet paper strips dipped in potting mix paste. Let dry, then plant the whole strip. It dissolves naturally.
| Method | Best For | Pros |
|---|---|---|
| Sticky note | Poppies, lettuce | No waste, easy spacing |
| Toothpick | Carrots, microgreens | Controls moisture |
Toothpick and Water Method for Minute Seeds
Dip a toothpick in water, then touch a seed to pick it up. Place it gently on soil. Uncle Jim’s Worm Farm recommends this for moisture-sensitive varieties.
- Ideal candidates: Carrots, lettuce, and microgreens.
- Succession planting: Sow every 2 weeks after last frost for continuous harvests.
- Warning: Overwatering drowns tiny roots. Mist soil lightly instead.
With these tips, even the smallest seeds grow into thriving plants. Patience and creativity go a long way!
Essential Tools to Simplify Your Gardening
Smart tool choices save hours of work each season. The right equipment handles soil prep, planting, and maintenance with ease. Whether you’re starting out or upgrading, these picks deliver value for years.
Hori-Hori Knife: The All-in-One Tool
This Japanese digging knife outperforms three tools in one. The serrated edge cuts roots, while the measuring marks ensure perfect bulb depth. Its stainless steel blade stays sharp through heavy soil work.
- Root division: Saw through tough roots without damaging nearby plants
- Weeding: Pry out deep taproots with the angled tip
- Planting: Use depth markings for consistent bulb placement
For wooden handles, sand annually and treat with linseed oil. Plastic versions suit wet climates but lack the grip of quality hardwood.
Mailbox Hack for Tool Storage
Repurpose a retired mailbox as weatherproof storage. Mount it near your garden bed for instant access to essentials. The locking mechanism deters theft while allowing airflow.
- Spray interior with rust-resistant paint
- Add hooks for hanging small tools
- Use the letter slot for quick glove storage
For larger items, try an IKEA Torkis tub with neon-painted handles. The bright color prevents lost tools in tall grass. Always store metal implements upside-down to improve drainage and prevent rust.
Bonsai hunters favor compact multi-tools with concave cutters. These make excellent gifts for urban gardeners. Pair with arborist wood chips for natural mulch that lasts all year.
Soil and Watering Tips for Healthier Plants
Healthy plants start with the right soil and watering habits. Simple changes can boost growth and prevent common problems. Whether you’re growing flowers or veggies, these tips ensure your garden thrives.
Composting Fall Leaves for Nutrient-Rich Soil
Don’t bag those fall leaves—turn them into “leaf mold.” This crumbly, dark compost improves soil structure and retains moisture. Here’s how:
- Shred leaves with a mower to speed decomposition (takes 6–12 months).
- Layer with greens: Add grass clippings or vegetable scraps for nitrogen balance.
- Test readiness: Finished compost smells earthy and breaks apart easily.
Avoid fresh manure—it can burn roots due to high ammonia. Cure it for 6 months first. For quick fixes, try Epsoma’s Organic Compost or Black Gold mixes.
Deep Watering vs. Frequent Light Watering
Most plants need 1–2 inches of water weekly, but how you deliver it matters. Shallow sprinkles encourage weak roots. Instead, soak the soil deeply to promote drought resistance.
| Method | Benefits | Best For |
|---|---|---|
| Deep watering | Stronger roots, less evaporation | Tomatoes, trees, perennials |
| Drip irrigation | Precise delivery, no leaf wetness | Raised beds, arid climates |
Check soil moisture by squeezing a handful. If it crumbles lightly, it’s perfect. Soggy soil? Hold off to avoid rot. For edible flowers like nasturtiums, ensure they’re pesticide-free before harvesting.
Want fewer weeds? Try no-dig gardening. Layers of compost and cardboard create a thriving ecosystem while saving water.
Seasonal Timing: Know Your Frost Dates
Planting at the right time makes all the difference between thriving plants and frost damage. Understanding your local frost dates helps you maximize each season. Whether you’re starting spring seedlings or prepping for winter, timing is key.
How to Find Your USDA Hardiness Zone
The USDA Plant Hardiness Zone Map divides North America into 13 zones based on average annual minimum temperatures. This helps gardeners choose plants that survive their local climate.
- Check online: Use the USDA’s interactive map by entering your zip code
- Microclimates matter: Urban areas often run 5–10°F warmer than rural zones
- Perennial choices: Zone 5 gardeners should avoid Zone 7 plants unless using protective covers
Bri Books’ zone cheat sheet simplifies this for major cities. It also notes special exceptions like coastal buffers or mountain valleys.
Calculating Your Growing Season Length
Your growing season runs from the last spring frost to the first fall frost. In NYC, this spans 222 days—plenty of time for multiple harvests.
| City | Last Spring Frost | First Fall Frost |
|---|---|---|
| Chicago | April 21 | October 19 |
| Atlanta | March 28 | November 8 |
Track dates in a spreadsheet. Add 2 weeks buffer for unexpected cold snaps. For tomatoes, wait until soil hits 60°F—planting too early stunts growth.
Frost-tolerant vegetables like kale and Brussels sprouts can go in 4 weeks before the last frost. Tender crops like basil need nighttime temps above 50°F.
Remember, chill hours (temps between 32–45°F) affect fruit trees. Blueberries need 800+ hours, while figs thrive with just 100. Check variety requirements before buying.
Ready to Grow? Put These Hacks to Work!
Turn your space into a thriving oasis with these simple yet powerful ideas. Start small—try one hack at a time, like pairing seed-saving with winter sowing for double the savings. Track progress with monthly photos to see how far your garden comes.
Join local seed swaps to diversify your plants. For nighttime charm, explore BHG’s moon garden concept using white blooms and reflective foliage. Always clean tools after use; a quick wipe prevents rust and disease.
Stuck? Troubleshoot common issues with pH checks and pest control. Every step forward is a way to grow smarter, not harder.
Your home harvest awaits—get digging!


