
Ever wondered how to add character to your outdoor space while keeping it functional? Repurposed materials from train tracks are becoming a favorite for creative landscaping. These rugged beams, once built to handle locomotives, now bring industrial-strength durability to backyard projects.
Their weathered surfaces and natural tones blend seamlessly with greenery, creating a cozy, lived-in feel. Whether you’re crafting planters or defining garden borders, these timbers offer endless possibilities. They resist rot and pests, making them perfect for long-term use in any climate.
You’ll love how they simplify DIY projects. With basic tools, you can assemble sturdy structures that last decades. The thick wood retains heat, helping plants thrive in cooler seasons. Plus, their weight keeps soil firmly in place—no shifting or warping over time.
Looking for eco-friendly options? Many suppliers source reclaimed timber, reducing waste while preserving history. Pair them with native plants or modern decor—their versatility suits any style. Transform your yard into a space that’s as practical as it is picturesque.
Introducing the Allure of Railway Sleepers in Garden Design

Imagine a garden feature that combines industrial strength with timeless beauty. Repurposed railroad timbers bring unique character to outdoor spaces while solving practical challenges. Their history of supporting massive loads translates to unmatched stability in your landscape projects.
Timeless Beauty Meets Practical Strength
Weathered surfaces tell stories through cracks and knots, creating focal points that age gracefully. These materials blend effortlessly with flowering plants or minimalist hardscapes. Their dense construction resists bending under pressure, whether supporting soil mounds or serving as seating.
Elevating Plant Growth Opportunities
Elevated planters made from these beams offer multiple advantages. The height reduces strain on your back during planting and weeding. Warmer soil in spring lets you start crops earlier, while improved drainage prevents root rot during heavy rains.
You’ll appreciate how defined growing areas simplify crop rotation and pest control. The sturdy walls protect delicate roots from temperature swings and strong gusts. Over time, the wood’s natural oils help deter wood-boring insects without chemical treatments.
Exploring the Benefits of Railway Sleepers for Your Garden

Why choose between eco-friendly materials and lasting performance when you can enjoy both? These rugged timbers bring unique advantages that go beyond their sturdy appearance.
Sustainability and Natural Appeal
Reclaimed options give old materials new purpose, cutting down on waste. Their weathered surfaces blend effortlessly with outdoor spaces, offering a timeworn aesthetic that synthetic alternatives can’t match. Many are sourced from decommissioned tracks, meaning no fresh trees are cut for your project.
Pressure-treated versions resist decay without harsh chemicals, staying intact through rain, snow, and sun. This makes them perfect for creative landscaping ideas that last decades.
Improved Drainage and Soil Temperature Advantages
Elevated beds built with these timbers let excess water escape easily. Roots stay oxygenated, reducing rot risks during heavy storms. The wood’s insulation properties warm earth faster in spring, giving plants a head start.
You’ll notice more consistent moisture levels too. Soil stays damp but never soggy, creating ideal growing conditions for veggies and flowers alike. Plus, the dense structure shields roots from sudden temperature swings.
Selecting the Perfect Materials and Tools
Ready to build but unsure where to start? Your project’s success begins with smart material choices and the right equipment. Let’s break down what works best for creating lasting outdoor structures.
Reclaimed Charm vs. New Reliability
Used timber sleepers bring history to your space. Their weathered grooves and natural patina add instant character. Plus, they’re eco-friendly—giving old materials new life cuts waste.
New options offer predictable quality. Pressure-treated wood resists rot without visible wear. Choose brown-dyed versions if you prefer a uniform look that blends with soil tones.
Hardwood or Softwood? Know the Difference
Dense hardwood like oak lasts decades but costs more. Softwood varieties are lighter and easier to cut, perfect for building raised beds on a budget. Both types handle outdoor conditions when properly treated.
Toolkit Essentials
Grab a drill with 150mm screws—they’ll anchor corners securely. A level ensures your structure stays even as soil settles. Don’t forget a saw for trimming and measuring tape for precise layouts.
Pro tip: Mark cuts with chalk instead of pencil. It wipes clean easily if plans change. With these materials and tools, you’ll create planters that stand the test of time.
Planning and Designing Your Raised Garden Bed

Transform your backyard into a thriving green space by mastering these foundational design steps. Smart planning now saves headaches later while boosting your plants’ success rates.
Identifying the Ideal Location and Marking Dimensions
Start by scouting areas that get 6+ hours of daily sun. Avoid spots near tree roots—they’ll steal nutrients and water. Use spray paint or stakes to outline your bed’s shape, keeping width under 4 feet for easy reaching.
Measure twice before finalizing. Curved edges add visual interest but require precise cutting. Pro tip: Orient long beds north-south for even sunlight distribution across plants.
Incorporating Proper Drainage and Soil Quality
Layer 2-3 inches of gravel at the base to prevent water pooling. Top it with landscape fabric before adding soil—this blocks weeds while letting moisture drain. Mix in compost for nutrient-rich growing conditions.
“Healthy roots need oxygen as much as water,” notes one horticulturist. Aim for 12-inch soil depth for most veggies. Test your dirt’s pH yearly and adjust with lime or sulfur as needed.
Step-by-Step Guide to Assembling Your Garden Raised Bed

Ready to turn those rugged timbers into a sturdy growing space? Let’s break down the process into manageable steps anyone can follow. You’ll need basic tools and about half a day to create a structure that lasts seasons.
Preparing the Ground and Base
Clear rocks and roots from your chosen spot. Use a shovel to level the area—uneven ground causes shifting later. Lay landscape fabric to block weeds while letting water drain freely.
| Material | Drainage Support | Cost | Durability |
|---|---|---|---|
| Gravel | Excellent | $ | 10+ years |
| Sand | Good | $ | 5-7 years |
| Soil | Fair | $$ | 2-3 years |
Securing Sleepers and Ensuring Stability
Position your first timbers in a rectangle, butting corners tightly. Drill pilot holes at 45-degree angles through both pieces. This prevents splitting when driving in 150mm screws.
Check each joint with a level before adding layers. Stagger vertical seams like brickwork—overlapping joints make the structure three times stronger. Add metal brackets at corners for extra support if building taller than 18 inches.
Pro tip: Rub beeswax on screw threads. It reduces friction while driving them through dense wood. Your raised bed will stand firm through storms and seasons!
Caring for and Maintaining Your Railway Sleepers Garden Raised Bed

Keeping your planters thriving requires smart soil choices and consistent care. A well-maintained setup protects your plants and preserves the structure’s integrity season after season. Let’s explore how to create ideal growing conditions while extending your timbers’ lifespan.
Choosing the Right Soil and Compost Mix
Start with a 30cm (12-inch) layer of blended topsoil, compost, and coarse sand. This trio balances nutrients and drainage—sand prevents waterlogging, while compost feeds plant roots. For organic gardening basics, use chemical-free compost to nurture a healthy ecosystem.
Refresh the mix annually as soil settles. Add 2-3 inches of fresh compost each spring to replenish nutrients. Test moisture levels weekly by squeezing a handful—it should hold shape briefly before crumbling.
Regular Upkeep and Long-Term Durability Tips
Inspect timbers every 3 months for cracks or soft spots. Clean surfaces with a stiff brush and water to remove algae. Softwood sleepers need extra attention—apply wood preservative yearly if untreated.
Rotate crops to prevent nutrient depletion in your garden bed. Mulch around plants to lock in moisture during summer. In winter, cover empty beds with tarps to protect soil structure from heavy rains.
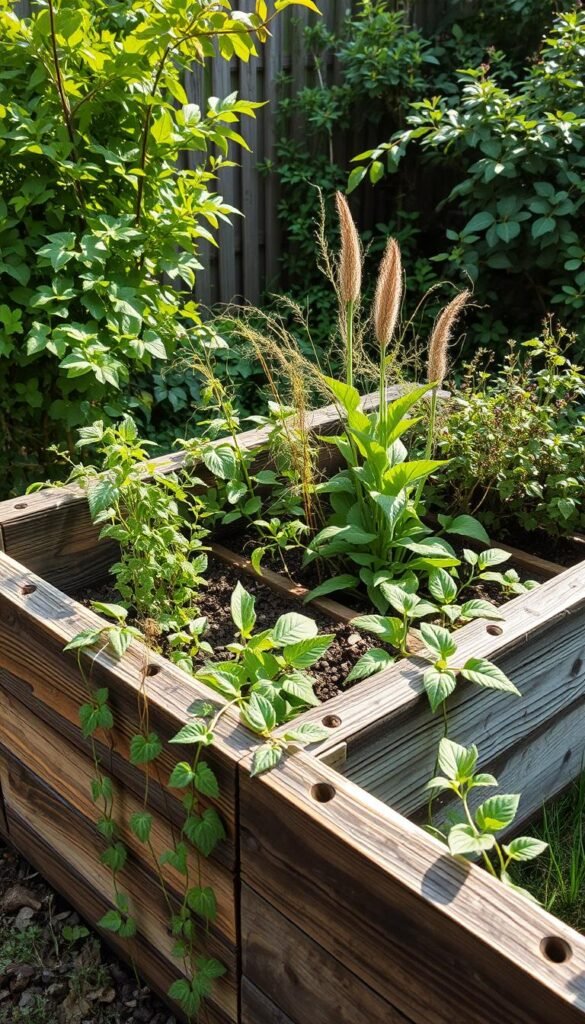
Railway Sleepers Garden Raised Beds: Rustic Charm with Heavy-Duty Support
Transform your yard with materials built to last a lifetime. These rugged timbers bridge the gap between practicality and visual warmth, giving your space purpose without sacrificing personality.
Built to Endure, Designed to Inspire
Sleepers offer unmatched longevity, handling harsh weather and heavy soil loads effortlessly. Their sturdy frames adapt to curved layouts or multi-level designs, proving their flexibility in diverse projects. Pair them with climbing vines or sleek stone paths—they enhance any garden’s appeal.
Tailor-Made Growing Spaces
Get creative with your layout. Stack timbers vertically for tiered herb planters or lay them horizontally as stepping stones between raised beds garden areas. Add built-in benches using leftover pieces, or carve shallow grooves for solar lighting.
For a modern twist, stain timbers charcoal gray and surround them with ornamental grasses. Prefer a cottage vibe? Let moss grow naturally on the wood’s textured surface. With endless variety, your outdoor oasis reflects your unique vision while staying functional for years.


