
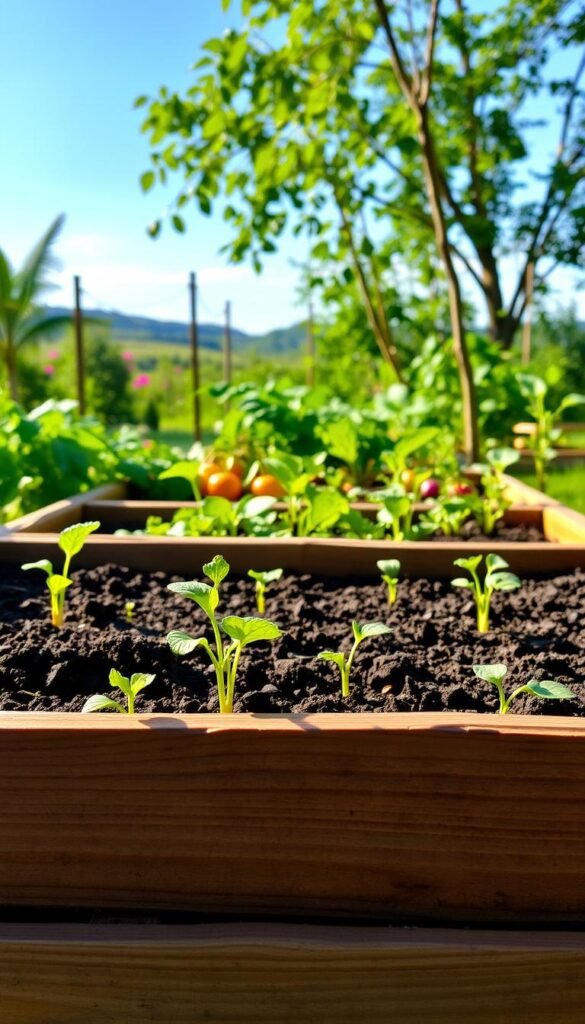
Growing fresh produce becomes simpler when you create elevated planting spaces. These structures let you manage soil conditions more effectively than traditional methods, giving roots the perfect environment to thrive. Early spring warmth penetrates the earth faster here, letting you sow seeds weeks ahead of schedule.
Want bigger harvests? Customizable layouts let you grow more in less space. Pair vertical supports with clever arrangements to maximize every square foot. Our step-by-step building guide shows how to construct durable frames that last seasons.
Sunlight matters most for thriving plants. Position your setup where leafy greens and sun-loving crops get 6-8 hours daily. Rotate crops every six months to keep earth nutrient-rich – try peas in spring, tomatoes in summer, then spinach when temperatures drop.
Smart spacing makes all the difference. Pack 16 carrots or 9 spinach plants into one square foot without crowding. Use cold frames when frost threatens to protect tender shoots and extend your harvest window by over a month.
Exploring the Benefits of Raised Bed Gardening

Elevated growing systems offer distinct advantages that boost plant health and yield. Unlike traditional plots, these setups let you craft ideal earth conditions while simplifying maintenance. Let’s explore how these innovations reshape your relationship with the soil.
Earth That Breathes and Nourishes
Superior drainage stops root rot before it starts. Loose, uncompacted earth lets roots stretch freely, accessing nutrients more effectively. Mix your perfect blend using compost and mineral-rich amendments – a luxury ground-level plots rarely offer.
“Elevated planters create living laboratories where gardeners control every variable”
Test this theory yourself:
| Factor | Raised Systems | Ground Plots |
|---|---|---|
| Soil Warm-Up | 2-3 weeks faster | Depends on weather |
| Water Drainage | 1 hour after watering | Up to 3 days |
| Plant Density | 30% higher | Standard spacing |
| Accessibility | Waist-high options | Ground level only |
Stretch Your Harvest Calendar
Start peas when snow still dusts conventional plots. The earth in elevated systems absorbs spring sunlight like thermal blankets. Come autumn, this stored warmth shields crops from early frosts, letting tomatoes ripen longer.
Pair these advantages with organic gardening practices for truly remarkable results. You’ll notice sturdier stems, deeper leaf colors, and fruits that burst with flavor – nature’s reward for optimized growing conditions.
Establishing Your Garden Vision

Imagine stepping outside to pick ingredients tailored to your kitchen. Start by listing foods your household eats weekly – if stir-fries dominate meals, prioritize bell peppers and snap peas. Love fresh salads? Butter lettuce and cherry tomatoes should claim prime garden bed real estate.
Balance ambition with reality. A time-crunched cook might favor low-maintenance kale over fussy cauliflower. Use this quick-reference table to match crops with your schedule:
| Crop Type | Weekly Care | Harvest Window |
|---|---|---|
| Leafy Greens | 15 minutes | 3-5 weeks |
| Root Vegetables | 10 minutes | 8-12 weeks |
| Fruiting Plants | 25 minutes | 10-14 weeks |
Mix instant rewards with delayed gratification. Radishes poke through soil in 21 days, while butternut squash needs 110 frost-free days. Follow foundational layout principles to position taller plants where they won’t shade smaller neighbors.
Leave room for experimentation – dedicate one bed section to exotic purple carrots or striped heirloom tomatoes. Intersperse marigolds among your vegetables; their bright blooms deter pests while adding splashes of color to your garden canvas.
Planning the Layout for Your Raised Bed
Smart positioning transforms good growing areas into high-performance zones. Watch how light dances across your yard before breaking ground. Morning rays matter most for cool-weather crops, while afternoon sun fuels heat-loving plants.
Selecting the Ideal Space
Track sun patterns for three days straight. Use chalk to mark spots getting 6+ golden hours daily. Keep beds 10 feet from tree roots and north-facing walls. South-facing locations work magic in colder zones, warming soil faster than flat ground.
Mapping Out Your Design
Sketch beds parallel to your home’s longest wall for visual harmony. Leave 18-inch walkways between structures – enough room for wheelbarrows. Narrower 3-foot bed widths let you harvest carrots without stepping in.
Group thirsty plants near spigots. Place tall crops like pole beans on northern edges. This prevents shading while creating windbreaks. Remember: Your garden should please both plants and people – curved lines often look more inviting than rigid grids.
Choosing the Perfect Materials

Your growing structures’ lifespan depends on smart material choices. Durable options protect your investment while keeping plants safe from chemical exposure. Let’s break down what works best for different needs and budgets.
Wood Options
Cedar and redwood lead the pack for natural durability. These woods contain oils that fight rot, often lasting 10-20 years untreated. Heart redwood (the tree’s dense center) outperforms standard lumber, though costs more upfront.
Budget-friendly pine offers a starter solution. Expect 3-7 years from these softer boards. Thicker 2×6 or 2×8 planks extend service time compared to slender 2x4s. Remember: replacement costs add up over decades.
| Material | Cost per 8ft Board | Lifespan | Best For |
|---|---|---|---|
| Heart Redwood | $45-$60 | 15-25 years | Permanent installations |
| Cedar | $25-$40 | 10-15 years | Balanced budgets |
| Pine | $8-$15 | 3-7 years | Temporary setups |
| Composite | $30-$50 | 20+ years | Low maintenance |
| Galvanized Steel | $100-$150 | 30+ years | Modern aesthetics |
Recycled Plastic and Alternatives
Composite lumber blends recycled materials for weatherproof performance. These planks won’t warp or splinter, ideal for curved designs. Food-grade plastic containers make portable options for renters.
“I switched to steel frames after replacing pine beds three times – now I’m saving money long-term”
Avoid older pressure-treated wood containing arsenic. Newer treatments use safer chemicals, but many gardeners prefer untreated options near edibles. Concrete blocks work for terraced layouts, though they alter soil pH over time.
Understanding Raised Bed Soil and Compost Blends

The secret to thriving plants starts beneath the surface. Unlike native earth, your elevated planting space lets you craft a custom mix that supercharges growth. Get this right, and you’ll see healthier roots, faster harvests, and fewer pest problems.
Soil Recipes and Nutrient Ratios
Professional growers swear by the 60/40 rule: combine quality topsoil with aged compost. Look for dark brown earth that crumbles like chocolate cake – sticky or sour-smelling dirt fails the test. This blend drains better than clay-heavy ground while holding moisture during dry spells.
Calculate your needs using length × width × depth. A 4×8-foot bed requires 32 cubic feet of mix (4×8×1). Add 5% worm castings or leaf mold to boost microbial activity. These “soil helpers” release nutrients slowly, feeding plants for months.
“My tomatoes doubled in size after switching to the 60/40 mix – it’s like giving plants a vitamin shot”
Avoid bargain soils containing construction debris or chemicals. Contaminated blends can stunt growth or introduce toxins into your food. Always wear gloves when handling unknown dirt, and consider testing samples through local extension services.
Setting Up Drip Irrigation and Watering Systems

Smart watering solutions transform how your plants thrive. Drip systems deliver hydration straight to roots through tiny tubes, cutting evaporation by up to 60% compared to sprinklers. This method keeps leaves dry, reducing disease risks while conserving resources.
Install soaker hoses before filling your bed with soil for seamless integration. Bury them 2-3 inches deep near plant rows – the slow seep mimics natural rainfall patterns. Connect to a mainline using brass fittings, which resist corrosion better than plastic.
Test moisture levels weekly by pressing fingers into soil. Aim for that “wrung-out sponge” feel – damp but not soggy. Overwatered earth smells musty and clumps tightly, while parched dirt crumbles instantly.
“My automatic timer saved last summer’s tomatoes during a heatwave – plants didn’t miss a single drink while I was away”
Position raised bed setups within 25 feet of spigots for optimal water pressure. Use ½-inch poly tubing for main lines, stepping down to ¼-inch emitters near plants. Pair these systems with beginner-friendly crops for stress-free growth.
Digital timers with rain sensors adjust schedules during storms, preventing waterlogged roots. Morning watering sessions (5-8 AM) align with plant uptake cycles, making every drop count. These techniques slash water bills while creating lush, productive spaces.
DIY Raised Garden Beds Vegetables: Planning Varieties and Planting Times
Timing is everything when filling your growing areas. Root crops like carrots and radishes demand direct seeding – their delicate roots hate being moved. Beans and squash join this group, thriving when sown straight into loose earth.
Soil warmth determines success. Check temperatures at 2-inch depth using a kitchen thermometer. Cool-season stars like peas push through at 45°F, while melons wait for 60°F+ conditions. Use this quick-reference guide:
| Crop Type | Soil Temp | Planting Window |
|---|---|---|
| Spinach | 45°F | Early spring |
| Beets | 50°F | Mid-spring |
| Cucumbers | 60°F | Late spring |
| Eggplant | 70°F | Early summer |
Stagger plantings for non-stop harvests. Sow lettuce every 14 days from March through May. This technique keeps your kitchen stocked while preventing crop overload.
Elevated spaces give you a head start. Their quick-draining earth warms faster in spring, letting you plant peas weeks before ground plots. Come fall, these structures protect greens from early frosts using simple row covers.
Pair compatible species to save space. Try basil between tomatoes – the herbs repel pests while enhancing flavor. Marigolds make excellent border plants, their bright blooms deterring nematodes naturally.
Always check local frost dates through your agricultural extension office. Mark last spring frost and first fall frost on your calendar. These dates guide when to start heat-loving plants and when to squeeze in final fall crops.
Gathering Essential Tools and Supplies
Equipping yourself properly makes bed construction efficient and enjoyable. Having the right gear reduces frustration and ensures your planting space withstands seasons of growth. Let’s explore what you’ll need to create durable structures that serve your green thumb for years.
Essential Tools for Cutting and Assembling
A power drill and sharp saw form your foundation. Circular saws handle straight cuts on boards, while miter saws create precise angles. Measure twice with a steel tape – ¼-inch errors compound quickly when joining corners.
Use 2½-inch deck screws for wood connections. They grip better than nails and allow adjustments during assembly. Clamps keep pieces aligned while drilling, preventing frustrating slips that ruin clean lines.
Useful Materials for a Long-Lasting Bed
Choose rot-resistant lumber like cedar for longevity. These boards outlast cheaper pine by years, saving replacement costs. Line beds with hardware cloth if burrowing pests plague your garden – it stops diggers without blocking roots.
Galvanized corner brackets add stability to taller designs. Pair them with weatherproof glue for joints that laugh at rainstorms. Your future self will thank you when harvests overflow from sturdy, wobble-free frames.


