
Imagine stepping outside to harvest everything you need for fresh, zesty salsa in minutes. A dedicated growing space lets you combine vibrant flavors while connecting to a 3,000-year culinary tradition rooted in ancient Mesoamerican cultures. This approach isn’t just convenient—it transforms your outdoor area into a flavor-packed hub that thrives from spring planting to autumn harvests.
Raised beds offer distinct advantages for cultivating these ingredients. Their improved drainage prevents waterlogged roots, while the contained environment makes it easier to maintain ideal soil conditions. Pair this with a strategic square foot gardening layout, and you’ll maximize every inch of space without sacrificing plant health.
Beyond convenience, homegrown ingredients deliver exceptional nutrition. Freshly picked varieties contain 40% more vitamins than store-bought equivalents, with each serving packing antioxidants that support immune function. You’ll also control exactly what goes into your soil—and ultimately, your recipes.
This guide walks through designing a compact 4×4-foot setup that balances productivity with simplicity. You’ll learn spacing tricks for sun-loving crops, companion planting strategies, and soil blends that turbocharge growth. Let’s create a space where every harvest becomes an opportunity to craft restaurant-quality dips and sauces.
Embracing the Homegrown Salsa Dream

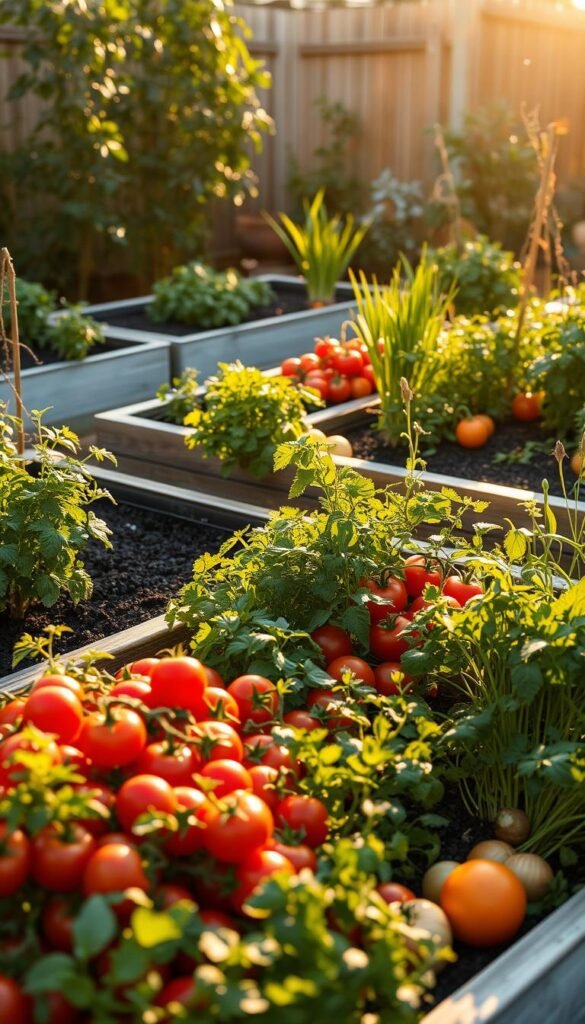
There’s magic in plucking sun-warmed produce straight from your backyard. Cultivating ingredients for a signature blend connects you to generations of cooks who valued freshness above all. You’ll find purpose in every watering session and pruning cut when your efforts yield crisp, aromatic components for meals.
Your Custom Flavor Factory
Growing your own mix lets you experiment like a chef. Choose fiery habaneros or mild poblanos. Pick tangy tomatillos instead of standard tomatoes. This flexibility transforms ordinary recipes into family traditions. One study shows homegrown veggies contain 50% more antioxidants than supermarket equivalents.
Freshness You Can Taste
Store-bought versions lose vibrancy during transport. Yours go from plant to plate in minutes. That immediacy locks in juices and textures commercial producers can’t match. Try this comparison:
| Feature | Homegrown | Store-Bought |
|---|---|---|
| Vitamin C per serving | 28mg | 12mg |
| Days since harvest | 0-1 | 5-7 |
| Customization options | Unlimited | Limited |
Beyond taste benefits, you’ll save money. A single $3 pepper plant can yield 15-20 fruits—enough for months of zesty creations. As plants thrive through the season, your confidence grows alongside them.
Planning Your Raised Bed for a Bountiful Salsa Garden

Crafting the perfect salsa starts long before harvest season—it begins with smart spatial design. A well-organized growing zone ensures each ingredient thrives while keeping maintenance simple.
Sunlight First, Everything Else Follows
Pick a spot that gets 6+ hours of direct sun daily. Morning light dries dew quickly, reducing disease risks. Southern exposures work best in most regions.
Space-Smart Design Tactics
A 4×4-foot raised bed offers ideal proportions for beginners. This size lets you reach all plants without stepping on soil. Pair it with vertical supports to triple your growing real estate.
| Bed Size | Tomato Plants | Pepper Plants | Herb Capacity |
|---|---|---|---|
| 4×4 ft | 4 | 6 | 8-10 |
| 4×8 ft | 8 | 12 | 16-20 |
Position tall crops like tomatoes on the north side using a trellis. This prevents shading while creating microclimates for heat-loving peppers. Leave 3-4 feet between beds if expanding—you’ll appreciate the knee room when harvesting.
For detailed layout diagrams, explore our complete salsa garden guide. Remember: good planning today means fewer headaches tomorrow!
Preparing the Soil for Optimal Plant Growth

Your plants’ flavor and vitality begin with what’s beneath them. A nutrient-rich foundation transforms ordinary dirt into a powerhouse that fuels robust growth and enhances taste profiles. Let’s dig into the essentials of creating the perfect growing environment.
Incorporating Quality Raised Bed Soil and Compost
Start with a triple-threat blend for new beds: equal parts garden soil, compost, and organic matter. This combination creates ideal texture while delivering slow-release nutrients. Brands like Miracle-Gro® Performance Organics® offer pre-mixed solutions tailored for container growing.
Existing beds need rejuvenation each season. Remove old roots and weeds, then mix in 2-3 inches of compost. This refreshes mineral content and improves water retention. Pair this with an organic fertilizer during planting to kickstart root development.
| Component | Purpose | Benefit |
|---|---|---|
| Garden Soil | Base structure | Anchors roots |
| Compost | Nutrient source | Feeds microorganisms |
| Perlite | Aeration | Prevents compaction |
Well-prepared earth acts like a five-star restaurant for your vegetables. It balances moisture drainage with retention—crucial for preventing rot in peppers and tomatoes. Test your mix by squeezing a handful; it should hold shape briefly before crumbling.
Remember: healthy soil means fewer pests and bigger harvests. Invest time here, and your plants will reward you with vibrant colors and intense flavors that make store-bought produce taste bland.
Salsa Garden Layout Raised Beds: Tomatoes, Peppers, Onions, and Cilantro

The secret to mouthwatering salsa lies in your plant choices. Each variety brings unique textures and intensities that shape your final blend. Let’s explore how to match your taste preferences with nature’s offerings.
Crafting Your Flavor Profile
Start with meaty, low-moisture tomatoes like Roma or San Marzano. These types concentrate flavors while preventing watery dips. For vibrant color, try Juliet hybrids—they’re disease-resistant and prolific.
Peppers dictate your salsa’s personality. Use this guide to find your perfect match:
| Heat Level | Varieties | Scoville Units |
|---|---|---|
| Mild | Bell, Cubanelle | 0-500 |
| Medium | Poblano, Anaheim | 1,000-2,500 |
| Hot | Jalapeño, Serrano | 2,500-8,000 |
| Super Hot | Habanero, Ghost | 100,000+ |
Onions add crunch and zing. Sweet Walla Walla varieties mellow out spicy blends, while Red Creole packs punchy notes. Pair them with slow-bolt cilantro like ‘Long Standing’—it resists early flowering in summer heat.
Balance is key. Match bold peppers with sweeter tomatoes, or let fiery varieties shine against mild backdrops. Your family’s preferences should guide every selection, creating personalized combinations that store-bought jars can’t replicate.
Step-by-Step Planting Guide

Timing transforms seeds into salsa superstars. Begin with indoor starts during winter’s tail end, then transition sprouts to their permanent home when frost risks vanish. This method gives plants a vigorous head start.
Foundational Crops Setup
Start tomato seeds 6-8 weeks before spring’s last freeze. Peppers need 8-10 weeks indoors, while onions require 12 weeks. Harden seedlings gradually over 7 days before transplanting.
Position tomato plants 16″ apart along the bed’s north edge. Their vertical growth won’t shade companions. Peppers thrive at 12″ spacing—one per square foot maximizes yield without crowding.
Quick-Growing Additions
Onions fit snugly at 4″ gaps. Direct-sow cilantro seeds ½” deep, spacing them 4″ apart. Keep soil moist until sprouts emerge.
For garlic lovers: plant cloves in fall (6/sq ft) for jumbo bulbs. Spring planting (9/sq ft) works too, yielding smaller but punchy cloves. Both options add depth to homemade blends.
Ensuring Proper Plant Spacing and Support
Give your green companions room to stretch their roots while keeping them upright and thriving. Smart arrangements prevent overcrowding and create conditions where flavors intensify naturally.
Balance Between Density and Health
Follow spacing tags on plant labels as a starting point. Many varieties tolerate slightly tighter quarters if you amend soil regularly. Divide your growing area into one-foot grids using string or sticks—this visual guide helps maximize every inch.
Airflow matters most. Leave enough space between plants so leaves don’t touch at maturity. For tomato varieties, 16-24 inches prevents disease spread. Pepper plants grow well at 12-inch intervals when staked properly.
Install supports early. Cage tomato seedlings when transplanting—their stems thicken faster with consistent guidance. Use tall trellises on the north side to avoid shading shorter crops. As plants grow, gently tie stems to structures using soft twine.
Remember: slightly fuller beds yield more harvests if managed carefully. Just ensure sunlight reaches lower leaves, and you’ll enjoy bushy, productive plants all season long.


