
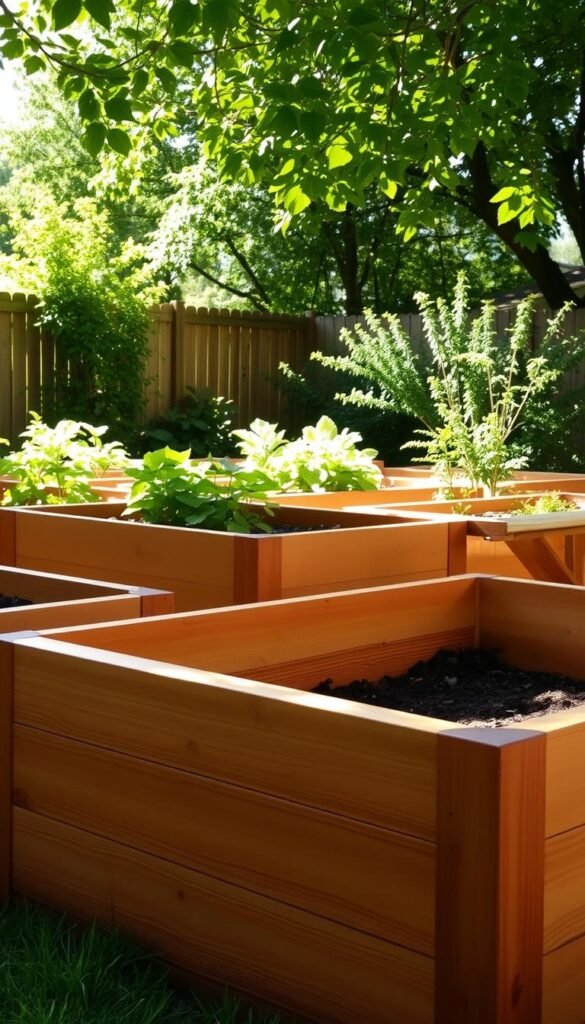
Nothing beats the rustic charm of natural materials in your green space. Wooden raised beds blend seamlessly with landscapes while giving plants the drainage and structure they need. But without proper care, these timeless features can warp, crack, or rot within just a few seasons.
Moisture from soil and weather slowly breaks down untreated lumber. Insects like termites or carpenter ants see unprotected timber as an all-you-can-eat buffet. Even sun exposure can fade your garden’s visual appeal over time.
Here’s the good news: strategic maintenance can triple the lifespan of your planters. Choosing rot-resistant woods like cedar during construction helps, but ongoing care makes the real difference. A little effort now saves money and hassle later.
This guide shares insider methods to shield your investment. You’ll learn how to create weather-resistant barriers that let plants thrive while keeping materials intact. We’ll also explore smart schedules for upkeep that fit busy lifestyles.
By the end, you’ll know how to turn vulnerable planters into durable structures that last through countless growing seasons. Let’s dive into solutions that keep your garden looking fresh year after year.
Understanding Wood Vulnerabilities in Your Raised Garden Beds

Your garden’s wooden beds face hidden battles against nature’s forces every day. Moisture seeps through soil, insects scout for weak spots, and seasonal shifts test structural integrity. Let’s explore how these factors impact your planters.
Moisture, Pests, and Environmental Challenges
Constant dampness from soil turns untreated lumber into a sponge. Softwoods like pine or spruce absorb water 30% faster than cedar, according to forestry studies. This leads to warping and rot in just 2-3 seasons.
Ground contact poses special risks. The bottom edges of your beds sit in damp soil year-round – like leaving a sponge in a puddle. Temperature swings worsen the problem by creating cracks that welcome pests.
| Wood Type | Rot Resistance | Insect Resistance | Lifespan Untreated |
|---|---|---|---|
| Pine/Fir/Spruce | Low | Poor | 2-4 years |
| Cedar/Redwood | High | Excellent | 10-15 years |
When building new beds, material choice matters most. Cedar’s natural oils repel termites, while redwood’s tight grain resists swelling. These options cost more upfront but save replacement costs over time.
Unsealed joints become water traps. Think of them like tiny ponds where decay organisms thrive. Regular inspections help catch these issues before they spread through your entire structure.
Preparing Your Wooden Raised Beds for Treatment

Before applying any protectants, groundwork determines your beds’ future resilience. Start by choosing thicker 2×6″ boards over standard 2×4″ lumber – they resist soil pressure better and create fewer seams. Fewer gaps mean fewer entry points for moisture, a key strategy when building raised beds for budget-conscious gardeners.
Clean every surface thoroughly. Use a stiff brush to remove dirt clumps and old finishes that block treatment absorption. Pay extra attention to knots and cracks – these trouble spots need double sealing to prevent water infiltration.
Let fresh-cut lumber breathe outdoors for 48 hours before assembly. This acclimation period helps wood adjust to local humidity levels, reducing warping later. Pro tip: Schedule your prep work during a dry spell – treatments cure faster without rain interfering.
Gather your tools first. You’ll need coarse sandpaper for rough edges, a vacuum for dust removal, and quality brushes for precise application. Inspect each board like a detective – even small defects become big problems when soil weighs them down season after season.
Remember: proper prep work today means fewer repairs tomorrow. By minimizing weak points and maximizing material readiness, you create the perfect canvas for protective treatments to work their magic.
Choosing the Right Products and Treatments

Your garden’s defenses start with smart material choices. Modern solutions blend environmental safety with robust protection, letting you safeguard your planters without compromising soil health.
Eco-Friendly Preservatives and Sealants
Valhalla Wood Preservative leads the pack for large projects. At $75 per five-gallon bucket, it shields 750-1,000 square feet of surface area. Its non-toxic formula makes it ideal for edible gardens.
For precise mixing, try Eco Wood Treatment. One $30 packet creates a gallon of preservative using plant mineral extracts. It covers 150 square feet – perfect for single-bed touch-ups.
Pro tip: Eco Restore Wood Treatment penetrates deep into fibers for lifetime protection. While it might slightly alter cedar’s color, its environmental credentials outweigh cosmetic changes.
Natural Oils and Finishing Options
Hope’s 100% Pure Tung Oil offers food-safe moisture resistance. Derived from tung tree seeds, this $20 bottle protects without chemicals. Expect annual reapplications for sustained results.
Consider these natural alternatives:
- Beeswax blends for surface sealing
- Linseed oil for deep nourishment
- Mineral oil for quick-drying protection
These plant-based treatments let you maintain safe growing conditions while extending your wood’s lifespan. Always check compatibility with your specific lumber type before full application.
Application Techniques for Maximum Protection

Proper technique separates temporary fixes from decade-spanning results. Whether you’re sealing new structures or refreshing older ones, method matters more than materials alone. Let’s break down the strategies professionals use to lock out moisture and pests.
Coating Best Practices for Even Coverage
Start by treating every surface – especially hidden interior walls touching soil. Use angled brushes to push sealant into wood fibers, creating deep protection. For rough textures, try lint-free rags that grip better than standard applicators.
Apply products in thin, even layers. Two coats typically shield effectively, but three create fortress-like barriers. Always wait 4-6 hours between layers – rushing this step causes uneven curing. “Thin and thorough beats thick and sloppy every time,” notes a Seattle-based garden designer.
Securing Seams and Corners Effectively
Joints demand special attention. Squeeze class 50 silicone caulk deep into gaps until it bulges slightly. Smooth with a damp finger wrapped in paper towel – this removes air pockets better than tools. Focus on:
- Corner posts where boards meet at angles
- Base edges contacting soil
- Any cracks wider than 1/16 inch
Time applications for dry days above 50°F. Cold or damp conditions prevent proper adhesion. Work from inner surfaces outward, methodically covering each section before moving clockwise around your raised bed. This systematic approach ensures no spot gets missed.
Maintenance and Upkeep Strategies for Lasting Durability

Consistent care transforms temporary structures into lasting garden assets. While quality materials and proper sealing form your first defense, smart maintenance habits determine whether your planters survive seasons or decades.
Regular Inspections and Cleaning Methods
Set monthly reminders during growing months to examine your planters. Run your hand along surfaces – rough patches or soft spots signal trouble. Check corners for cracks wider than a dime’s edge, and look for dark mold streaks near soil lines.
Mix warm water with biodegradable soap for gentle cleaning. Scrub with a soft-bristle brush to remove grime without damaging treatments. Always dry surfaces completely before reapplying products – trapped moisture undermines protection.
| Frequency | Task | Tools Needed | Benefit |
|---|---|---|---|
| Monthly | Edge inspections | Flashlight, putty knife | Catches early rot signs |
| Seasonally | Full cleaning | Soft brush, pH-neutral cleaner | Removes decay catalysts |
| Annually | Structural review | Level, moisture meter | Prevents collapse risks |
Seasonal Reapplication and Touch-Ups
Refresh high-wear zones monthly during active growing periods. Use a small brush to dab sealant on corners and joints. When plants finish producing, remove soil and treat entire interiors – this protection boost adds 2-3 years between major overhauls.
Time major maintenance with soil preparation cycles. While amending nutrients, check bed bases for water damage. Replace single boards immediately if warped – delaying spreads rot to healthy sections.
With diligent care, even untreated pine can outlive its 5-year expectancy. One gardener reported cedar beds lasting 22 years through methodical upkeep. Your planters’ longevity ultimately reflects how consistently you address small issues before they escalate.
Wrapping Up Your Garden Bed Protection Journey
By now, you’ve armed yourself with knowledge to shield your green investments. From selecting eco-friendly wood preservatives to mastering sealing techniques, these strategies turn temporary planters into decade-spanning assets. Your efforts will pay off in vibrant harvests and fewer replacements.
Natural treatments like tung oil and cedar-friendly products protect without harming garden soil. They defend against moisture while letting your vegetables thrive. Remember – thicker boards and smart construction choices form the foundation of lasting beds.
Stick to those maintenance schedules like clockwork. Quick monthly checks catch small issues before they become expensive headaches. Seasonal touch-ups keep defenses strong against sun and rain.
With care, your planters will outlive expectations while keeping their natural charm. Grab those brushes, mark your calendar, and enjoy watching your kitchen garden flourish season after season. Here’s to many years of fresh produce and sturdy beds!


