
For over a decade, families have turned tiny outdoor spaces into enchanted escapes. What began as a simple way to spark kids’ creativity has grown into a beloved hobby for all ages. These tiny landscapes let you design everything from peaceful forest scenes to lively beach setups—all bursting with personality.
The secret to making yours stand out? Characters. Tiny figures act as storytellers, turning plants and pebbles into a world that feels alive. Whether you prefer delicate winged creatures or playful campers, each piece adds layers of meaning and invites viewers to imagine what happens next.
You’ll find that mixing styles creates balance. A wise owl perched near a cottage or a mischievous squirrel by a pond adds depth. These choices shape themes and encourage interaction, making your creation more than just decor—it becomes a stage for endless adventures.
Ready to start? This guide walks you through selecting figures that match your vision. Learn how size, material, and placement work together to maximize visual charm. With the right approach, your tiny oasis will radiate magic while reflecting your unique style.
Embracing the Magic of Your Mini Fairy Garden

There’s something special about crafting a space where dew drops become lakes and pebbles transform into mountains. These tiny realms invite you to rethink ordinary objects through a lens of wonder, blending nature’s beauty with playful storytelling.
Discovering the charm of a miniature world
Every detail in your enchanted space tells a story. A winding path of crushed gravel might lead to a hidden cottage, while a tiny bench under a fern becomes a resting spot for imaginary visitors. Arranging these elements encourages mindfulness, letting you savor the process as much as the result.
You’ll notice how sunlight dances across miniature windows or how raindrops pool in tiny clay pots. These moments turn your creation into a living scene that evolves daily.
How a fairy garden brings imagination to life
Your landscape becomes a stage where stories unfold. Maybe a carved owl watches over acorn treasures, or a ceramic fox peeks from behind mossy rocks. These characters spark conversations and inspire tales of midnight tea parties or secret forest meetings.
Families often bond over designing these worlds, debating whether a bridge should cross a “river” of blue stones or where to place a wishing well. It’s not just about aesthetics—it’s about building shared memories rooted in playful creativity.
Gathering Supplies and Planning Your Project
Creating your enchanted space starts with smart preparation. Think of it as building a theater set – every prop and backdrop matters. Let’s explore how to collect materials that spark joy while staying organized.
Essential materials and tools
Your foundation begins with containers. Shallow pots work for desert scenes, while deep planters let you build hills. Pair them with fast-draining soil for succulents or nutrient-rich mixes for flowering plants.
Don’t forget these helpers:
- Long tweezers for placing tiny pebbles
- Pruning shears that trim moss like scissors cut fabric
- Old paintbrushes to dust off miniature roofs
Keep a tray nearby to separate decorative sand from planting soil. This simple trick saves time when rearranging elements.
Tips for selecting unique accessories
Hunt for character beyond craft stores. Check thrift shops for teacup fountains or repurpose toy train set trees. Variety comes from mixing textures – try combining polished glass “ponds” with rough bark benches.
Smart shoppers hit Joann’s after Halloween for discounted mushroom cottages. Dollar Tree’s dollhouse section often hides perfect benches. For rare finds, Factory Direct Crafts offers hand-painted bridges that elevate any design.
Store your treasures in labeled bins. Group rocks by size, stack containers by depth, and keep delicate figures in padded boxes. When everything has a home, creativity flows freely.
Choosing the Perfect Container and Soil

The foundation of any thriving miniature ecosystem lies in two key elements: your container and soil. These choices shape both aesthetics and plant health, turning ordinary materials into a stage for natural storytelling.
Finding the right pot or vessel for your space
Your container acts as the canvas for your creation. Shallow pots work like picture frames, highlighting flat scenes with moss or sand. Deeper planters let you build hills using stacked terra cotta pieces or broken pottery. Indoor spaces shine with repurposed teacups, while galvanized tubs handle outdoor weather.
| Container Type | Best Use | Drainage Tip |
|---|---|---|
| Terra Cotta Pots | Outdoor scenes | Add gravel layer |
| Galvanized Tubs | Large displays | Drill side holes |
| Teacups | Desktop gardens | Use charcoal chips |
Picking quality soil for drainage and structure
Match your soil to plant needs. Succulents thrive in gritty mixes with perlite, while flowering plants need richer blends. Boost basic potting soil with worm castings for nutrients. Always layer: rocks at the base, soil above, then moss for finishing touches.
Test drainage by watering your setup. If puddles form within 10 minutes, add more sand or gravel. Your plants’ roots will thank you!
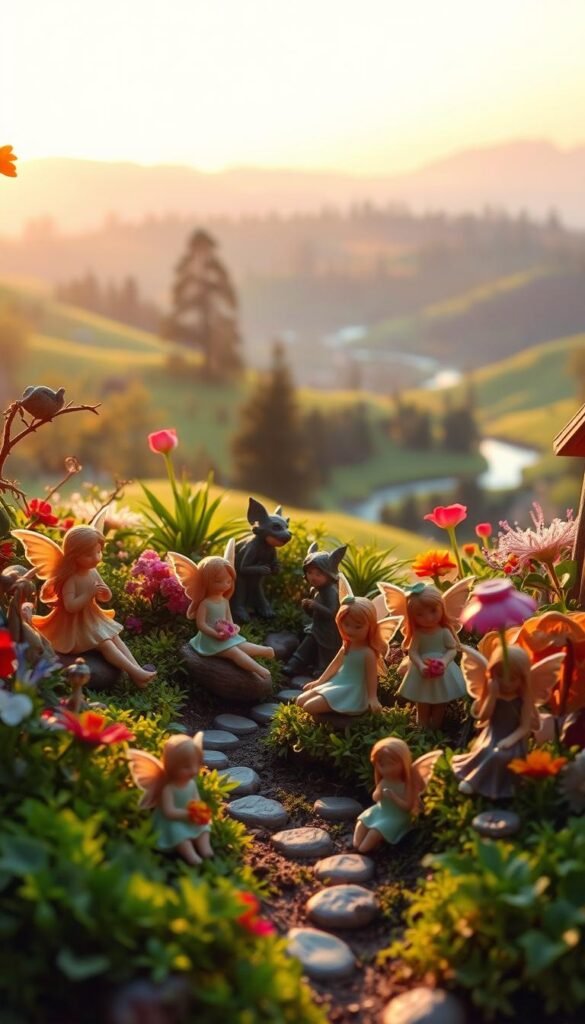
Mini Fairy Garden DIY with Figurines: Choosing Characters to Bring It to Life

Characters in your tiny world do more than decorate—they invite curiosity and spark endless narratives. Let’s explore how to choose pieces that resonate with your vision while blending durability with creative flair.
Selecting figurines that spark personality
Scale matters most when picking characters. A 3-inch fairy towers over thyme plants but fits perfectly beside a miniature oak. Match themes by mixing styles: pair a ceramic gnome with resin mushrooms for woodland charm or position a metallic dragon near quartz crystals for fantasy drama.
Balancing homemade and store-bought miniatures
Combine craft store finds with backyard treasures. Twig benches and pebble pathways add rustic authenticity, while pre-made cottages anchor your design. Use this guide to choose lasting materials:
| Material | Durability | Best For |
|---|---|---|
| Resin | 5+ years (fades) | Detailed figures |
| Painted Wood | 3-10 years | Rustic furniture |
| Metal | 2-5 years | Decorative accents |
Hot glue fails outdoors—opt for waterproof adhesives. Let kids paint stone creatures or build stick ladders. These projects become cherished memories while personalizing your space.
Curating Your Plant Selection

Your tiny landscape thrives when plants match both your vision and environment. The right greenery acts as living decor, framing scenes while staying manageable in size. Let’s explore how to pair aesthetics with practicality for a thriving display.
Opting for small plants, succulents, and moss
Focus on species with compact growth. Succulents like hens and chicks form natural “mushroom rings” around figurines, while trailing varieties soften container edges. Mosses serve as lush carpets—Irish moss thrives in partial sun, whereas Scotch moss tolerates foot traffic in play-friendly setups.
| Climate | Suggested Plants | Key Features |
|---|---|---|
| Arid (e.g., San Diego) | Echeveria, Donkey Tail | Drought-resistant, sun-loving |
| Humid | Baby Tears, Ferns | Moisture-retentive, shade-tolerant |
| Variable | Creeping Thyme, Mini Roses | Adaptable, seasonal blooms |
Adjusting plant choices for your climate
Match species to local weather patterns. Desert dwellers lean on ice plants and sempervivums that store water. Those in rainy regions use ferns and African violets that relish humidity. Always check nursery tags for light needs—group sun-worshippers separately from shade-seekers.
Hit multiple garden centers to discover rare finds like dwarf cypress. Ask staff about miniature cultivars hiding in ground cover sections. With smart pairings, your creation stays vibrant through seasons without constant upkeep.
Designing Your Fairy Landscape Layout

Transform your tiny realm into a living storybook through thoughtful design. Strategic elevation changes and winding paths turn ordinary containers into dynamic scenes that beg exploration. Let’s craft spaces where every glance reveals new details.
Planning pathways and multi-level designs
Start by sketching elevation ideas. Stack broken pottery pieces with clay-rich soil as mortar to build terraced levels. Flat river rocks become natural stairs connecting zones—place them at angles to mimic weathered mountain paths.
Path materials set your scene’s tone. Coarse sand suggests desert trails, while rounded pebbles create forest walkways. Arrange them in gentle curves rather than straight lines for organic flow.
| Material | Effect | Best For |
|---|---|---|
| Coarse Sand | Dry, rustic texture | Desert themes |
| Pea Gravel | Soft crunch underfoot | Woodland trails |
| Aquarium Pebbles | Vibrant color pops | Fantasy realms |
Using natural elements for authentic charm
Twigs become fallen logs when laid horizontally across paths. Press bark strips into soil to form rustic fences—secure them with twine for extra stability. Scatter pine cones near miniature tree bases to simulate natural debris.
Lighting matters more than you’d think. Position taller elements like resin trees on the west side to avoid midday shadows on key features. This placement creates golden-hour backlighting for photos.
Remember: nature isn’t perfect. Cluster shells slightly off-center or tilt a stone bridge for whimsy. These imperfections make your space feel lived-in rather than staged.
Step-by-Step Garden Construction
Building your tiny paradise becomes effortless when you break it into manageable stages. Start by visualizing how layers and pathways will guide the eye through your scene. This methodical approach ensures every element works together harmoniously.
Building supports and layered sections
Begin with your pot filled three-quarters full with well-draining soil. Create terraced levels using broken pottery shards, pressing clay-heavy dirt between them as natural mortar. Flat river rocks become instant stairs when angled at 45 degrees against slopes.
Test each structure’s stability before adding plants. A gentle tap should’t topple your supports—if it does, pack more soil around the base. This foundation step saves time by preventing rework later.
Arranging plants and accentuating details
Position taller greenery at the back of your garden, trailing plants near edges. Use chopsticks to make precise holes for roots without disturbing hardscapes. After planting, define pathways by pressing sand into curved shapes with a spoon handle.
For beach themes, layer sea glass over river rocks to mimic water effects. Add final touches like miniature house accents last, securing them with waterproof glue. Step back occasionally to assess balance—sometimes moving one stone transforms the whole scene.


