
Imagine transforming a simple container into a whimsical coastal escape that captures the relaxed vibe of oceanfront living. Miniature landscapes blend natural elements like textured sands, weathered shells, and hardy succulents to create pocket-sized vacation spots right in your home.
These tiny ecosystems offer more than visual charm – they’re therapeutic projects that let you reconnect with nature’s rhythms. Whether designing a zen-inspired retreat or playful mermaid cove, you’ll learn how everyday materials become extraordinary displays. We’ll guide you through selecting containers with proper drainage, arranging eye-catching focal points, and keeping plants thriving in salty air conditions.
From desktop accents to patio centerpieces, these creations adapt to any environment. Discover how driftwood becomes seating areas, pebbles form walking paths, and miniature lighthouses add storytelling flair. Our methods work for all skill levels, using supplies easily found at craft stores or gathered during seaside strolls.
You’ll soon master techniques for building layered textures and balanced compositions. Learn why certain vegetation handles sandy soil better than others, and how to prevent salt buildup in containers. We’ll also share clever ways to refresh your scene with seasonal elements while maintaining its coastal character year-round.
Introduction to Coastal Fairy Garden Magic

Unlock the joy of building your own miniature coastal paradise, perfect for any room or patio. These tiny worlds blend creative expression with nature’s calming influence, letting you design a personal oasis that sparks wonder. Whether placed on your desk or displayed outdoors, they invite daily moments of peace through their delicate details.
What makes these fairy gardens so special? They’re living art projects that grow and evolve. Swap tiny umbrellas for seasonal decor or add miniature sailboats for summer flair. Their flexibility means you’ll never tire of rearranging coastal elements to match your mood.
Beyond beauty, these creations teach valuable lessons. Kids learn responsibility by caring for drought-resistant plants while exploring marine ecosystems through play. Adults find stress relief in arranging pebble pathways or positioning driftwood benches – simple acts that ground you in the present.
Best part? You don’t need oceanfront property to enjoy seaside vibes. Apartment dwellers often use repurposed trays or bowls to craft their mini escapes. Each piece becomes a conversation starter, blending craftsmanship with the raw beauty of shells and weathered wood.
Inspiring Beach-Themed Fairy Garden Ideas
What if your coffee table could host a miniature seaside village? With a few clever swaps, your beach fairy garden becomes a rotating gallery of coastal charm. Let’s explore themes that turn basic setups into storytelling masterpieces.
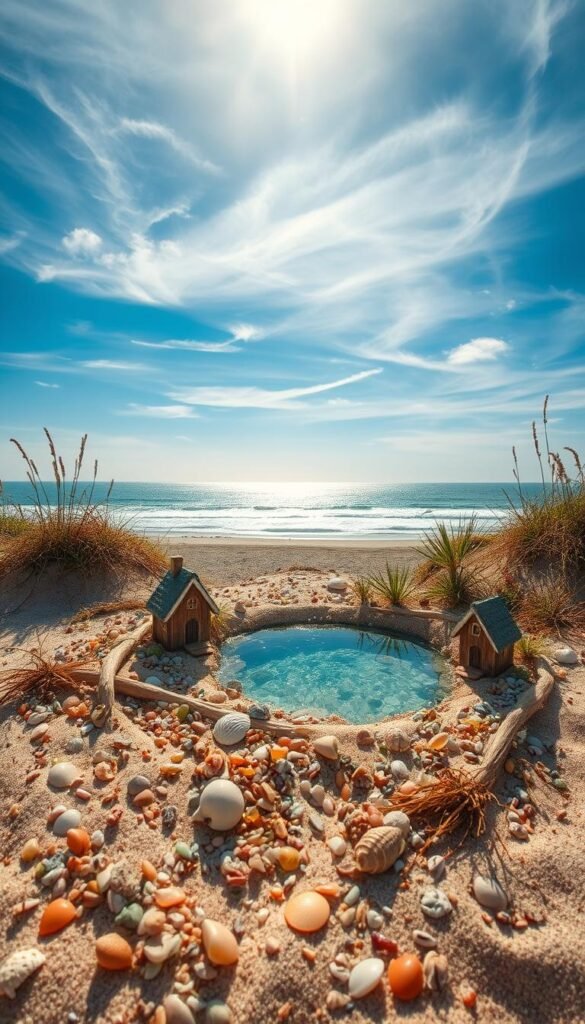
Seaside villages burst with personality using tiny cottages and painted driftwood signs. Add a mini fishing net or weathered rowboat for authenticity. For mermaid lovers, layer blue glass gems as tide pools and craft coral reefs from painted pebbles. A tiny mirror becomes an instant underwater portal.
| Theme | Key Elements | Best For |
|---|---|---|
| Sunset Retreat | Mini Adirondack chairs, tea lights | Tabletop displays |
| Pirate Cove | Treasure chests, faux gold coins | Kids’ play areas |
| Zen Shoreline | Raked sand patterns, stone lanterns | Meditation spaces |
| Seasonal Beach | Mini pumpkins (fall), glitter snow (winter) | Holiday decor |
Interactive designs let kids rearrange shell pathways or hide “sea treasures.” Try movable palm trees from twine and felt – they’re perfect for tropical blends. For rugged drama, stack slate pieces into cliffs topped with a working LED lighthouse.
Rotate accessories monthly to keep your scene fresh. Swap summer flip-flops for autumn sea grass wreaths. These adaptable displays prove even small spaces can channel endless ocean magic.
Essential Materials and Tools for Your DIY Fairy Garden

Building your miniature paradise starts with gathering the right components. Quality materials ensure both visual appeal and long-term plant health, while clever tool choices simplify assembly. Let’s explore what brings these tiny worlds to life.
Selecting the Right Sand, Pebbles, and Seashells
Play sand creates smooth shorelines, while kinetic varieties let kids reshape “waves.” For artistic flair, layer colored sands to mimic sunset horizons. Smooth river rocks work as faux sea glass, and granite chips add rugged texture to miniature cliffs.
Source seashells ethically – avoid buying from ecologically sensitive areas. Mix small whelks with larger scallop shells for depth. Rinse collected shells in vinegar to remove salt residue before placing them near plants.
Choosing Coastal Plants and Succulents
Drought-resistant succulents like echeverias thrive in sandy setups. Their rosette shapes mirror seashell patterns, creating visual harmony. String of pearls cascades beautifully over pebbles, mimicking seaweed.
For container options, consider drainage needs. Metal trays suit desert themes, while upcycled bowls handle moisture better. Always use wire nippers to customize barriers from recycled materials.
Step-by-Step Guide to Building Your Mini Coastal Oasis

Ready to bring your coastal vision to life? This hands-on walkthrough helps you construct a durable, eye-catching display that balances practicality with creative flair. We’ll focus on smart material choices and space-efficient designs perfect for tabletops or shelves.
Setting Up the Base and Barriers
Start by lining your container with recycled plastic strips – cut them 3½” tall for optimal sand containment. Secure barriers using waterproof tape along all edges. This creates separate zones for succulent soil and decorative sand without mixing.
| Layer Order | Material | Purpose |
|---|---|---|
| 1st | Pebbles | Drainage |
| 2nd | Potting mix | Plant growth |
| 3rd | Coarse sand | Visual texture |
Planting and Arranging Garden Elements
Nestle pots directly into your base, leaving 1″ between plants for growth. Position taller specimens like air plants toward the back. Gently firm soil around roots, then water lightly to settle. Add finishing touches like shell pathways after plants establish.
Pro tip: Use tweezers to place tiny accessories without disturbing your layout. Rotate the container weekly so succulents grow evenly toward light sources.
Crafting a Beach Fairy Garden with Sand, Seashells, and Coastal Plants

Bring your miniature shoreline to life by mastering the art of strategic placement. Start by sprinkling pebbles around succulent plants to hide exposed soil. Tuck medium shells into gaps between rocks – their curves mimic wave-worn textures found along real coastlines.
Create depth by layering sand in uneven mounds. Use your fingers to sculpt gentle slopes near plants and steeper drops along container edges. For stability, press small shells sideways into sandy areas – they’ll act as natural anchors against accidental bumps.
Arrange taller seashells as focal points, clustering three varieties for visual rhythm. Space smaller specimens along imaginary pathways to guide the eye. Leave breathing room around coastal plants – overcrowding blocks sunlight and stifles growth.
Secure loose elements with clear aquarium glue dots under pebbles. This keeps your design intact while maintaining a casual, windswept look. Rotate the container weekly to ensure even light exposure for all succulents.
Balance is key. Pair smooth sand patches with rough stone clusters, and let trailing plants soften hard edges. Add miniature accessories sparingly – a single weathered chair often tells a richer story than crowded decor.
Decorating with Unique Beach Accessories

Turn ordinary containers into vibrant coastal displays by adding character through tiny decor pieces. These accessories act as storytelling tools, transforming basic setups into scenes bursting with personality and movement.
Choosing Playful Elements for Your Scene
White Adirondack chairs instantly suggest relaxation when angled toward a “sunset” made of orange sea glass. Pair them with a mini umbrella for shade – tilt it slightly to mimic ocean breezes. Flip-flops and surfboards add playful energy; lean them against “driftwood” crafted from twigs.
| Accessory | Function | Placement Tip |
|---|---|---|
| LED lighthouse | Night lighting | Elevate on pebble mounds |
| Message stones | Interactive decor | Line pathways |
| Mini sandcastle | Focal point | Center of sandy areas |
| Life-preserver | Color accent | Hang on palm trees |
Keep proportions balanced – oversized items drown delicate fairy elements. For outdoor setups, seal wooden pieces with clear varnish. Secure lightweight accessories using museum putty, which holds firm yet removes cleanly.
Encourage creativity by leaving movable items like shell coins. Kids love hiding these “treasures” for others to discover. Rotate decor seasonally: swap summer beach balls for autumn-inspired seaweed wreaths made from jute twine.
Creating a Coastal Zen Space with Natural Elements
Transform any corner into a calming retreat where crashing waves meet mindful design. These miniature sanctuaries blend the serenity of zen practices with coastal charm, offering hands-on relaxation for all ages.
Incorporating Water Features and Zen Garden Tools
Add movement with simple water elements. Blue glass beads form shimmering tide pools, while tabletop fountains create soothing trickles. Arrange smooth stones around these features to anchor your design naturally.
Miniature rakes let you sculpt wave patterns in sand – perfect for daily meditation. Pair them with shell-shaped stamps to imprint temporary designs. “The act of raking becomes a moving meditation,” explains a mindfulness coach. Space these tools within easy reach for spontaneous creative sessions.
| Zen Element | Therapeutic Benefit |
|---|---|
| Stacking stones | Improves focus |
| Worry stones | Reduces anxiety |
| Message rocks | Encourages reflection |
Choose flat pebbles for writing affirmations – use waterproof pens for lasting inspiration. Balance decorative shells with functional elements, keeping your fairy garden both beautiful and purposeful. Rotate featured stones weekly to maintain engagement without overcrowding the space.
Transforming Containers: From Tabletop Trays to Upcycled Suitcases
Your coastal fairy garden’s personality begins with its container choice. Repurpose a vintage suitcase into a portable paradise by drilling drainage holes in its base. Line wheelbarrows with plastic sheeting for larger layouts, or nestle air plants into glass terrariums for elegant tabletops. Every vessel tells a story – cracked rain barrels become weathered beachscapes, while ceramic pots mimic seaside cottages.
Material matters. Terracotta breathes better for moisture-sensitive plants, while plastic retains water in sunny spots. For container gardening basics, balance drainage needs with visual style. Upcycled drawers stack beautifully for tiered displays – separate “rooms” using slate dividers.
Scale your scene wisely. Miniature palms need deeper space than succulents. A wagon planter offers roaming room for accessories, while birdcages maximize vertical garden zones. Keep proportions playful – tiny lighthouses shouldn’t tower over fairy-sized sailboats.
| Container Type | Best Use | Modification Tip |
|---|---|---|
| Slant terrarium | Coastal cliff scenes | Use aquarium gravel layers |
| Tree stump | Rustic displays | Seal with outdoor varnish |
| Hanging basket | Space-saving designs | Add moss liner for moisture |
Weatherproof outdoor containers with marine-grade sealant. Rotate wheeled planters between shade and sun. For travel-ready gardens, secure accessories with museum gel. Turn an old barrel into a self-contained ecosystem – its curved walls protect plants while showcasing your creativity.
Maintenance Tips for a Long-Lasting Coastal Fairy Garden
Keep your miniature oasis thriving year-round with simple care habits. Check soil moisture weekly—succulents prefer drying out between waterings. Use a turkey baster for precise hydration without disturbing delicate fairy garden elements.
Wipe shells and decor monthly with a soft brush to maintain their coastal charm. Rotate scene elements seasonally—swap summer umbrellas for autumn pebble mosaics. Seal wooden accessories with weatherproof spray to prevent salt air damage.
Refresh sandy areas by sifting out debris every 6 weeks. This prevents mold and keeps your garden looking crisp. For faux streams, rinse glass beads in vinegar solution to restore their sparkle.
Watch plant growth patterns—trim overhanging stems to preserve your fairy scale. Reposition accessories slightly each month to spark new storytelling ideas. With these routines, your tiny shoreline stays vibrant through storms and sunshine alike.


