
Imagine turning a plain yard into a colorful retreat that stops neighbors in their tracks. That’s exactly what Jo and Simon Rutherford achieved, transforming their basic concrete pathway into a blooming paradise featured in the National Garden Scheme. Their story proves you don’t need deep pockets to craft eye-catching outdoor spaces.
Many modern homes have wide, shallow yards that feel challenging to design. But these spaces hold hidden potential. With smart strategies, you can layer plants, reuse materials, and focus on high-impact blooms that thrive in your climate. It’s about working with your landscape, not against it.
This guide reveals how everyday gardeners create magazine-worthy results. You’ll learn to maximize every dollar while building borders that evolve beautifully over time. From selecting durable perennials to repurposing unexpected items, we’ll explore techniques that deliver lush textures and vibrant colors.
Ready to rethink what’s possible? Let’s dive into practical solutions that turn limited spaces into personalized retreats. Your dream outdoor area starts here – no professional designer required.
Getting Started with Your Thrifty Garden Transformation

Patience pays when reshaping outdoor areas. Take inspiration from Jo and Simon, who spent six months studying their yard before planting. This approach helps you spot hidden opportunities and avoid expensive reworks later.
Assessing Your Garden’s Layout and Potential
Grab a notebook and track sunlight patterns for 2-3 weeks. Morning rays might highlight perfect spots for daisies, while afternoon shade could host ferns. Notice where puddles linger after storms – these zones need drainage solutions or moisture-loving plants.
| Sunlight Type | Best Use | Plant Examples |
|---|---|---|
| Morning Only | Partial-shade blooms | Columbine, Foxglove |
| All-Day Sun | Drought-resistant plants | Lavender, Sedum |
| Dappled Shade | Foliage texture | Hostas, Heuchera |
Identifying Natural Walkways and Focal Points
Your feet know where paths should go. Those worn grass patches from taking shortcuts? They’re free blueprints for garden design. Enhance these routes with stepping stones or low-growing thyme instead of fighting against them.
Snap photos weekly at different times. You’ll start seeing patterns – maybe that old tree stump becomes a charming planter, or that sunny wall transforms into a vertical herb display. Small observations lead to big changes without big spending.
Embracing Affordable Garden Border Concepts

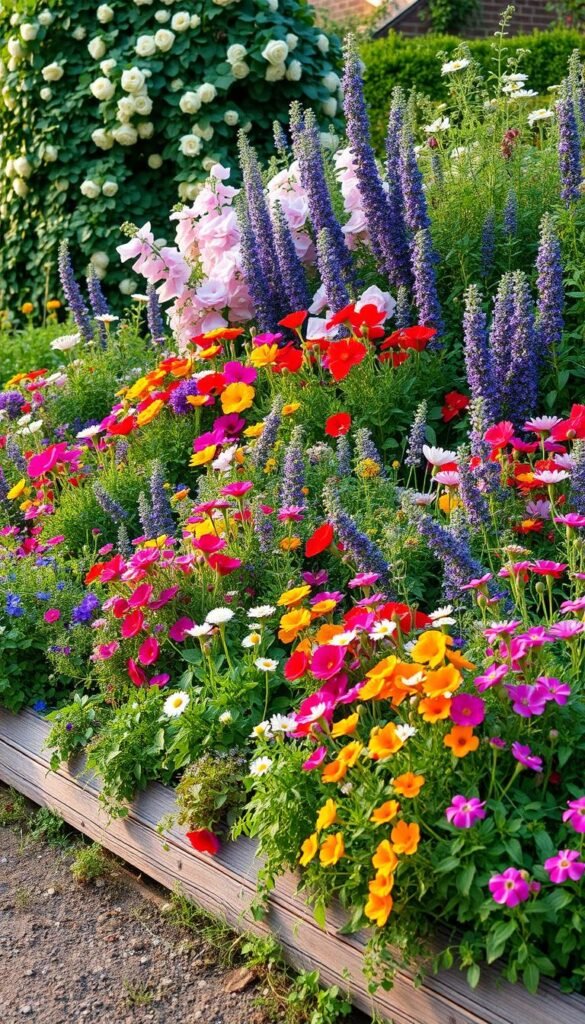
Affordable beauty starts with smart design choices in your planting areas. Let flowers cascade over walkways and allow self-seeding varieties like poppies or cosmos to fill gaps naturally. This approach creates that coveted “lived-in” charm while cutting plant costs by 40% compared to formal layouts.
Mix edible herbs like rosemary with flowering perennials for dual-purpose edging. The silver foliage of lavender makes a stunning contrast against purple salvias, and you’ll harvest seasonings while gardening. Curved lines work wonders here – they’re easier to maintain than sharp angles and create flowing visual movement.
Build depth through strategic layering. Place tall foxgloves at the back, mid-height daisies in the center, and creeping thyme along the front border. This technique makes narrow spaces feel lush without overcrowding. For year-round interest, stagger bloom times: early tulips followed by summer phlox and autumn sedum.
Remember, perfection isn’t the goal. Let plants mingle freely – columbines popping up between ferns add delightful surprises. This relaxed style forgives mistakes and evolves beautifully, proving great gardening results come from working with nature’s rhythm rather than against it.
Cottage garden borders on a budget: thrifty tips for big impact – Essential Edging Techniques

Edging transforms outdoor spaces from messy to magical without draining your wallet. Take inspiration from Jo’s clever approach – she turned reclaimed bricks into charming border definitions by simply angling them halfway into the soil. No mortar or professional skills needed, just creative placement that weathers beautifully over time.
Scour local online groups like Freecycle for free materials. Many homeowners gladly part with leftover bricks rather than pay disposal fees. One person’s trash becomes your textured edging that adds instant structure to planting areas.
For a playful twist, try the wine bottle technique. Bury intact bottles neck-down in shallow trenches – their green and amber glass creates jewel-toned accents. Save bottles from friends or local cafes to build this eco-friendly border gradually at zero cost.
Mix materials strategically for visual interest. Pair a brick-edged herb section with bottle-lined flower zones. The variation feels intentional yet maintains that relaxed cottage vibe. Remember, slightly uneven placements enhance authenticity – perfection’s overrated in this style.
Time your project during dry spells when soil’s easier to shape. Always contact utility companies before digging to avoid underground surprises. With these simple methods, you’ll craft edging that looks professionally designed while keeping cash in your pocket.
Designing with Diagonals to Enhance Your Space

Wide, shallow yards often feel like design dead-ends. Jo Rutherford cracked this challenge using a clever optical trick: diagonal lines. By angling her planting areas, she transformed a cramped space into a layered retreat that feels twice its actual size.
Creating Visual Depth and Broadening Perception
Diagonal borders work like visual speed bumps. They interrupt the eye’s straight path to fences, creating moments of discovery. Jo placed her main planting bed at a 45-degree angle to the house. This simple shift made visitors pause at her lavender-edged path before noticing the back boundary.
Try these techniques to maximize your layout:
- Angle pathways to curve around specimen plants or seating nooks
- Position bold foliage like elephant ears where sight lines intersect
- Let creeping thyme spill over zigzagging stone edges
One homeowner reported, “Our yard gained 20 feet of perceived depth just by rotating two flower beds.” This approach costs nothing but planning time. Use garden stakes and string to map potential angles before digging.
Diagonal designs also simplify visual storytelling in your space. Curved walks past staggered blooms create natural chapters – morning coffee spots transition into evening firepit zones seamlessly.
Remember: imperfect angles add charm. Let your borders meander slightly, echoing nature’s asymmetry. This strategy turns limitations into assets, proving smart design beats square footage every time.
Budget Landscaping with Upcycled and Second-Hand Materials
Your backyard can become a treasure trove of free finds with the right approach. Jo Rutherford proves it’s possible to create stunning features using discarded items others overlook. Her secret? Building relationships and seeing potential where others see waste.
Finding Free or Inexpensive Bricks and Fencing
Construction sites and renovation projects overflow with reusable materials. Jo scored 50 bricks from a neighbor’s patio demo last spring. “Contractors often pay to dump extra supplies,” she notes. “Offer to haul them away yourself.”
| Source | Common Finds | Savings Tip |
|---|---|---|
| Online Groups | Fence panels, stones | Set keyword alerts |
| Landscapers | Soil, mulch | Ask at project end |
| Neighbors | Pots, tools | Help with cleanup |
Check Facebook Marketplace daily around 8 AM when people post leftovers from weekend projects. One gardener found enough reclaimed wood to build a fence for just $12 in gas money.
Simple Upcycling Projects for Garden Accents
That chipped chair on the curb? Prime real estate for climbing nasturtiums. Jo turns broken items into focal points:
- Ladder plant stands (free from a client)
- Tree stump succulent planters
- Painted chair seating (saved from landfill)
Her wildlife pond cost nothing – she used leftover lining from her brother’s project. “Upcycling isn’t about perfection,” Jo says. “It’s giving materials new purpose through creative problem-solving.”
Start small. Paint mismatched containers the same color for unity. Join local plant swap groups to share resources. Before you know it, you’ll transform money-saving finds into a space that feels uniquely yours.
Affordable Hardscaping and DIY Solutions

Hardscaping doesn’t have to drain your savings account. With clever material choices and hands-on effort, you can craft pathways and edges that elevate your space. The secret? Focus on projects that deliver maximum visual payoff with minimal cash outlay.
Using Bricks, Gravel, and Wine Bottles Creatively
Transform empty wine bottles into glittering borders. Bury them neck-down along paths, leaving their colorful bases exposed. Jo Rutherford shares: “Peeling labels took longer than digging trenches!” Collect bottles from local restaurants – many gladly donate instead of recycling.
Gravel proves perfect for first-timers. Spread it over weed fabric for instant pathways that require no special tools beyond a shovel and rake. Unlike pavers, uneven surfaces hide minor installation flaws, letting you achieve pro results worry-free.
Invest in three essentials: a sturdy wheelbarrow, metal rake, and tamper. These tools handle multiple projects, from moving gravel to compacting soil around bottles. Always call 811 before digging to locate underground lines – it’s free and prevents costly mishaps.
Time your work during dry spells when soil crumbles easily. Build bottle edges gradually as you collect materials. Before long, you’ll craft polished hardscapes that look professionally designed – with money left for more plants!
Seasonal Planting Strategies for Big Impact
Nature’s calendar holds the key to stunning displays that don’t drain your wallet. Jo Rutherford proves this with her late spring spectacle – waves of blue forget-me-nots mingling with citrus-green euphorbia. These plants started as cuttings from her mother’s yard, now creating free flowers year after year.
Paint Your Landscape with Bold Color Blocks
Focus on one knockout combination each season. Jo pairs her self-seeding blues and greens with orange calendulas for contrast. This approach lets you buy fewer plants while making stronger visual statements. “Why chase every color when two or three sing together?” she asks.
Multiply Beauty Through Smart Propagation
Swap divisions with neighbors to grow your collection. Many perennials like hostas and daylilies need splitting every few years – perfect for free new plants. Jo’s euphorbia came from a gardening club member who had extras.
Watch for these money-saving opportunities:
- Nursery clearance racks in late summer
- Community plant swaps every spring
- Volunteer seedlings popping up in odd places
Learn to identify desirable sprouts early. That tiny weed might become next year’s showstopping phlox. With strategic choices, your flowers will multiply like nature’s own budget plan.
Maximizing Small and Shallow Garden Spaces
Shallow yards in new developments don’t have to limit your creativity. Jo and Simon transformed their cookie-cutter home plot into a layered oasis using clever visual tricks. Their secret? Working with the space rather than fighting its proportions.
Vertical elements instantly add depth. Try training jasmine vines on a salvaged ladder or mounting wall planters with trailing lobelia. These solutions draw eyes upward, making narrow spaces feel taller. Pair them with tiered shelves holding herbs and succulents for living texture.
Divide wide areas using strategic greenery. A single columnar apple tree creates natural room separators. Underplant it with shade-tolerant ferns to form distinct zones. This approach costs less than building structures while providing privacy screens that mature over years.
Containers solve tricky soil issues common in new builds. Arrange movable pots along concrete edges where ground planting fails. Swap seasonal blooms like pansies and chrysanthemums to keep the look fresh year-round. Pro tip: Group odd containers by color for cohesion.
Mirror magic works wonders in tight spots. Position reflective surfaces to bounce light into dark corners or double the appearance of prized plants. A small water feature achieves similar effects while attracting beneficial pollinators to your garden.
Choose plants that improve with age. Slow-growing dwarf conifers and perennial grasses establish beautiful frameworks that flourish over years. Patience rewards you with evolving beauty that makes every inch of your home landscape count.
Innovative Container and Vertical Gardening Ideas
Elevate your outdoor spaces without breaking the bank by looking upward. Vertical designs and suspended planters turn blank walls and fences into lush focal points. These solutions work especially well in tight areas where ground space feels limited.
Installing Hanging Baskets for Instant Color
Plastic hanging baskets offer a lightweight, affordable way to add blooms at eye level. Fill them with trailing lobelia or petunias for cascading drama. For edible flair, cherry tomatoes thrive in these setups – just ensure they get 6+ hours of sunlight.
Pre-planted baskets from local nurseries deliver instant gratification. Rotate them weekly to promote even growth and prevent lopsided shapes. In hot climates, opt for heat-loving lantana paired with drought-tolerant succulents.
Upcycle old colanders or buckets into quirky planters. Line them with coconut fiber to retain moisture. Mix textures by combining spiky dracaena with soft ivy geraniums. This approach creates dynamic displays that feel curated, not cluttered.
For year-round interest, explore colorful container arrangements that adapt to seasonal changes. Self-watering systems simplify maintenance, while recycled plastic liners keep costs low. Your vertical oasis awaits – all it takes is a hook, some soil, and imagination!


