
Your backyard holds endless potential to become a living masterpiece. Like an artist facing a blank canvas, you get to shape every detail through intentional design choices. Creating a cohesive landscape requires more than enthusiasm—it demands thoughtful preparation that balances beauty with practicality.
Rushing into planting without a roadmap often leads to wasted effort. Many discover too late that shrubs outgrow their space or sun-loving flowers wilt in shadows. A well-planned layout prevents these headaches while saving time and money. Professionals always start with sketches because visual planning reveals opportunities and challenges hidden in rough ideas.
Your outdoor area will naturally change as plants mature. Strategic arrangements account for growth patterns and seasonal shifts. This foresight ensures your space evolves gracefully rather than becoming overcrowded. For inspiration on blending aesthetics with functionality, explore our tips for elevating your gardening aesthetic.
This approach lets you craft environments reflecting personal taste while complementing your home’s architecture. Whether you prefer structured symmetry or wildflower meadows, clarity in the early stages leads to satisfying results. With each season, your carefully planned sanctuary will deepen in character and charm.
Understanding the Basics of Garden Design

Successful gardens blend vision with the land’s inherent characteristics. Whether you’re refreshing a small patio or reimagining an acre, thoughtful planning transforms random ideas into cohesive spaces. Start by viewing your yard as a puzzle where each piece—sun exposure, soil quality, and slopes—shapes the final picture.
Why a Solid Plan Matters
Imagine planting a row of hydrangeas only to find they block your kitchen window. A detailed design prevents these mishaps by mapping growth patterns and sightlines. Studies show households with sketched layouts reduce replanting costs by 40% compared to impulsive setups.
Consider slopes: they’re not just drainage challenges but natural stages for terraced gardens. As landscape designer Mara Thompson notes, “Every imperfection is a design opportunity waiting for the right perspective.”
Identifying Your Garden’s Unique Features
Grab a notebook and walk your property at different times. Note where sunlight lingers or vanishes—these zones dictate plant choices. Measure areas with builder’s rubble; they could anchor a rustic rockery instead of requiring costly removal.
- Track morning shadows cast by fences or trees
- Flag spots where water pools after rain
- Mark existing features worth preserving
This process reveals your landscape’s personality. Dry, sunny corners become herb gardens, while damp zones host ferns or small ponds. By working with these elements, you create a space that thrives naturally.
Discovering Inspiration and Defining Your Vision

Great outdoor spaces begin with ideas that reflect your personality and environment. Start by exploring diverse sources to shape a vision that feels uniquely yours. Observe how colors, textures, and layouts work together in settings you admire.
Curate Ideas From Multiple Sources
Flip through landscaping magazines to spot trending patterns. Visit local botanical gardens to see plants thriving in your climate. Notice how neighbors balance flower beds with walkways—these observations reveal practical solutions for your own design.
| Design Style | Key Features | Best For |
|---|---|---|
| Classical | Symmetrical layouts, box hedges | Traditional homes |
| Natural | Curved paths, wildflower clusters | Rustic properties |
| Modern | Clean lines, minimal plantings | Contemporary architecture |
Balance Beauty With Practical Needs
Choose native plants like coneflowers or switchgrass—they’re adapted to local conditions and need less care. Add one exotic specimen, like Japanese maple, as a focal point. Avoid invasive species that could disrupt your landscape.
Consider how you’ll use the space daily. Do you need play areas for kids? Seating for evening relaxation? Merge these functional elements with your preferred aesthetic for a garden that works as hard as it impresses.
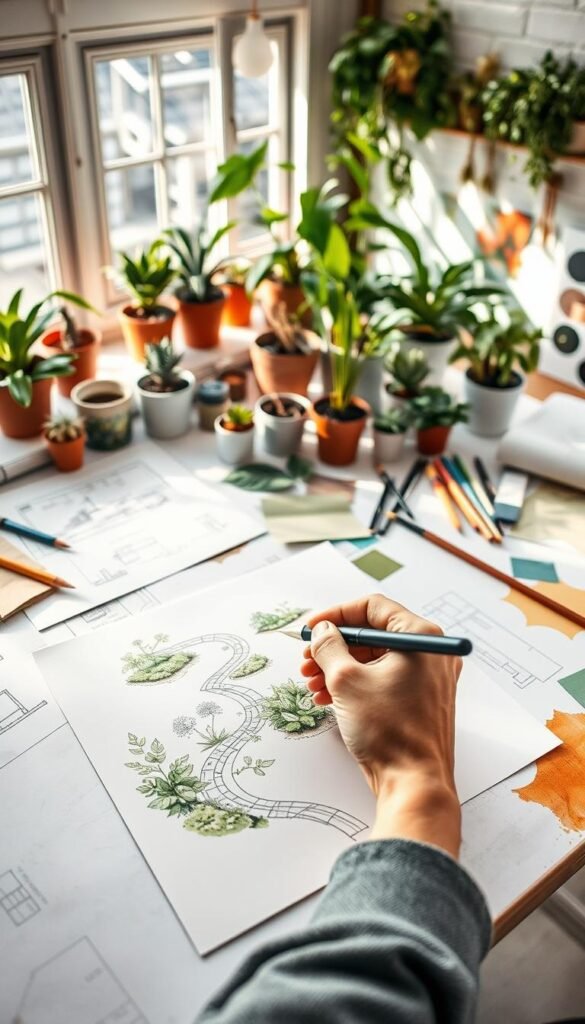
A Step-by-Step Guide to Sketching Your Garden Design Before Implementation

Translating ideas into visual form bridges imagination and reality. Begin with loose pencil sketches to explore layouts freely—these initial drafts help identify what feels right. Keep a kneaded eraser handy; early concepts often evolve as you spot opportunities.
Graph paper becomes your secret weapon for precision. Each square could represent 6-12 inches in your actual space, letting you plan plant spacing accurately. This method prevents overcrowding and aligns with efficient square-foot garden layouts.
| Sketch Version | Purpose | Key Details |
|---|---|---|
| Rough Draft | Explore concepts | Basic shapes, flow lines |
| Refined Sketch | Confirm proportions | Plant symbols, hardscape |
| Final Blueprint | Implementation guide | Exact measurements, labels |
Break your landscape into zones using curved borders. Gentle arcs soften rigid property lines and guide movement through the space. Mark seating areas with circles and pathways with parallel lines—these symbols create clear visual language.
Expect multiple revisions. Your third sketch often reveals solutions missed in earlier attempts. Layer tracing paper over drafts to test variations without redrawing entire plans.
Final drawings should include a scale legend and compass rose. These details transform creative concepts into actionable guides, ensuring your vision materializes exactly as imagined.
Preparing Your Sketching Toolkit and Materials

Gathering the right supplies turns abstract ideas into actionable plans. Think of your toolkit as a bridge between imagination and execution—every item serves a purpose in capturing your vision accurately.
Essential Tools for Accurate Garden Mapping
Start with a camera to document existing conditions. Pair it with a 100-foot measuring reel for precise perimeter checks. Jot observations in a weatherproof notebook—ink smears less than pencil when damp.
| Tool | Purpose | Pro Tip |
|---|---|---|
| Laser measurer | Quick distance checks | Ideal for large properties |
| Colored pencils | Zone marking | Use green for plants, gray for hardscape |
| Digital level | Slope measurement | Check patio gradients |
Choosing the Right Graph Paper and Measuring Instruments
Opt for ¼-inch scale graph paper—each square equals one foot. This standard makes converting measurements effortless. Tracing paper layered over base maps lets you test layouts risk-free.
Compare hand measurements with Google Earth images. Spot discrepancies early—a fence might be 2 feet shorter than you recorded. Update notes accordingly.
Organize supplies in a zippered portfolio. Keep frequently used items like erasers and scale rulers in front pockets. This system keeps your design process smooth from first sketch to final landscape plan.
Assessing Your Outdoor Space and Environmental Factors
Every thriving landscape begins with understanding your land’s natural rhythms. Observe how sunlight dances across your property and where water collects after storms. These details shape plant survival and visual harmony in your outdoor space.
Evaluating Sunlight, Shade, and Climate Conditions
Track sunlight patterns three times daily for a week. Note how shadows shift with seasons—tall trees might block summer sun but allow winter light. This reveals prime spots for sun-loving veggies or shade-tolerant hostas.
| Sun Exposure | Daily Hours | Plant Examples |
|---|---|---|
| Full Sun | 6+ hours | Lavender, Tomatoes |
| Partial Shade | 3-6 hours | Hydrangeas, Ferns |
| Full Shade | Hostas, Astilbes |
Check your USDA zone using your ZIP code. Zones 5-7 handle tulips well, while citrus thrives in 9-11. Microclimates near walls or slopes can create unique growing areas—capture these in your notes.
Analyzing Soil, Drainage, and Topography
Dig six inches and feel your soil. Sandy types drain fast but need frequent watering. Clay holds moisture but may drown roots. A $10 test kit reveals pH and nutrients—most veggies prefer 6.0-7.0.
Walk your land after rain. Puddles mark poor drainage spots—ideal for rain gardens or container gardening. Gentle slopes direct water flow—position thirsty plants downhill where moisture collects naturally.
Drafting Your Initial Garden Plan

Bringing your garden vision to life starts with putting pencil to paper. Rough sketches act as playgrounds for ideas, letting you experiment before committing to permanent choices. This stage prioritizes creativity over precision—think bubble diagrams and loose shapes rather than exact measurements.
Creating Rough Sketches to Capture Ideas
Start with tracing paper over your property outline. Sketch activity zones using circles and arrows—a squiggly oval could represent a future fire pit area. Use colored markers to distinguish between plant beds (green), seating (brown), and pathways (gray).
Landscape architect Elena Cruz advises: “Let your first three sketches be terrible. The fourth will surprise you.” Layer multiple drafts to compare layouts side-by-side. This process reveals which arrangements feel most natural for your daily routines.
Using Functional Diagrams to Organize Spaces
Transform rough concepts into structured diagrams that show relationships between elements. Position high-traffic zones like patios near home entrances. Keep vegetable plots close to water sources for easier maintenance.
| Element Type | Recommended Spacing | Key Considerations |
|---|---|---|
| Seating Areas | 6-8 ft diameter | Wind patterns, shade access |
| Pathways | 3-4 ft width | Material durability, slope |
| Plant Beds | 2-3 ft depth | Sun exposure, growth height |
Balance visual weight by placing bold elements like water features opposite delicate flower beds. Leave breathing room between features—crowded spaces feel chaotic rather than inviting. Consider mature plant sizes to prevent future overcrowding in your landscape.
Update diagrams seasonally. What works for summer barbecues might need adjustment for winter views. This flexible approach keeps your design functional year-round while maintaining its core aesthetic.
Incorporating Key Garden Elements in Your Sketch
Your garden sketch transforms from lines on paper to living reality through intentional element placement. Thoughtful arrangements balance beauty with practicality, creating spaces that thrive through seasons while matching your lifestyle needs.
Strategic Plant Positioning for Lasting Beauty
Group plants by their sunlight needs—lavender thrives in full sun, while hostas prefer shaded corners. Place seasonal stars like hydrangeas where they’ll shine in summer, then let winterberries take center stage later. Position thirsty veggies near spigots to simplify watering routines.
Use evergreens or tall grasses to hide utility boxes without blocking access. Curved planting beds soften property edges, while staggered heights create depth. Remember: leave elbow room for growth—crowded saplings become tangled problems in three years.
Balancing Nature With Built Features
A stone path winding through flowers adds structure, while a small pond attracts dragonflies. Match water features to your climate—recirculating fountains work in dry areas, while rain gardens manage storm runoff. Arbors and benches become focal points when surrounded by blooming vines.
Choose materials that age gracefully, like cedar for raised beds or slate for stepping stones. Keep structures proportional—a massive pergola overwhelms a petite patio. Blend textures: pair smooth river rocks with feathery grasses for tactile contrast that delights bare feet.
Your sketch now holds the blueprint for a landscape that grows more captivating each year. By harmonizing living elements with crafted details, you’ll create outdoor rooms ready for memories yet to bloom.


