
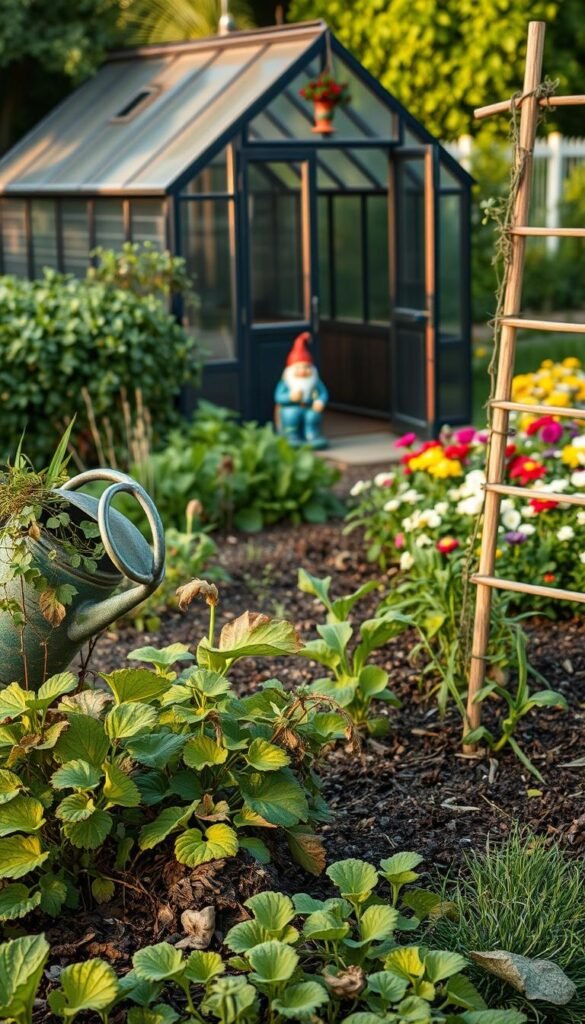
Many people discovered the joy of growing their own plants during the pandemic. But without the right know-how, it’s easy to feel discouraged when things don’t go as planned.
Did you know? Nearly 90% of first-time growers give up after their initial setback. Even experienced hands face challenges—like the time my tomatoes withered from poor soil choices.
Every misstep is a chance to learn. This guide covers 16 practical solutions to help your garden thrive. You’ll discover why picking the right plants and nurturing healthy earth makes all the difference.
Let’s turn those frustrations into flourishing green spaces together.
Why Avoiding Common Beginner Gardening Mistakes Matters
Your dream garden starts with avoiding pitfalls that drain time and hope. Small missteps—like poor soil or wrong plants—can cost months of effort. Worse, they discourage 70% of new growers from trying again.
Gardens offer structure in chaotic times, but failures sting. Wilted seedlings or barren soil feel personal. That’s why soil health is non-negotiable. Unhealthy earth starves roots, wasting your investment.
Over years, thriving plants depend on observation. Notice drooping leaves? Adjust watering. Spot pests? Act early. This way, you’ll fix issues before they escalate.
Stats show beginners quit after one season. Don’t let frustration win. With the right fixes, your garden can flourish—saving time, money, and heartache.
Starting with the Wrong Plants (Like Tomatoes!)

Tomatoes might tempt you, but leafy greens offer faster rewards. My first attempt ended with wilted plants and stolen fruit—thanks to squirrels. That failure inspired my book Leaves, Roots & Fruit, a guide to smarter starts.
Why Leaves Are Easier Than Fruits
Tomatoes demand triple the time and care of greens. While sprouts appear in 5 days, ripe fruit takes 3+ months. Leafy plants like spinach or lettuce forgive mistakes and yield quick harvests.
The 30-Day Harvest Rule
New gardeners thrive on early wins. Follow the “Leaves > Roots > Fruit” system:
- Leaves: Harvest in 30 days (kale, arugula).
- Roots: Try after 60 days (radishes, carrots).
- Fruit: Save for year two (tomatoes, peppers).
Start with these 10 fast growers:
- Spinach
- Lettuce
- Kale
- Swiss chard
- Bok choy
- Arugula
- Mustard greens
- Microgreens
- Peas (for shoots)
- Basil
Build confidence with quick wins. Your plants—and patience—will thank you.
2. Neglecting Your Soil Health
Healthy soil is the foundation of every thriving garden. It feeds your plants, holds water, and fights disease. Yet, many overlook its importance until roots struggle or leaves yellow.
Signs of Unhealthy Soil
Cracked, dry earth or puddles after rain signal trouble. Here’s how to test it:
- Ribbon Test: Roll damp soil between your fingers. Sandy soil crumbles; clay forms a ribbon.
- Visual Clues: Look for gray color, mold, or lack of worms.
| Soil Type | Drainage | Fix |
|---|---|---|
| Clay | Slow | Add compost |
| Sandy | Fast | Mix in mulch |
How to Enrich Soil Naturally
Boost nutrients without chemicals:
- Lasagna Composting: Layer leaves, kitchen scraps, and cardboard. Let it decompose.
- Worm Tea: Steep worm castings in water for 24 hours. Dilute and pour.
- Cover Crops: Plant clover or buckwheat to add nitrogen.
Pro Tip: Mulch with straw or wood chips to lock in moisture and block weeds.
3. Overwatering or Underwatering

Watering mistakes are among the top reasons plants struggle to thrive. Whether you’re in dry Perth or tending indoor pots, your approach must adapt. Too much water drowns roots, while too little leaves plants gasping. Here’s how to strike the perfect balance.
How to Check Soil Moisture
Forget guesswork. Use the finger-knuckle test:
- Push your finger into the soil up to the second knuckle.
- If it feels dry, water deeply. If damp, wait a day.
Pro Tip:Dawn is the best time to water. Lesssunmeans less evaporation, androotsabsorb more.
Perils of Overhead Watering
Sprinklers waste water and spread disease. Compare these tools:
| Tool | Efficiency | Best For |
|---|---|---|
| Soaker Hose | 90% | Beds, shrubs |
| Drip Irrigation | 95% | Containers, veggies |
| Sprinkler | 60% | Lawns only |
Some plants hate wet leaves. Avoid overhead watering for:
- Tomatoes
- Peppers
- Basil
- Zinnias
- Lavender
Wind drift is another problem. Water at ground level to prevent waste. In windy areas, use drip lines or a watering can.
4. Skipping Mulch Like It’s Optional
Mulch is the unsung hero of a thriving garden. It locks in water, blocks weeds, and feeds your soil as it breaks down. Yet, many treat it as an afterthought—until plants struggle.
Did you know? Mulch maintains your soil’s microbiome, fostering healthier roots. A 2–3 inch layer cuts watering needs by 30% and stops erosion. Skip it, and you’ll battle droughts and invaders all season.
Top Budget-Friendly Mulches
Not all mulches cost a fortune. Here’s how seven options stack up:
| Mulch Type | Cost (per sq ft) | Best For | Lifespan |
|---|---|---|---|
| Straw | $0.10 | Veggie beds | 1 season |
| Shredded Bark | $0.25 | Paths, shrubs | 2 years |
| Leaf Mold | Free | Flower beds | 6 months |
| Wood Chips | $0.15 | Ornamentals | 3+ years |
| Grass Clippings | Free | Nitrogen boost | 2 months |
Avoid dyed wood—chemicals can harm plants. For pots, use lightweight cocoa hulls or leaf mold instead.
Living Mulch: Nature’s Free Upgrade
Clover or creeping thyme doubles as ground cover. These living mulches:
- Fix nitrogen in soil
- Suppress weeds naturally
- Attract pollinators
Refresh mulch every 6–8 weeks. Rake old layers to prevent matting, as compacted mulch blocks water and nutrients.
5. Planting Too Close Together

Ever seen a zucchini plant take over half your garden? Proper space prevents this. Crowded plants compete for sun, water, and nutrients, weakening roots and raising pest risks by 60%.
Veggie Spacing Cheat Sheet
Follow these guidelines for healthier harvests:
- Zucchini/Squash: 3 feet apart (they sprawl!)
- Tomatoes: 24–36 inches for airflow
- Carrots: 2 inches apart in rows 12 inches apart
- Lettuce: 8–10 inches for full heads
Square Foot Gardening Grid
Maximize small space with this simple system:
| Plant | Plants per Square |
|---|---|
| Radishes | 16 |
| Spinach | 9 |
| Peppers | 1 |
Companion Planting Pairs
Some plants thrive together. Try these duos:
- Tomatoes + Basil: Repels pests naturally
- Corn + Beans: Beans climb corn stalks
- Cucumbers + Nasturtiums: Deters beetles
Pro Tip: Use vertical space with trellises for cucumbers or peas. It frees up ground space and improves sun exposure.
6. Forgetting to Observe Your Garden’s Microclimate
Placing a banana plant near a plumeria once cost me an entire season’s harvest. The banana’s broad leaves stole all the sun, leaving the plumeria stunted. Microclimates—tiny zones with unique light, wind, and moisture—dictate your garden’s success.
Track Sun and Shade Like a Pro
Use the shadow-tracking method to map light patterns:
- Stake & String: Mark shadows at 9 AM, noon, and 3 PM.
- SunCalc App: Predicts sun angles year-round.
- Thermometer: Log hot/cold spots over time.
Winter sun sits lower, shrinking shade. Adjust plant placement seasonally.
Shade-Tolerant Veggies for Problem Spots
These six plants thrive with less light:
- Spinach
- Kale
- Swiss chard
- Lettuce
- Broccoli
- Peas
Tech Tools for Microclimate Mastery
| Tool | Use | Cost |
|---|---|---|
| Soil Sensor | Tracks moisture/temp | $25+ |
| Anemometer | Measures wind speed | $15 |
| Infrared Thermometer | Finds heat islands | $20 |
Pro Tip: Pavement and walls reflect heat, creating microclimates. Use this space for heat-loving plants like peppers.
7. Ignoring Wildlife and Pest Balance

Nature thrives on balance—your garden is no exception. Insects and birds aren’t just visitors; they’re partners in growth. Harness their power, and you’ll slash pest problems naturally.
Plants That Attract Helpful Insects
Some plants act as bodyguards. Marigolds repel nematodes, while dill invites ladybugs—a single ladybug eats 5,000 aphids in its lifetime. Here’s a top 5 list:
- Marigolds: Deter soil pests.
- Lavender: Lures pollinators.
- Sunflowers: Feed birds that eat caterpillars.
- Mint: Repels ants and mice.
- Yarrow: Hosts predatory wasps.
Bird Baths and Bug Hotels
Birds reduce caterpillars by 70%. Place a birdbath near your garden to invite them. For insects, try these DIY hotels:
- Bundle hollow stems (bamboo) for solitary bees.
- Stack wood slices for beetles.
- Fill a pot with straw for lacewings.
| Plant | Beneficial Insect | Pest Controlled |
|---|---|---|
| Dill | Ladybugs | Aphids |
| Fennel | Parasitic Wasps | Tomato Hornworms |
| Clover | Ground Beetles | Slugs |
Pro Tip: Release ladybugs at dusk—they’re less likely to fly away. Avoid pesticides; they kill insects you need. Instead, use compost teas to strengthen plants against pests.
8. Starting Too Big Too Fast
Three pots might seem modest, but they’re the secret to lasting success. Studies show 80% of first-year growers quit when overwhelmed. By limiting your space initially, you’ll master care routines before expanding.
The 3-Pot Success System
This proven way balances variety and manageability:
- Herb Pot: Basil or mint (fast-growing, forgiving)
- Veggie Pot: Cherry tomatoes or bush beans (rewarding but simple)
- Flower Pot: Marigolds or nasturtiums (pest control + color)
Weekly Time Investment
Small plants mean big savings on maintenance:
| Task | 3 Pots | Full Garden |
|---|---|---|
| Watering | 15 mins | 2+ hours |
| Weeding | 5 mins | 45 mins |
| Harvesting | 10 mins | 30 mins |
6-Month Expansion Plan
Grow confidence alongside your garden:
- Months 1-2: Master the 3-pot system
- Months 3-4: Add 2 more containers
- Months 5-6: Transition to a 4×4 bed
Cost Comparison: Pots vs Ground
Starting small saves money:
| Item | Containers | In-Ground |
|---|---|---|
| Soil | $20 | $100+ |
| Tools | Trowel only | Full set |
| Water Use | Low | High |
5 Foolproof Starter Plants
These thrive with minimal time:
- Radishes: Ready in 25 days
- Green Onions: Regrow from scraps
- Pansies: Cold-hardy blooms
- Thyme: Drought-resistant herb
- Spinach: Grows in shade
Pro Tip: Label each pot with planting dates. Tracking progress this way builds skills for larger projects.
9. Planting Out of Season
Nurseries might sell peppers in winter, but that doesn’t mean you should plant them. Growing plants at the wrong time wastes effort and yields disappointing results. Your local climate—not store shelves—should dictate planting schedules.
USDA Zone Planting Adjustments
Your garden‘s success starts with knowing your zone. This chart shows how to adjust planting dates:
| USDA Zone | Last Frost | First Frost | Summer Crop Start |
|---|---|---|---|
| 3-4 | May 15-June 1 | Sept 1-15 | Indoors March |
| 5-6 | April 15-May 1 | Oct 1-15 | Indoors Feb |
| 7-8 | March 15-April 1 | Nov 1-15 | Direct sow March |
| 9-10 | Feb 15-March 1 | Dec 1-Jan 15 | Year-round options |
Top Crops by Season
Match these plants to your growing season:
- Summer Stars: Tomatoes, peppers, cucumbers, squash, basil
- Winter Warriors: Kale (sweetens after frost), spinach, Brussels sprouts, leeks, parsley
Soil Thermometer Tricks
Some seeds need specific soil temps. Push a thermometer 2 inches deep to check:
- Lettuce: 40°F
- Peas: 45°F
- Tomatoes: 60°F
Succession Planting Schedule
Maximize your garden space with this rotation:
- Early spring: Peas + radishes
- Late spring: Beans + carrots
- Fall: Kale + turnips
Watch out for big-box stores selling out-of-season starters. Those June tomato plants? They’ll struggle in summer’s peak sun. Stick to nature’s calendar for the best harvests.
10. Using Cheap or Wrong Seed-Starting Mix
The right seed-starting mix can make or break your garden’s success. Poor-quality blends stunt roots or invite mold, slashing germination rates by 50%. With a simple DIY recipe, you’ll give seeds the perfect launchpad.
Store-Bought vs. DIY: Cost and Quality
Premade mixes cost $0.50–$1 per quart. A DIY blend cuts that to $0.20—and outperforms most brands. Here’s why:
- Control: Adjust nutrients and texture for specific seeds.
- Purity: Avoid synthetic fertilizers or unknown additives.
- Yield: Healthier starts mean fewer replants.
5 Must-Have Ingredients
This 3:1:1 ratio balances drainage and fertility:
- Coconut coir: Holds moisture without sogginess.
- Perlite: Aerates soil for strong roots.
- Compost: Packed with microbial life and nutrients.
- Vermiculite: Boosts mineral retention (optional).
- Worm castings: Gentle fertilizer for tender sprouts.
pH and Mold Prevention Tips
Most seeds thrive at pH 6.0–7.0. Test with a $5 meter, then adjust:
- Too acidic? Add crushed eggshells.
- Too alkaline? Mix in peat moss.
Prevent mold by baking soil at 200°F for 30 minutes. Or spray with chamomile tea—a natural antifungal.
Heat Mats for Faster Germination
Warmth tricks seeds into thinking it’s spring. A $20 heat mat under trays:
- Cuts germination time by 30%.
- Works best for peppers, tomatoes, and basil.
- Remove once sprouts appear to avoid leggy roots.
Pro Tip: Label mixes with dates and ingredients. Reuse extra blend for potting up seedlings.
11. Transplanting Seedlings Too Early

Moving young plants outdoors without preparation is like sending them into battle unarmed. Wind, intense sun, and temperature swings can shock tender roots, setting growth back weeks. Brassicas (like kale or broccoli) are especially vulnerable—their leaves wilt dramatically if transplanted too soon.
The 7-Day Hardening-Off Blueprint
Gradual exposure builds resilience. Follow this schedule:
- Day 1-2: Place seedlings outside for 1 hour in shade.
- Day 3-4: 3 hours with morning sun.
- Day 5: 5 hours with light wind exposure.
- Day 6: Full day in sheltered spot.
- Day 7: Noon sun test (watch for wilting).
Wind and Root Prep Tricks
Strengthen stems by brushing your hand over plants daily—mimics wind stress. Before transplanting:
- Check roots: They should fill but not circle the pot.
- Water deeply 1 hour before moving.
- Choose a cloudy day to reduce shock.
| Plant Type | Min Height for Transplant | Special Notes |
|---|---|---|
| Tomatoes | 15cm | Bury stems deeper |
| Lettuce | 10cm | Hates root disturbance |
| Peppers | 12cm | Needs warm soil |
Anti-Transplant Shock Tea
Mix 1 tbsp kelp powder + 1 tsp molasses in 1 gallon water. Soak roots for 15 minutes before planting. The kelp’s hormones reduce stress, while molasses feeds microbes.
Pro Tip: Cloudy days are ideal for transplanting—less sun stress means faster recovery. If plants droop, shade them with a laundry basket for 48 hours.
12. Leaving Garden Beds Empty
Bare garden beds lose nutrients faster than you think—cover crops fix this. Unprotected soil erodes, while weeds move in like squatters. A 30-day cover crop like buckwheat acts as a bandage, healing your beds between seasons.
Fast-Growing Soil Protectors
Think of soil health like a battery. Each harvest drains nutrients; cover crops recharge it. These six options balance speed and benefits:
| Cover Crop | Days to Maturity | Key Benefit |
|---|---|---|
| Buckwheat | 30 | Blocks weeds, attracts bees |
| Crimson Clover | 60 | Fixes nitrogen |
| Winter Rye | 21 (germ) | Prevents erosion |
| Hairy Vetch | 90 | Deep nutrients |
| Radish (Daikon) | 45 | Breaks compacted soil |
| Oats | 50 | Adds organic matter |
Nitrogen Fixation Explained
Legumes (clover, vetch) host bacteria that convert air nitrogen into soil food. Here’s how it works:
- Step 1: Roots form nodules with rhizobia bacteria.
- Step 2: Bacteria “fix” nitrogen into plant-usable form.
- Step 3: Chopped plants release nitrogen as they decompose.
Chop-and-Drop Simplicity
When crops mature, cut them at the base. Leave roots to decompose and tops as mulch. This:
- Feeds soil microbes
- Locks in moisture
- Suppresses weeds
Edible Cover Crops
Some protect beds while feeding you:
- Peas: Harvest pods, then till vines.
- Radishes: Eat roots, compost tops.
- Kale: Pick leaves, let stalks nourish soil.
Pro Tip: Mix 1 part compost into chopped crops to speed decomposition. Most beds recover in 4–6 weeks.
13. Overreacting to Plant Problems
Not every drooping leaf means disaster—patience often fixes more than panic. Studies show 40% of plant issues resolve naturally within two weeks. Your tomatoes might just need a breather after transplant shock, while yellow leaves could be old growth making way for new.
When to Wait It Out
These five scenarios rarely need intervention:
- Evening wilt: Leaves perk up by morning? Just heat stress.
- Single yellow leaf: Natural shedding if others look healthy.
- Holes in leaves: Small insect damage that plants outgrow.
- White specks: Could be harmless mineral deposits from water.
- Slow growth: Check soil temp—cold pauses development.
Red Flags Demanding Action
Act fast if you spot:
- Spreading spots: Fungal issues worsen quickly.
- Sticky residue: Aphids or scale insects at work.
- Sudden collapse: Root rot needs immediate treatment.
Neem oil works best when applied at dawn or dusk—direct sun burns treated leaves. The ideal treatment window is 48 hours after spotting the problem.
Tech-Assisted Diagnosis
These apps help identify issues accurately:
- PlantNet: Snap a photo for instant ID.
- PictureThis: Tracks recovery progress.
- Garden Answers: Connects to local experts.
Pro Tip: White fuzz on soil is often beneficial mycelium—not mold. Rub a leaf between fingers. A powdery residue means mildew, while smooth texture suggests natural wax.
Keep a garden journal to track patterns. What seems like a problem today might be your plants adapting to seasonal changes. When in doubt, wait three days before acting—nature’s solutions often just need time.
14. Forgetting to Label Plants and Seeds
Labels fade, memories blur, and suddenly your garden becomes a guessing game. Studies show 80% of growers confuse their plants within months. A few simple tricks can save you time and frustration for years.
7 Label Materials Compared
Not all markers withstand sun and rain. Here’s how popular options stack up:
| Material | Durability | Best For | Cost |
|---|---|---|---|
| Copper tags | 10+ years | Perennials | $$ |
| Stone slabs | Lifetime | Herb gardens | $ |
| Plastic stakes | 2 seasons | Annuals | $ |
| Wooden sticks | 1 season | Seed starts | $ |
| Aluminum tags | 5+ years | Shrubs | $$ |
| RFID chips | 10+ years | Rare plants | $$$ |
| Engraved spoons | 3+ years | Container plants | $ |
DIY Weatherproof Labels
Try these budget-friendly ideas:
- Engraved stones: Use a nail to scratch names on river rocks
- Repurposed spoons: Hammer flat and stamp with letter punches
- Map journal: Sketch bed layouts with seed varieties
Pro Tip: Staedtler Lumocolor markers last 3+ years outdoors. For seeds, store packets with silica gel to prevent ink smudging.
Tech-Savvy Tracking
Go digital with these tools:
- RFID plant tags: Scan with your phone to pull up care notes
- Gardenize app: Photo-document growth stages
- QR code sticks: Link to planting dates and recipes
Clear labels turn chaos into order. Your future self will thank you when harvesting that “mystery plant” turns out to be prized heirloom tomatoes.
15. Letting Weeds and Invasives Take Over
A single weed can unleash thousands of seeds, creating years of headaches. Invasives like mint or bindweed spread aggressively, choking your plants and stealing nutrients. With a few smart strategies, you can stop them before they start.
5 Sneaky Invaders to Watch For
These weeds disguise themselves as harmless—until they take over:
- Mint: Spreads via underground runners (even pots can’t contain it).
- Bindweed: Roots grow 13 feet deep by year three.
- Japanese Knotweed: Busts through concrete.
- Crabgrass: One plant drops 150,000 seeds.
- Creeping Charlie: Smothers lawns and beds alike.
Solarization: The No-Chemical Fix
Smother weeds with sunlight. Here’s how:
- Water the area thoroughly.
- Cover with clear plastic (black attracts heat but blocks light).
- Seal edges with rocks. Leave for 4–6 weeks in summer.
This kills roots, seeds, and even soil-borne pests. For small patches, try boiling water—it’s instant and chemical-free.
Edible Weeds? Yes, Really!
Some invaders double as food. Try these in salads:
| Weed | Use | Caution |
|---|---|---|
| Dandelion | Leaves (bitter greens) | Avoid sprayed areas |
| Purslane | Stems (crunchy, high in omega-3s) | Don’t confuse with spurge |
| Lambsquarters | Steamed like spinach | Harvest young leaves |
10-Minute Daily Weeding Rule
Consistency beats marathon sessions. Set a timer and:
- Target seedlings before roots establish.
- Use a stirrup hoe for quick slicing (no bending!).
- Drop weeds in a bucket—don’t let them re-root.
Pro Tip: Weed after rain—roots slide out easily. For gravel paths, sprinkle salt sparingly to prevent regrowth.
16. Enjoy Your Thriving Garden Journey
Your garden journey is a lifelong adventure, not a race. Every season teaches something new—whether it’s your first harvest or tenth year nurturing plants.
Celebrate progress with photos. Snap weekly shots to track growth. A simple journal helps too. Note what thrives and what struggles. Over time, patterns emerge.
Three milestones to aim for:
- Year 1: Keep one crop alive all season.
- Year 3: Grow enough to share with neighbors.
- Year 5: Save seeds for next year’s planting.
Experiment fearlessly. Move plants to sunnier spots. Try odd pairings. Some fail, but others surprise you. That’s the joy of garden life.
In ten years, you’ll laugh at early stumbles. For now, savor each small win. Your garden grows best when you do.


