
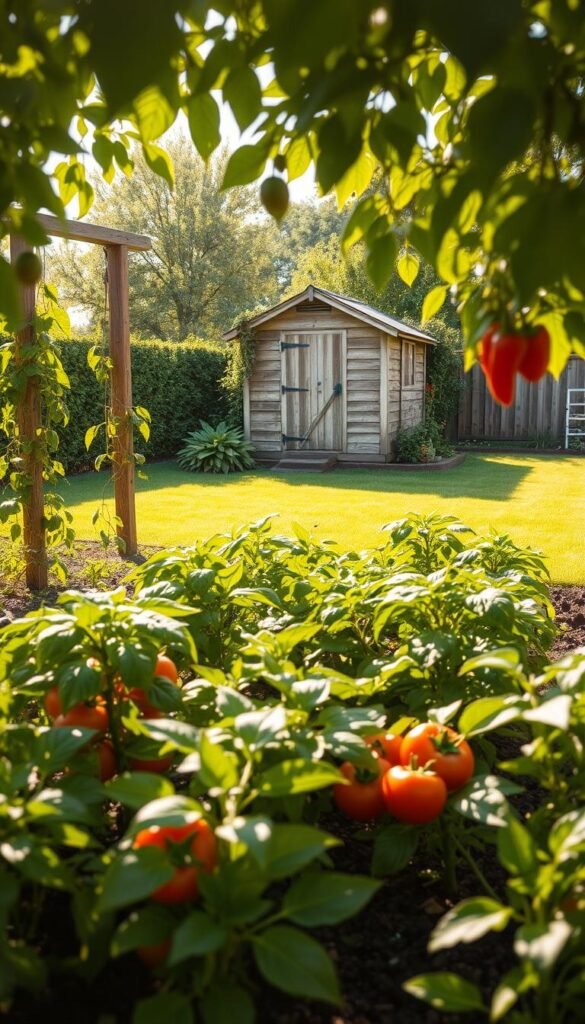
Ever thought about swapping grass for fresh, homegrown food? Transforming an unused lawn into a vegetable garden is easier than you think. Not only does it save water, but it also brings nature closer to home.
Starting small helps. A single raised bed or a few containers can kick off your journey. Over time, you can expand the garden to fit your space and needs.
This change benefits more than just your kitchen. A well-planned edible landscape attracts pollinators and reduces maintenance. Plus, you’ll enjoy the freshest produce right outside your door.
Ready to dig in? Let’s explore how to turn that open lawn into a thriving, sustainable space.
Preparing Your Lawn for a Vegetable Garden Transformation

Ready to transform that unused space into a thriving food source? The right prep work ensures your plants flourish. Focus on sunlight, soil, and smart tools to set the stage.
Choosing the Right Location and Sunlight Assessment
Most veggies need 6+ hours of direct sunlight daily. Track light patterns with a sun calculator app or by observing shadows. Note microclimates—spots near walls stay warmer, while slopes drain faster.
Pick a flat area close to a water source. Avoid low spots where puddles form. Test your soil pH with a kit; most crops prefer 6.0–7.0.
Tools and Materials You’ll Need
Gather these essentials before breaking ground:
- Shovel or auger for digging
- Sod cutter (rent for large areas)
- 4×4 treated lumber for garden beds
- Measuring tape and pry bar
Repurpose removed grass as compost to save money. Layer it with soil and kitchen scraps for nutrient-rich mulch.
Step-by-Step Guide to Removing Grass and Sod

Breaking ground for a new garden starts with smart sod removal. Whether you dig manually or use tools, the right method saves time and prevents weeds from competing with your plants. Here’s how to clear the way for healthy soil.
Manual Digging vs. Sod Cutter: Pros and Cons
Two main ways to remove sod exist: elbow grease or machinery. Choose based on your space and budget.
- Manual digging: Ideal for small areas (under 100 sq ft). Expect 8 hours of work but zero equipment costs. Use a sharp shovel to slice under roots at 2–3 inches deep.
- Sod cutter: Rented for large spaces. Cuts labor to 1 hour/100 sq ft. Wear steel-toe boots for safety. Perfect for converting full lawns quickly.
How to Repurpose Removed Sod for Compost
Don’t trash the grass—turn it into nutrient-rich compost. Stack sod pieces grass-side down in a pile. Add soil and kitchen scraps to speed decomposition. In 6–8 months, you’ll have free fertilizer.
Pro tip: Smother stubborn weeds with cardboard topped by 6 inches of mulch. This no-dig process enriches the garden bed naturally.
Building and Filling Raised Garden Beds

Raised beds give your plants the perfect foundation for strong growth. They improve drainage, warm faster in spring, and reduce weeds. Start with durable materials and a smart soil recipe to maximize yields.
Selecting the Best Lumber for Durability
Choose rot-resistant wood like cedar or redwood for garden beds. Untreated 2×10 lumber lasts 5–7 years, while pressure-treated options add decades but cost more. Avoid railroad ties—they leach chemicals into soil.
Pro tip: For deep-rooted crops like tomatoes, build beds 18″ tall. Carrots thrive in 12″ depths. Measure your space to calculate lumber needs—a 4×8 bed requires three 8-foot boards.
Layering Soil, Compost, and Mulch for Optimal Growth
Fill beds with a mix of 60% topsoil, 30% compost, and 10% vermiculite for aeration. This “lasagna” method works wonders:
- Cardboard base (smothers weeds)
- 2″ compost (EPA ratio: 1 part green to 2 parts brown)
- 4″ garden soil blended with organic matter
- Straw mulch topping (locks in moisture)
Boost growth by adding mycorrhizal fungi—a “living soil” enhancer. One cubic yard of mix covers 100 sq ft at 3″ depth. Test soil yearly to maintain quality.
Selecting and Planting Your Vegetables

Fresh, homegrown veggies start with smart plant selection. Pairing the right crops with your climate and space ensures a thriving garden. Start simple, then expand as you gain confidence.
Best Beginner-Friendly Vegetables for Your Climate
Zucchini, cucumbers, and snow peas are foolproof for new growers. They need minimal care and offer quick rewards. Check your USDA zone for planting dates—cool-season crops like peas thrive in early spring.
Succession planting keeps your harvest coming. Try radishes (25 days) followed by beans (60 days). For small spaces, trellis snap peas behind bush beans to maximize vertical growth.
- Seeds vs. nursery plants: Seeds cost less but need more time. Starter plants speed up your first harvest.
- Water wisely: Drip irrigation prevents leaf diseases in humid areas.
Companion Planting Tips for Healthier Crops
Some plants grow better together. Marigolds repel pests from tomatoes, while basil improves their flavor. Garlic planted nearby deters aphids naturally.
Attract pollinators with flowers like lavender and sunflowers. They boost yields for crops like squash. Avoid pairing onions with peas—they stunt each other’s growth.
“Companion planting is nature’s pest control. Let the garden work for you.”
Test combinations each season. Nasturtiums lure pests away from prized vegetables, making them a sacrificial crop. Keep notes to refine your plan yearly.
Installing an Efficient Irrigation System

Smart watering keeps plants thriving while saving time and resources. The right irrigation method ensures your garden gets just enough water—no more, no less. Whether you choose drip lines or sprinklers, automation takes the hassle out of daily care.
Drip Irrigation vs. Sprinklers: Which Suits Your Garden?
Drip systems target roots directly, using 30–50% less water than sprinklers. They’re ideal for:
- Vegetable beds (prevents leaf diseases)
- Sloped areas (reduces runoff)
- Small spaces (like small-space gardening tips)
Sprinklers cover large lawns quickly but waste water through evaporation. Costs vary:
- DIY drip setup: $0.50/sq ft
- Professional install: $2.50/sq ft
How to Automate Watering for Low-Maintenance Care
Smart timers let you schedule twice-daily 15-minute cycles. Pair them with rain sensors to avoid over-watering. For slopes, add a pressure regulator to maintain even flow.
“Automation turns a chore into a set-and-forget process. Your plants get consistency, and you get free time.”
Pro tip: Convert 5-gallon buckets into drip feeders for potted plants. Link zones to smart home systems for remote control. Winterize by blowing out lines before frost.
Harvest rainwater—600 gallons per 1″ of rain—to boost quality and cut costs. Test soil moisture with a finger; if damp, delay watering.
Enjoying Your Harvest and Planning for Next Season
Nothing beats the joy of picking fresh produce from your own garden. As you savor this season’s bounty, start thinking ahead. Simple steps now set you up for even better results next year.
Keep notes on what thrived and what struggled. Track pest issues or weather challenges. This information helps refine your plan. Consider adding perennials like asparagus—they’ll reward you for years.
Preserve extras by freezing, canning, or fermenting. Test your soil after frost to adjust nutrients. Rotate crops to keep the garden healthy and avoid disease buildup.
When expanding, add beds gradually. A 25% increase each season keeps the workload manageable. Winter prep matters too—cover crops enrich soil, while mulch protects dormant plants.
Every harvest teaches something new. Start small, learn, and grow. Your efforts will bloom season after season.


