
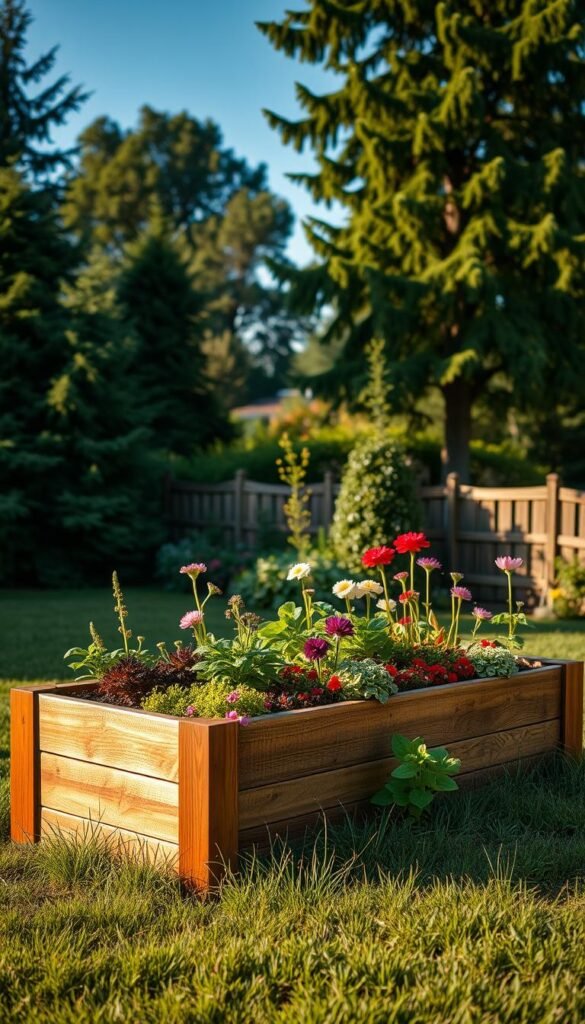
Imagine stepping outside to a vibrant, organized space where your plants thrive with minimal effort. Elevated planting areas offer precise soil management and improved drainage compared to traditional methods, making them ideal for growing everything from crisp vegetables to colorful blooms. Whether you’re new to cultivating greenery or refining your skills, these structures simplify maintenance while boosting productivity.
One major advantage is the ability to customize soil composition for specific crops. You’ll avoid common issues like compacted earth or poor drainage, which often plague in-ground plots. With costs ranging from $100 to $300 depending on size and materials, creating a durable setup is both affordable and rewarding. For guidance, check out this resource on material selection to match your vision.
This approach isn’t just practical—it’s transformative. Properly designed beds extend growing seasons and reduce physical strain, letting you focus on nurturing your harvest. Ready to start? Our detailed tutorial breaks down measurements, lumber choices, and soil calculations so you can build with confidence. Soon, you’ll enjoy fresh produce and blossoms right outside your door.
Understanding the Advantages of Raised Garden Beds

Gardening enthusiasts often discover that elevated structures revolutionize their growing experience. Unlike in-ground plots, these systems let you craft ideal conditions for roots to flourish while solving common cultivation challenges.
Tailored Earth Composition Matters
You control what goes into your planting area from day one. Mix nutrient-rich compost with sandy loam or clay soil to create the perfect balance. This customization prevents waterlogging and ensures oxygen reaches plant roots effectively.
Smart Defense Against Unwanted Visitors
Ground-dwelling pests struggle to invade when you line the base with hardware cloth. Combined with landscape fabric, this barrier stops weeds and burrowers. At waist height, tending your greens becomes effortless—no more sore knees from crouching.
| Feature | Elevated Systems | In-Ground Plots |
|---|---|---|
| Soil Customization | Full control | Limited options |
| Pest Prevention | Barrier-based | Chemical reliance |
| Accessibility | Standing height | Ground-level work |
Those dealing with heavy rainfall will appreciate how excess moisture drains faster. The elevated design prevents root rot while maintaining consistent hydration. For newcomers, this complete raised bed gardening guide simplifies the journey from setup to harvest.
Your back will thank you during long planting sessions. The reduced strain makes nurturing flowers and vegetables enjoyable rather than exhausting. Transform problem areas into productive spaces where every seed gets its best start.
Planning Your DIY Raised Garden Bed

Creating your perfect growing area starts with smart spatial awareness. Before assembling materials, grab a notebook and track light patterns across your yard for three days. Sunlight availability determines whether your tomatoes thrive or barely survive—it’s that simple.
Assessing Your Available Space and Sun Exposure
Walk your property at sunrise, noon, and dusk during planting season. Notice how shadows from fences or sheds creep across potential spots. “Plants don’t read clock faces,” says veteran grower Marie Viljoen. “They need consistent rays, not occasional glimpses.”
Mark areas receiving 6+ hours of direct light—these become prime real estate. Use free apps like Sun Seeker to predict seasonal shifts. Deciduous trees might offer summer shade but winter sun, while evergreens block light year-round.
Keep these factors in mind:
- South-facing zones capture maximum daylight in northern climates
- Morning sun dries dew gently, reducing mold risks
- Afternoon shade protects delicate greens from scorching
Sketch multiple layout options using graph paper. Leave pathways wide enough for wheelbarrows—you’ll thank yourself during harvest. Smart positioning now means fewer headaches later.
Determining the Perfect Bed Size and Layout
Getting your measurements right makes all the difference between a functional space and a frustrating one. Aim for a width under 4 feet—this lets you reach every plant without straining. Longer isn’t always better; keep beds between 6-8 feet to prevent bowing and simplify soil management.
Depth matters too. Shoot for 16-18 inches to give roots room to stretch while keeping soil costs manageable. Need mobility? Smaller beds weigh less and let you rearrange your setup as needs change. The classic 4×8-foot design remains popular for good reason—it maximizes space without sacrificing accessibility.
| Feature | Ideal Measurement | Why It Works |
|---|---|---|
| Width | 4 feet max | Easy center access |
| Length | 6-8 feet | Prevents sagging |
| Depth | 16-18 inches | Root development |
| Path Width | 28-36 inches | Equipment clearance |
Leave breathing room between beds—three feet lets wheelbarrows glide through. For larger areas, group multiple 4×8 units rather than building one massive bed. This approach works wonders when paired with square foot garden planning techniques.
Remember: Your physical comfort matters. Test different heights by mimicking reaching motions before finalizing dimensions. A well-planned layout turns maintenance into a breeze and harvests into celebrations.
Selecting the Best Wood and Materials for Longevity

The foundation of a durable planting area starts with smart material choices. Your lumber selection determines whether your structure thrives for decades or needs replacing in just a few seasons.
Comparing Redwood, Cedar, and Other Options
Redwood and cedar lead the pack for natural rot resistance. These woods contain protective oils that repel moisture and insects. Redwood shines on the West Coast, while cedar dominates Eastern markets—both require no chemical treatments.
Heart redwood offers superior density compared to standard grades. But expect higher costs: premium boards can triple your initial investment. For budget-conscious builders, pine or Douglas fir work temporarily. These softer options last 3-7 years but save money upfront.
| Material | Lifespan | Best For |
|---|---|---|
| Redwood | 15-25 years | Coastal climates |
| Cedar | 10-20 years | Humid regions |
| Pine | 3-7 years | Temporary setups |
Thicker boards (2-inch) outlast thinner 1-inch versions. Pair them with 2×6 or 2×8 dimensions for added stability. Always check for FSC certification—this ensures sustainable forestry practices.
In warm climates, consider how heat impacts material expansion when choosing boards. Inspect each piece for cracks or knots before building—flaws accelerate wear over time.
Gathering Essential Tools and Equipment

Having the right gear transforms your building experience from frustrating to fulfilling. Organize your workspace first—clutter-free surfaces prevent mistakes and keep materials within reach. Let’s break down what you’ll need to craft a sturdy, long-lasting setup.
Must-Have Tools for a Smooth Build
Start with a reliable cutting tool. A miter saw delivers clean angles for corners, while a circular saw handles straight cuts on lumber. Pair either with sharp blades designed for cedar or redwood to avoid splintering.
Your drill becomes your best friend during assembly. Use 8-gauge deck screws (2.5-3 inches) for strong joints. Keep a measuring tape handy—double-check every dimension before drilling. Don’t forget galvanized braces to reinforce long sides.
| Essential Tools | Recommended Additions | Purpose |
|---|---|---|
| Power Drill | Galvanized Mending Braces | Secure assembly & reinforcement |
| Deck Screws | Portable Workbench | Stable work surface |
| Hardware Cloth | Non-Toxic Wood Sealer | Pest protection & durability |
Safety Gear and Preparation
Protect your hands with thick gloves when handling rough lumber. Safety glasses shield your eyes from flying debris, especially during cutting. If using treated wood, wear a dust mask to avoid inhaling particles.
Set up sawhorses or a temporary workbench at waist height. This reduces back strain and improves control. Hearing protection matters too—power tools generate noise levels that can damage hearing over time.
With these tools and precautions, you’ll build efficiently while avoiding common pitfalls. Preparation now means fewer interruptions later.
Analyzing Site Location and Sunlight Patterns

Before building, map how sunlight moves across your space through the seasons. South-facing locations work best in the northern U.S., while north-facing spots shine in southern regions. Track shadows at 9 AM, noon, and 3 PM over three days—this reveals hidden shade patterns from fences or trees.
Position beds north-to-south for even light distribution. This stops tall plants from shading shorter neighbors. Leave 3 feet between structures so morning rays reach every leaf. Watch how deciduous trees create summer shade but winter sun—perfect for cool-weather crops.
| Season | Sun Angle | Plant Types |
|---|---|---|
| Spring | 45-70° | Leafy greens, peas |
| Summer | 70-90° | Tomatoes, peppers |
| Fall | 30-60° | Root vegetables |
| Winter | 25-45° | Kale, spinach |
Use free apps like Sun Surveyor to predict light changes. Pair this data with square foot gardening layout techniques for maximum yield. Remember: morning sun dries dew faster, reducing mildew risks on squash and cucumbers.
Mark problem areas where buildings cast afternoon shadows. Rotate beds yearly if needed—mobile designs let you chase optimal exposure. Your plants will reward you with stronger growth and bigger harvests!
Designing Your Raised Garden Bed Structure
Transforming your outdoor space starts with a solid blueprint. Sketching your layout helps avoid costly mistakes and ensures every board serves a purpose. Grab graph paper or use free apps like SketchUp to map dimensions before heading to the hardware store.
Visualizing Through Smart Planning
Detailed drawings reveal hidden opportunities to maximize materials. Instead of buying separate pieces for each side, plan cuts from longer boards. A 12-foot 2×6 can yield two 6-foot sections, reducing waste and trips to the store.
Material Math Made Simple
For a standard 4×8-foot frame at 16.5″ depth, you’ll need:
- 9 eight-foot 2×6 boards or 6 twelve-footers
- 1 eight-foot 4×4 post for corner support
Always verify local lumber availability first. Some suppliers stock 16-foot boards that could simplify your build. Smart calculating now prevents last-minute scrambles later.
Remember: Your sketch becomes your shopping list. Double-check measurements against local material lengths to minimize cuts. With clear plans, you’ll create sturdy structures that support seasons of growth.


