
Transforming your outdoor space doesn’t require a fortune—just a little creativity and smart planning. Many homeowners achieve stunning results by focusing on high-impact projects that blend aesthetics with practicality. Whether you’re working with $300 or $1,000, strategic choices like upcycling materials or prioritizing thrifty upgrades can make all the difference.
Successful makeovers often start with a clear vision. Instead of splurging on expensive decor, consider repurposing items like wooden pallets for raised beds or cinder blocks for rustic planters. For example, home gardening ideas that won’t break the highlight how simple swaps—like starting seeds instead of buying seedlings—can save hundreds annually. A $0.10 seed packet yields vibrant blooms for a fraction of store-bought costs!
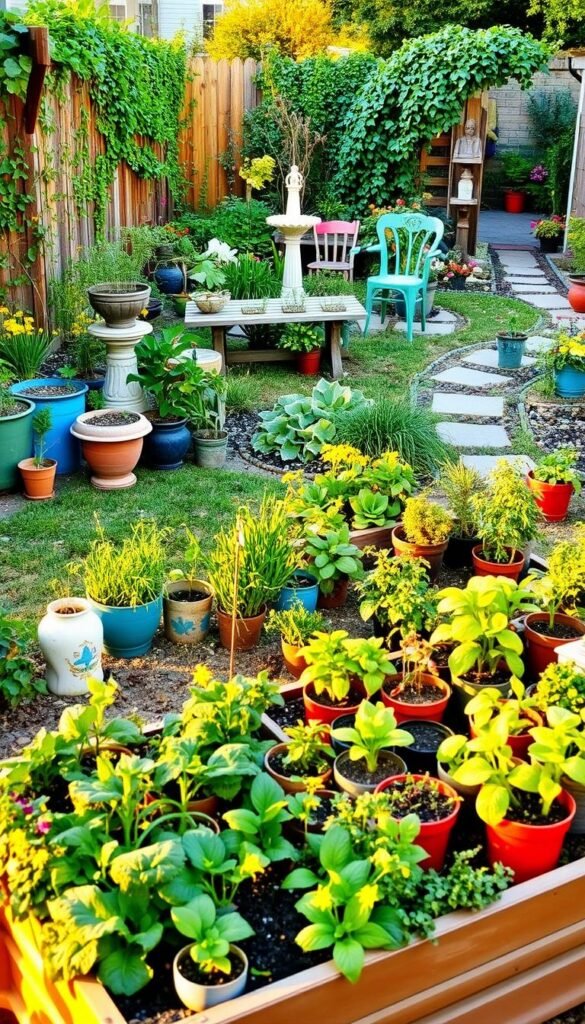
The key lies in balancing effort with impact. Projects like painting faded fences or stringing solar-powered fairy lights instantly refresh a tired backyard. Even small details, such as arranging repurposed containers or building a gravel pathway, add personality without draining your wallet.
Remember, your outdoor oasis thrives on imagination, not endless spending. With thoughtful preparation and a hands-on approach, you’ll create a space that feels both inviting and uniquely yours.
Welcome to Your Garden Makeover Adventure

Unlock the potential of your yard with a hands-on approach that celebrates your unique style. This isn’t about perfection—it’s about creating a space that feels authentically yours. Think of it as a blank canvas where every choice reflects your personality.
No landscaping degree? No problem! You’ll learn practical skills as you go, like arranging plants for visual balance or upcycling old items into functional decor. One homeowner turned vintage teacups into whimsical succulent holders—proof that creativity trumps costly materials.
Success lies in breaking projects into manageable steps. Start by sketching rough ideas, then prioritize tasks like clearing clutter or testing paint colors. Local plant swaps or community groups often offer free materials, making upgrades even more accessible.
By the end, you’ll have more than a refreshed outdoor space. You’ll gain confidence in tackling future projects and a deeper connection to your environment. Ready to dig in?
Setting Your Garden Makeover Budget and Priorities

Crafting an inviting outdoor space starts with smart financial planning. Many enthusiasts achieve stunning results between $300 and $1,000 by focusing on strategic upgrades. Begin by walking through your yard to identify areas needing immediate attention—like cracked pathways or bare corners begging for greenery.
Determining a Realistic Budget
Start with a clear spending limit based on your savings and goals. Allocate 60% to foundational changes like building raised beds or repairing fences. Reserve 30% for decorative elements like container plants, and 10% for unexpected costs. This approach prevents overspending while leaving room for creativity.
Prioritizing High Impact Projects
Focus on changes that transform how your space feels and functions. A fresh coat of paint on worn furniture often delivers more value than buying new items. Similarly, adding native plants boosts curb appeal with minimal upkeep. Pro tip: Tackle visible areas first—like entryways or seating zones—to create instant wow factor.
Social media trends can tempt you to splurge on intricate designs. Instead, stick to upgrades that align with your daily needs. A gravel pathway costs less than pavers but still adds structure. By balancing aesthetics with practicality, you’ll create lasting improvements without financial stress.
Design Ideas for an Impressive Outdoor Space

Crafting a stunning outdoor area begins with smart design choices, not deep pockets. Start by defining zones for dining, relaxation, and greenery. Use low-cost materials like repurposed bricks or wooden dividers to separate areas visually while maintaining an open feel.
Height variations work wonders in small backyards. Try tall planters with trailing vines near seating areas, paired with ground-level herbs for layered texture. Pro tip: Warm-toned decor like terracotta pots or rust-colored cushions adds cozy contrast to green spaces.
Guide the eye with focal points—a weathered bench under a tree or a repurposed vintage item as a conversation starter. Curved gravel pathways create flow, making narrow spaces feel more expansive. Stick to 2-3 complementary colors for unity without monotony.
Balance functional elements with nature’s softness. Pair geometric pavers with billowing ornamental grasses, or sleek metal accents with wildflower clusters. Match your home’s architectural style—modern lines for contemporary houses, rustic touches for farmhouse vibes.
Even simple updates like painting a shed door or arranging stepping stones can transform ordinary spaces into curated retreats. Remember: great design isn’t about filling every corner—it’s about creating moments that spark joy.
Utilizing DIY Projects for Creative Transformations

Breathing new life into your outdoor area starts with seeing potential in overlooked objects. Those cracked pots or weathered crates gathering dust? They’re gold mines for crafting personalized features that reflect your style. Best part? You’ll spend pennies while creating conversation starters.
Breathing New Purpose Into Forgotten Treasures
Old wooden pallets become rustic vertical herb gardens with minimal sanding and stain. Chipped teacups transform into quirky succulent holders—just drill drainage holes and add soil. Key rule: Always clean materials thoroughly and seal surfaces for weather resistance.
Check secondhand stores or neighborhood groups for free supplies like bricks or shutters. A coat of outdoor paint turns faded furniture into vibrant focal points. For example, personalized garden art using salvaged metal scraps adds industrial charm without the boutique price tag.
Test materials before committing. Leave wooden pieces outdoors for a week to spot warping. Use marine-grade sealant on porous surfaces like concrete. Simple upgrades—like adding casters to an old toolbox for a mobile planter—deliver function alongside flair.
Your space becomes a living scrapbook of clever reinventions. That ladder-turned-pot-stand? It’s not just practical—it tells a story. Start small, experiment boldly, and watch ordinary items become extraordinary features.
Creative DIY Planter and Vertical Garden Solutions

Elevate your greenery game by blending practicality with artistic flair. Custom planters and vertical setups let you grow more in less space while showcasing your personality. Bonus: You’ll slash costs by transforming everyday items into functional art.
Designing Unique DIY Planters
Turn forgotten items into eye-catching homes for your plants. An old toolbox becomes a rustic herb station, while cracked ceramic bowls morph into cascading succulent displays. Key tip: Drill drainage holes and line containers with landscape fabric to prevent soil loss.
“My favorite planter? A retro colander hung with chains—perfect for strawberries!” – Portland gardener
Building a Lush Vertical Garden
Wall-mounted systems maximize growing areas without sacrificing floor space. Use pallets or modular vertical garden designs to create living art on fences or blank walls. This table shows ideal plants for vertical setups:
| Plant Type | Light Needs | Water Frequency |
|---|---|---|
| Succulents | Full sun | Every 10 days |
| Ferns | Shade | Twice weekly |
| Herbs (thyme, oregano) | Partial sun | When soil dries |
Mix trailing vines with compact flowers for texture. Install drip irrigation lines with timers to simplify watering. In dry climates, add water-retaining crystals to soil mixes.
Enhancing Your Space with String Lights and Outdoor Decor
Turn your backyard into a glowing retreat using affordable and energy-efficient lighting ideas. Strategic placement of lights adds depth while highlighting your favorite features—think winding pathways or lush foliage. The right setup turns ordinary evenings into memorable gatherings, extending your enjoyment long after sunset.
Choosing Energy-Efficient Lighting
LED string lights dominate modern setups for good reason. They use 75% less energy than traditional bulbs and last up to 25 times longer. Solar-powered options shine in flexibility—place them anywhere without worrying about outlets. Pro tip: Install panels where they’ll get full afternoon sun for maximum glow time.
Warm white tones (2700K-3000K) create cozy nooks perfect for intimate dinners. Cool whites (4000K+) offer crisp illumination for reading corners or game nights. Mix both for layered effects—hang warm lights above seating areas and use cooler accents along walkways.
Creative arrangements make all the difference. Drape lights in zigzag patterns between trees for starry canopy effects. Wrap trunks with waterproof fairy lights to add dimension. Always secure cords with plastic clips instead of nails to protect surfaces.
“Solar LEDs let me light up my entire patio without raising the electric bill. Guests think I hired a pro!” – Texas homeowner
Revamping Old Furniture with a Splash of Color
Sun-bleached chairs and faded tables don’t need replacement—just a fresh coat of color to shine again. Outdoor furniture takes a beating from weather, but strategic updates can restore its charm while saving money. The secret lies in choosing durable paints and prepping surfaces properly for results that last seasons.
Start by scrubbing pieces with mild soap and water to remove dirt. Sand rough spots gently to create a smooth base for paint adhesion. For metal surfaces, use a wire brush to eliminate rust flakes. Pro tip: Let furniture dry completely overnight before painting to prevent bubbling.
Select exterior-grade formulas designed for your material—acrylic-latex works well on wood, while enamel sticks to metal and wicker. Neutral tones like slate gray or cream blend seamlessly with natural surroundings. Want bold flair? Try navy for contrast against greenery or terracotta for warm Mediterranean vibes.
“I transformed my rusty bistro set using $15 spray paint—it looks brand new!” – Colorado homeowner
Apply thin, even coats with a high-quality brush or roller. Let each layer dry fully to avoid streaks. Seal with clear outdoor varnish for extra protection against rain and UV rays. Suddenly, that tired bench becomes a vibrant focal point in your yard without draining your wallet.
Low-Cost Hardscaping with Gravel and Ground Cover Ideas
Gravel unlocks possibilities for your backyard that concrete simply can’t match. This affordable material offers endless flexibility—create winding pathways, define planting zones, or replace high-maintenance grass with decorative textures. Best part? You’ll spend far less than traditional stonework while achieving professional-looking results.
Start by removing existing grass and leveling the area. Lay landscape fabric to block weeds while allowing water drainage—a critical step for longevity. Define crisp edges using metal or plastic borders to keep stones in place. For visual drama, layer different gravel sizes. Pair chunky river rocks with fine crushed granite to create contrast.
This table shows popular gravel types and their best uses:
| Type | Best Use | Drainage | Cost per Sq Ft |
|---|---|---|---|
| Pea Gravel | Pathways | Excellent | $1.50 |
| Crushed Granite | Modern designs | Good | $2.00 |
| River Rock | Drainage areas | Superior | $3.25 |
Struggling with soggy spots? Gravel naturally improves drainage, making it ideal for low-lying zones. Swap waterlogged grass for a gravel-and-ground-cover combo—try creeping thyme between stones for fragrant greenery.
Explore styles from sleek contemporary layouts to cottage-charm circles. Backyard gravel installations adapt effortlessly to your vision. Mix warm earth tones for rustic appeal or stick to monochromatic grays for minimalist flair.
Maintenance? A quick rake keeps surfaces tidy. No mowing, fertilizing, or watering required—your weekends just got freer!
Incorporating Seasonal and Vintage Garden Decorations
Keep your outdoor area feeling alive through the months by blending rotating accents with timeless character. A few intentional swaps each season create fresh energy without overhauling your entire setup. Vintage treasures add soulful depth, turning ordinary corners into conversation starters.
Seasonal Touches for Year-Round Appeal
Swap throw pillows and table linens to mirror nature’s shifts. Spring calls for lavender-scented sachets and daffodil wreaths, while summer thrives with citrus-hued napkins and seashell centerpieces. Fall? Think burnt-orange blankets and mini pumpkin displays. These small changes make big visual impacts.
Hunt for unique vintage items at local estate sales or Facebook Marketplace. An antique watering can becomes a rustic vase for wildflowers. Chipped shutters get new life as vertical herb displays. One gardener shared:
“My favorite find? A 1950s milk crate that holds potted succulents—it’s like having living history!”
Balance temporary flair with permanent fixtures:
- Anchor spaces with evergreen shrubs or stone statues
- Use removable hooks for hanging seasonal wreaths
- Store off-season decor in labeled bins under benches
This approach keeps your garden feeling curated yet adaptable. You’ll celebrate each season’s magic while maintaining a cohesive foundation that grows with your style.
Reimagining Garden Sheds and Outdoor Seating Areas
Your garden shed is more than a storage spot—it’s a blank canvas waiting to surprise you. With fresh paint and clever tweaks, this humble structure can become a standout feature. Think of it as a bonus room that adapts to your needs, whether you crave a cozy reading nook or a potting station with organized tools.
Start by revitalizing the exterior. A coat of weather-resistant paint in sage green or navy adds instant charm. Pair it with window boxes filled with trailing petunias for a pop of color. Inside, add shelves using repurposed wooden crates to store supplies while keeping the rustic vibe.
Transform the space into a functional retreat. Clear out clutter to create a yoga studio with floor cushions, or build a fold-down desk for an outdoor office. One gardener turned theirs into a whimsical playhouse by adding chalkboard walls and fairy lights.
Don’t forget nearby seating areas! A refurbished bench or painted Adirondack chairs make perfect companions. Use durable outdoor fabrics in patterns that complement your shed’s new look. Suddenly, that forgotten corner becomes your favorite escape.


