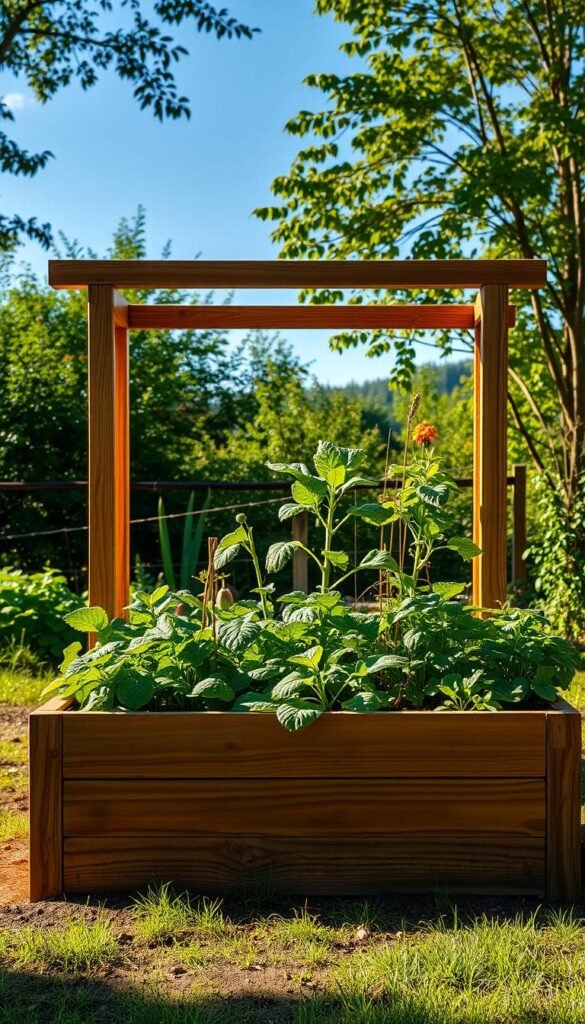
Want to grow fresh veggies without breaking the bank? Let’s talk about designing durable, budget-friendly garden beds that maximize your space. Whether you’re new to gardening or refining your green thumb, this method helps you produce more food with less effort.
Using materials like cedar wood or repurposed fence posts keeps costs low while ensuring longevity. Cedar naturally resists rot, making it perfect for outdoor use. Local lumber yards often offer scraps or discounted planks—ideal for DIY projects.
Raised designs improve soil quality and drainage, reducing weeds and back strain. They also let you control nutrient levels, giving plants a healthier start. Best of all, you can build one in an afternoon with basic tools.
Key Takeaways
- Cost-effective cedar and reclaimed materials keep projects under $22 per bed
- Improved drainage and soil control boost plant health
- Customizable layouts fit small yards or urban spaces
- Natural rot resistance extends the life of wooden beds
- Step-by-step plans simplify construction for beginners
Getting Started with Raised Garden Beds on a Budget
Small areas can yield big harvests when you elevate your approach. Raised beds turn cramped patios or narrow yards into productive plots. Let’s explore how to create these space-saving solutions without draining your wallet.

Why Raised Beds Are Ideal for Small Spaces
Vertical growing gives you more room to work. Unlike traditional rows, these setups pack plants closer while preventing overcrowding. Better drainage means roots stay healthy even during heavy rains.
Square foot gardening shines here. Dividing your bed into grids lets you grow a lot of veggies in just 16 square feet. You’ll spend less time weeding and more time harvesting ripe tomatoes or crisp greens.
Budget Considerations and Project Scope
Start by measuring your available space. A 4×4-foot design works well for beginners. Hunt for materials like old fence posts or pallet wood—they’re often free or cheap at local hardware stores.
Keep paths between beds at least 2 feet wide for easy access. This simple planning step saves frustration later. Remember: a weekend of work can give you years of fresh produce!
Understanding the Benefits of Raised Garden Beds
Transform your gardening game by lifting plants above ground level. Elevated designs solve common growing challenges while giving you precise control over your green space. Let’s break down why these setups outperform traditional methods.

Enhanced Soil Quality and Drainage
You decide what goes into your soil. Mix compost, peat moss, and perlite to create the perfect blend for your crops. Unlike ground-level plots, raised beds let you skip poor native earth entirely.
Built-in drainage stops roots from drowning during storms. Excess water flows through loose, nutrient-rich soil instead of pooling around plants. Healthier roots mean bigger harvests and fewer disease issues.
Space-Saving and Easy Maintenance
Grow more in less room with smart layouts. Square foot planting grids let you organize crops by size, maximizing every inch. You’ll spend weekends harvesting—not wrestling weeds.
Sturdy frames fastened with screws and supported by fence posts withstand years of use. Refill beds each spring with fresh compost using our complete raised bed gardening guide. Kids and pets won’t compact the soil, keeping your garden productive season after season.
Planning and Preparing Your Project Materials
Smart gardeners know preparation is half the battle. Before grabbing your tools, take time to map out your garden’s size and soil requirements. A simple tape measure and notebook will become your best allies during this phase.

Assessing Your Garden Space and Soil Needs
Start by measuring your planting area’s length and width. Multiply these numbers to calculate the amount of soil needed—most beds require 6-12 inches of depth. For a 4×4-foot frame, you’ll need about 8 cubic feet of nutrient-rich mix.
Create a checklist of materials before shopping. Cedar fence posts and ripped 2x4s form sturdy bases, while exterior-grade screws prevent rust. One gardener shared: “I saved $40 by splitting 8-foot boards into four 2-foot pieces for corner supports.”
Check local marketplaces for discounted wood or leftover construction supplies. Neighbors might offer unused planks perfect for your DIY project. Always measure twice before cutting—this step prevents costly mistakes and material waste.
Set aside a weekend afternoon for assembly. Having all tools ready saves time and keeps the process smooth. Remember, proper planning today means fewer headaches tomorrow!
Building Raised Beds for Square Foot Gardening on a Budget
Smart material choices make all the difference when creating cost-effective growing spaces. Let’s explore how to source durable components without draining your wallet.

The Importance of Using Budget-Friendly Materials
Start by prioritizing cedar over pricier options. At $3.15 per fence post, it’s a steal compared to treated lumber. One gardener noted: “I built three beds for under $65 using cedar scraps from a local mill.”
Repurposed materials add character while saving money. Check demolition sites or online marketplaces for free pallet wood. Sand rough edges, and you’ve got sturdy sides for your build raised garden project.
| Material | Cost | Lifespan |
|---|---|---|
| Cedar fence posts | $3.15/ea | 7-10 years |
| Reclaimed pallets | Free | 4-6 years |
| Pine boards | $1.50/ft | 3-5 years |
Avoid pressure-treated wood—chemicals can leach into your soil. Instead, use exterior-grade screws to assemble cedar frames. They’ll withstand weather while keeping plants safe.
Allocate funds wisely by splitting costs: 60% for wood, 30% for soil, 10% for tools. This balance ensures longevity without overspending. Remember—your budget grows more than plants; it grows possibilities!
Essential Tools and Materials for DIY Raised Garden Beds
Equipping your workspace with the right gear transforms DIY projects from frustrating to fulfilling. Let’s break down what you’ll need to craft sturdy frames that last seasons.

Tools You’ll Need for Cutting and Assembly
Start with these basics:
- Circular saw for precise wood cuts
- Cordless drill with Phillips-head bits
- Tin snips for trimming metal supports
Quality screws make or break your structure. Exterior-grade deck screws (2½ inches) hold cedar planks securely. One gardener shared: “Galvanized screws outlasted my first bed by three seasons—worth every penny!”
| Tool | Alternative | Cost Range |
|---|---|---|
| Power saw | Hand saw | $15-$120 |
| Electric drill | Manual screwdriver | $0-$80 |
| Metal shears | Hand snips | $8-$25 |
No power tools? No problem. A hand saw and elbow grease work for small projects. Keep cuts straight using a speed square—this $7 tool prevents crooked edges.
Clear 3 feet of workspace for assembly. Safety glasses and work gloves protect you during construction. Double-check measurements before cutting posts to avoid material waste.
With organized materials and proper tools, you’ll spend less time troubleshooting and more time planting. Remember: smart preparation today means fewer headaches tomorrow!
Step-by-Step Assembly Process: From Wood to Frame
Let’s turn those raw materials into a sturdy growing space. Grab your tools and follow these simple steps to create a durable frame that lasts seasons.
Preparing and Cutting Cedar or Repurposed Wood
Start by measuring your cedar fence posts. Cut 6-foot boards into 3-foot sections using a circular saw. Square off rough edges for clean joints. Pro tip: “Mark cuts with painter’s tape to prevent splintering,” suggests a seasoned DIYer.
Rip 2x4s lengthwise to create corner braces. These half-width pieces add stability without bulk. Arrange your wood pieces on a flat surface, ensuring ends align perfectly before drilling.
Securing the Frame with Screws and Supports
Connect boards at 90-degree angles using pre-cut braces. Drive two screws per joint—angled slightly for extra grip. Add a center support post midway along long sides to prevent bowing.
| Component | Quantity | Purpose |
|---|---|---|
| 3-foot cedar boards | 4 | Frame sides |
| Ripped 2×4 braces | 8 | Corner joints |
| Deck screws | 32 | Structural integrity |
Double-check every piece fits snugly before final tightening. Use a speed square to verify right angles. For raised garden bed longevity, seal screw heads with outdoor-rated wood glue.
Work with a partner to flip the frame upright—this step ensures even weight distribution. You’ll marvel at how a day’s effort yields a professional-looking structure ready for planting!
Adding Soil, Drainage, and Support Structures
Your garden’s success starts from the ground up. Proper layering techniques and structural reinforcements ensure your plants thrive while protecting your investment. Let’s explore how to build a nourishing environment that lasts.
Layering Nutrients with the Lasagna Method
Begin by lining your beds with cardboard to smother weeds. Alternate layers of grass clippings, fallen leaves, and coffee grounds. Finish with 6 inches of compost-rich soil for immediate planting.
This method mimics natural decomposition while improving drainage. One gardener reported: “My tomato yield doubled after switching to layered beds—the roots had room to breathe!”
| Layer | Material | Thickness |
|---|---|---|
| Base | Cardboard | 1/2″ |
| Middle | Yard waste | 4-6″ |
| Top | Compost mix | 6-8″ |
Drill 1/2-inch holes every 12 inches along the base boards. Line with landscape fabric to prevent soil loss while letting excess water escape. This simple step prevents root rot in heavy rains.
Reinforce corners with exterior screws and metal brackets. These additions help frames withstand soil pressure over time. Your garden will maintain its shape season after season with minimal upkeep.
Allow layers to settle for 3-5 days before planting. The top layer will compress slightly, creating ideal conditions for seeds or starters. With this foundation, your plants develop strong roots and abundant yields.
DIY Raised Garden Tips and Budget-Savvy Design Enhancements
Unlock your garden’s potential with clever hacks that stretch dollars and spark creativity. Whether you’re growing crisp greens or vibrant flowers, small tweaks can elevate both style and productivity.
Creative Use of Repurposed Materials
Old gutters become instant herb planters when mounted on fence posts. One gardener shared: “I transformed broken ladders into vertical strawberry towers—zero cost, maximum yield!” Check garage sales for:
- Chipped teacups as plant markers
- Bent tin roofing for pest-deterring edging
- Wine crates as modular growing boxes
These materials slash costs while adding personality. A comparison shows the savings:
| Item | New Cost | Repurposed |
|---|---|---|
| Planter Box | $22 | Free (pallet wood) |
| Trellis | $35 | $5 (bike wheels) |
| Edging | $1.50/ft | Scrap metal |
Optimizing Space for Square Foot Planting
Mark grids using painted twine for visual guides. Cluster plants by height—radishes beneath pole beans maximize vertical space. Add removable trellises from salvaged PVC pipes to support vining crops.
Rotate greens and flowers seasonally in the same plot. Early spring lettuce makes way for summer zinnias, then fall kale. This gardening approach keeps soil active and beds beautiful year-round.
Invest in quality corner brackets ($8/pair) to reinforce structures. While pricier upfront, they prevent costly rebuilds. Your budget-friendly garden will thrive with these strategic upgrades!
Maintenance and Long-Term Care for Your Raised Garden Beds
Your thriving garden deserves year-round attention to stay productive. Regular care keeps plants healthy and structures sturdy through changing seasons. Think of maintenance as an investment in your future harvests.
Seasonal Upkeep and Soil Replenishment
Refresh your soil each spring with 2 inches of compost. This replaces nutrients used by last season’s crops. Fall is perfect for adding shredded leaves—they’ll break down over winter, creating rich earthworms’ paradise.
Check wooden frames every 3 months. Tighten loose screws and replace rusted ones. A gardener friend once told me: “Five minutes with a screwdriver in March saved me hours rebuilding collapsed beds in July!”
| Season | Task | Time Needed |
|---|---|---|
| Spring | Topsoil refresh | 1 hour |
| Summer | Weed patrol | 15 mins/week |
| Fall | Leaf mulching | 30 minutes |
Mark your calendar for a quarterly day of care. Inspect corners for rot and ensure posts stand straight. These simple checks prevent bigger issues down the road.
Better maintenance means tastier food. Nutrient-dense soil grows vibrant veggies bursting with flavor. Your raised beds will reward consistent care with years of abundant harvests.
Keep pathways clear by trimming grass within 2 feet of beds. This stops weeds from creeping in while making gardening sessions more enjoyable. Remember—a little effort today keeps your green space thriving tomorrow!
Conclusion
Your journey to fresh, homegrown produce starts with smart design choices. By selecting cedar planks or repurposed materials, you create durable garden beds that protect plants and simplify maintenance. These elevated spaces let you control soil quality while maximizing every inch of your yard.
From measuring your space to layering nutrient-rich compost, each step builds toward a thriving ecosystem. One gardener noted: “My $22 bed grew enough greens to share with neighbors all summer!” Regular checks for loose screws and seasonal soil refreshes keep your setup productive for years.
Now’s the time to grab those fence posts and get creative. Whether adding cascading flowers along the sides or experimenting with vertical herbs, your personalized touch makes the garden bed uniquely yours. The first juicy tomato or crisp lettuce leaf will prove every moment was worth it.
Ready to dig in? Your raised garden adventure awaits—where budget meets bounty, and dirt under your nails becomes a badge of pride. Happy growing!