
What if you could grow fresh veggies while giving old materials new life? The EPA reports that reusing items cuts landfill waste by 60% and saves trees. That’s where creative DIY projects shine—especially when they blend sustainability with practicality.
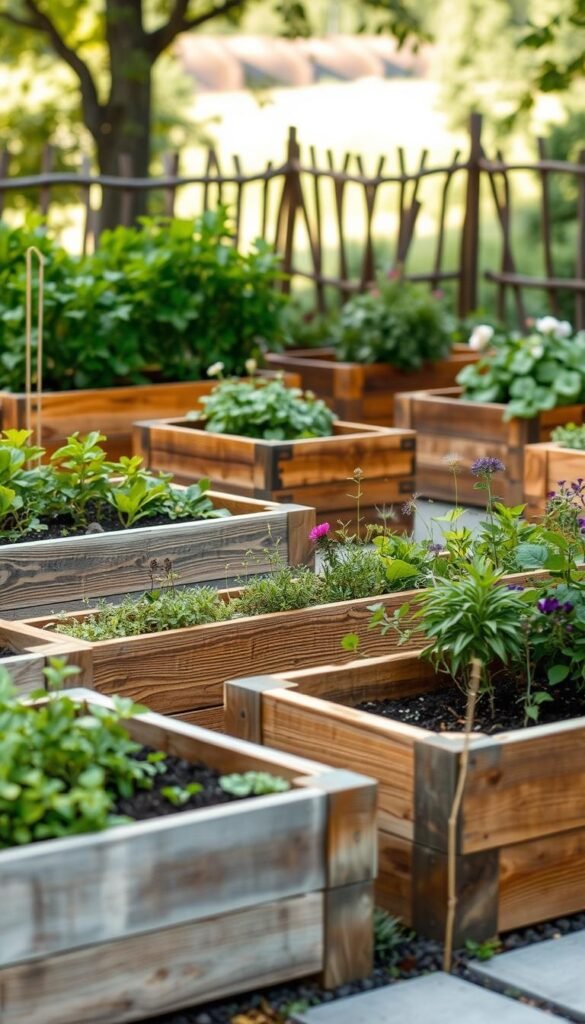
Imagine turning weathered planks from torn-down barns or fences into sturdy planters bursting with tomatoes and herbs. This approach lets you skip pricey lumber stores while keeping usable wood out of trash piles. You’re not just planting seeds—you’re nurturing the planet too.
Ready to learn how? We’ll show you where to find quality materials, prep them for outdoor use, and design beds that last. Whether you’re a seasoned grower or a first-timer, these steps make it simple to create durable, earth-friendly spaces for your plants.
By choosing recycled wood, you’ll save cash and reduce your environmental footprint. Plus, there’s nothing like the pride of crafting something beautiful from what others tossed aside. Let’s dig into techniques that’ll transform your backyard into a thriving, sustainable oasis.
Introduction to Eco-Friendly Gardening with Raised Beds

Eco-conscious gardening begins where sustainability meets creativity. By combining smart design with recycled materials, you create spaces that nurture both plants and the planet. Let’s explore how elevated planters transform ordinary yards into thriving ecosystems.
Understanding Sustainability in Your Garden
Think of your outdoor space as a living system. When you reuse materials like wood, you reduce waste and protect natural resources. This approach keeps usable items out of landfills while giving your herbs and veggies a healthy home.
Elevated planters let you control soil quality completely. Unlike traditional plots, you’re not stuck with clay-heavy earth or poor drainage. Mix compost, sand, and organic matter to create ideal conditions for roots to flourish.
Benefits of Raised Beds Over Traditional Gardens
Why bend over when you can garden at waist height? These structures minimize back strain and make weeding easier. Their compact size also lets you plant 4-5 times more densely, maximizing every inch of growing space.
Soil warms faster in spring, giving you earlier harvests. Improved drainage prevents root rot, while defined borders keep aggressive plants contained. You’ll spend less time battling weeds and more time enjoying fresh salads from your backyard.
Why Choose Reclaimed Wood for Your Project

Transform discarded materials into garden gold while keeping your budget intact. Reused lumber offers practical perks that go beyond basic sustainability—it brings history, strength, and character to your outdoor space.
Environmental Benefits and Cost Savings
Every board salvaged means one less tree cut down. Construction sites and demolition projects often toss perfectly good planks—you’ll pay 50-75% less than retail prices for these materials. Contractors might even give away old fence boards or barn siding if you ask.
Consider this: Manufacturing new lumber produces 3x more carbon emissions than repurposing existing wood. By choosing weathered planks, you’re slashing your project’s environmental impact while adding decades-old durability to your design.
Types of Reclaimed Wood and Their Advantages
Not all salvaged materials work equally well. Seek out cedar or redwood from dismantled barns—their natural oils resist rot for years without chemical treatments. Fir planks from roof construction often remain straight and sturdy despite their age.
Hardwoods like oak or black locust last longer than modern pressure-treated options. These dense varieties withstand weather extremes while developing a rich patina over time. Just check for untreated surfaces to keep your soil chemical-free.
Planning Your Raised Garden Bed Project

A well-planned garden bed begins with understanding sunlight patterns and human movement. You’ll want to balance practicality with plant needs—starting with smart measurements and ending with harvest-ready veggies.
Site Selection and Measurements
Start by walking your yard at different times. Notice where shadows fall and how light moves. Most edibles crave 6-8 hours of direct sun, so mark spots that meet this need.
Use stakes and string to outline your proposed area. Keep these essentials in mind:
- Width: 3-4 feet lets you reach the center without stepping on soil
- Height: 18-24 inches reduces bending strain
- Pathways: Leave 2-3 feet between beds for easy access
Check the ground for slopes—use a carpenter’s level to ensure even surfaces. Position your project near water sources to simplify irrigation.
Design Considerations for Accessibility and Sunlight
Align beds north-south so plants get equal light exposure. This orientation prevents taller crops from shading shorter neighbors as the sun crosses east-west.
Think beyond today’s needs. Could you add another bed next season? Leave space along one side for potential expansion. For comfort, build beds at waist height if kneeling challenges you.
Remember: Good design serves both plants and people. Wide pathways accommodate wheelbarrows, while strategic placement near your kitchen makes herb harvesting a breeze.
Gathering Reclaimed Wood and Essential Tools

Your backyard project starts with two critical steps: finding weathered materials and assembling the right gear. Let’s explore how to turn “trash wood” into garden treasures while keeping your fingers safe and your workload manageable.
Sourcing Old Wood from Fences and Barns
Start by scouting local demolition sites or chatting with neighbors replacing fences. Many contractors pay to dump materials you could take for free. One gardener’s secret: “Check Craigslist’s ‘free stuff’ section on Sunday nights—contractors post leftover lumber after weekend jobs.”
Look for these prime sources:
- Grayed cedar fence boards (resist rot naturally)
- Barn siding with tight nail holes
- Demolition site oak beams (check for termite damage)
Must-Have Tools and Safety Equipment
A circular saw and pry bar will become your best friends. But don’t skip the safety basics—steel-toe boots prevent crushed toes when moving heavy boards. Always wear ANSI-rated goggles when pulling nails; flying metal fragments cause 37% of DIY eye injuries.
Your toolkit checklist:
- Cutting: Circular saw, handsaw, clamps
- Measuring: Tape measure, speed square, level
- Safety: Work gloves, ear protection, dust mask
Pro tip: Borrow specialty tools like nail pullers from tool libraries—they’re cheaper than buying and prevent clutter. With the right boards and gear, you’ll save time and create beds that outlast store-bought kits.
Building Raised Garden Beds from Reclaimed Wood for Eco-Friendly Gardening
Transform weathered planks into sturdy growing spaces using simple techniques. The magic happens when you combine patience with practical know-how—turning potential firewood into functional art.
Reviving Old Boards Like a Pro
Start by flipping boards nail-side up. Tap exposed nail points with a hammer until they protrude ¼ inch. Grip them with vice grips or pry bar claws—twist rather than pull to prevent wood splintering.
| Tool | Purpose | Pro Tip |
|---|---|---|
| Magnetic Bowl | Collects metal bits | Attach to ladder rung |
| Angle Grinder | Removes stubborn nails | Use ⅛” cutting wheel |
| Wire Brush | Cleans wood surfaces | Scrub along the grain |
Inspect each board after cleaning. Solid sections with tight grain make perfect edges. Use split pieces as center supports—they’ll hide under soil anyway.
Customizing Layouts for Your Space
Small patios thrive with vertical designs. Stack three 6-foot fence pickets horizontally, securing them with 4×4 posts. Larger yards? Try interlocking 8-foot 2×6 boards in L-shapes for easy expansion.
Consider these size-based solutions:
- Compact (4×4 ft): Triple-layer pickets, 18″ height
- Medium (6×3 ft): Double 2×6 boards, 24″ posts
- Expansive (8×4 ft): Railroad tie corners, stacked planks
One gardener shared: “Using old porch columns as corner pieces gave my beds rustic charm while saving $40 on brackets.” Let your materials guide the design—those knots and cracks add character!
Step-by-Step Construction Process

Your hands-on journey begins with three crucial phases that transform scattered materials into a thriving ecosystem. Let’s break down each stage to ensure your project stands the test of time and weather.
Preparing the Site and Leveling the Ground
Clear your chosen area of grass and debris using a flat-edge shovel. While perfect flatness isn’t essential, address slopes exceeding 2 inches over 4 feet. Rake the ground to create a stable base—this prevents shifting and maintains structural integrity.
Assembling the Frame and Joining Corners
Cut your reclaimed boards to size: two 8-foot lengths for long sides, two 4-foot for short sides. Pre-drill holes every 12 inches along the corner joints to prevent splitting. Secure with 3-4 inch exterior-grade screws, adding metal brackets at each corner for extra stability.
| Material | Purpose | Pro Tip |
|---|---|---|
| Landscape fabric | Weed prevention | Overlap edges by 6″ |
| Galvanized screws | Frame assembly | Pre-drill pilot holes |
| Corner brackets | Structural support | Install diagonally |
| Compost blend | Soil enrichment | Mix while slightly damp |
| Wood chips | Drainage layer | Use rotting-free material |
Installing a Weed Barrier and Filling with Soil
Line the bottom with landscape fabric, extending it 2 inches up the sides. Create a drainage layer using twigs or wood chips. Fill your beds with a 60-30-10 mix of topsoil, compost, and perlite—stop 1.5 inches below the rim for mulch space.
One gardener notes: “Layering fresh compost between soil levels supercharges plant growth naturally.” Water thoroughly after filling to settle the soil before planting your first seeds or seedlings.
Incorporating Recycled Materials and Sustainable Practices
Your green space becomes a sustainability showcase when every element serves both function and ecology. Let’s explore how to blend resourcefulness with plant-friendly choices—turning waste into wealth while keeping your harvest healthy.
Selecting Safe Recycled Materials
Not all scraps belong near your snap peas. Focus on materials that age gracefully without leaching toxins. Corrugated steel roofing panels make excellent bed liners when free of rust, while concrete blocks create durable borders for herbs.
| Safe Choices | Avoid These | Why It Matters |
|---|---|---|
| Untreated oak planks | Railroad ties | Contains creosote |
| Wine barrels | Painted wood | Lead contamination |
| Bricks | Old tires | Heavy metal risk |
When sourcing roofing panels, check for sharp edges and wash with vinegar solution. One gardener shared: “I use salvaged gutter sections as strawberry planters—they drain perfectly!”
Enhancing Soil Quality with Organic Amendments
Healthy plants start with thriving soil. Mix 2 inches of compost into beds each spring, and try fish emulsion every 3 weeks for nitrogen boosts. Organic gardening basics emphasize crop rotation—swap heavy feeders like tomatoes with soil-building beans annually.
Try these additions for vibrant growth:
- Compost tea brewed from kitchen scraps
- Crushed eggshells for calcium
- Leaf mold as mulch to prevent soil erosion
Collect rainwater in repurposed barrels for irrigation. Over time, these practices create a self-sustaining system where your garden feeds itself—naturally.
Essential Tips for Maintaining Your Raised Garden Bed
Keeping your planters thriving requires smart routines that balance effort with results. With proper care, these structures can yield abundant harvests while conserving resources. Let’s explore simple habits that protect your investment and keep plants vigorous.
Watering Smartly
Drip irrigation systems use 35% less water than sprinklers while delivering moisture directly to roots. Install a timer to water early mornings—this reduces evaporation by 70% compared to midday sessions. Check soil moisture by pressing a finger 2 inches deep; if it feels dry, it’s time to hydrate.
Weeding Efficiently
Lay cardboard beneath mulch to block sunlight and smother weeds naturally. This technique prevents 60% of unwanted growth within two years. Pull survivors after rain when roots release easily, and consider transitioning from traditional rows to tighter plant spacing, which shades out competitors.
Feeding Your Soil
Mix 1 inch of compost into the top layer each spring to replenish nutrients. For quick boosts, brew compost tea using worm castings soaked in water for 48 hours. Test soil pH every two years—most crops thrive between 6.5 and 7.0. Adjust with lime or sulfur as needed for optimal plant health.


