Welcome to your roadmap for growing lush, flavorful berries that thrive in your unique environment. Whether you’re planting your first patch or refining an existing garden, success starts with one critical decision: which types to grow. Get this right, and you’ll enjoy overflowing baskets of sweet, chemical-free fruit. Get it wrong, and even the healthiest soil and sunniest spot won’t save your harvest.
Years ago, I learned this lesson the hard way after moving to Central Oregon. Dozens of plants struggled through late frosts and yielded tiny, lackluster berries. Turns out, I’d overlooked a simple truth: not every strawberry suits every climate. Some excel in short summers, while others need mild winters to flourish.
This guide cuts through the guesswork. You’ll discover how to match varieties to your local weather patterns, soil type, and growing goals. We’ll explore pest-resistant options that thrive without synthetic sprays and share tips for maximizing flavor and yield.
By the end, you’ll know exactly which plants belong in your garden—and how to turn those first blossoms into a cascade of juicy, sun-ripened rewards. Ready to skip the trial-and-error phase? Let’s dig in.
Introduction to Organic Strawberry Gardening

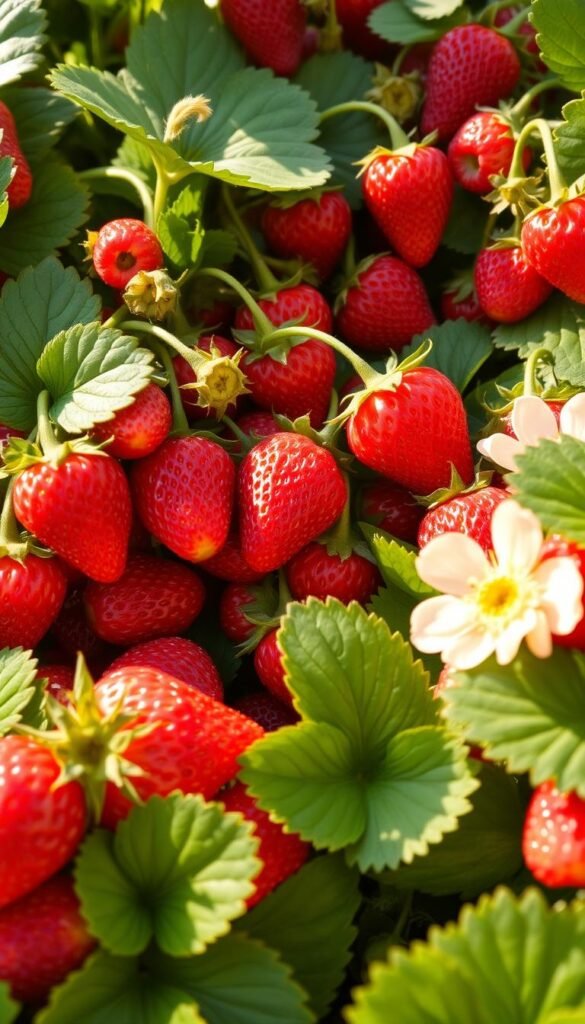
Imagine biting into a plump, sun-warmed berry bursting with flavor you’ll never find in stores. Organic homegrown strawberries offer more than taste—they’re a gateway to healthier eating and sustainable living. Let’s explore why these ruby-red gems deserve space in your garden.
Why Go Organic With Your Berry Patch?
Homegrown strawberries outshine store-bought ones in every way. You’ll avoid synthetic pesticides while getting 40% more antioxidants than conventionally grown berries. Organic methods also:
- Attract pollinators like bees and butterflies
- Build richer soil through natural composting
- Reduce plastic waste from supermarket packaging
Your First Season: Setting Realistic Goals
New growers often make one mistake—expecting instant results. Most strawberry plants need time to establish. Junebearing types, for example, focus on root growth their first year. You’ll pinch off early blooms to ensure bigger harvests later.
Here’s what to anticipate:
- Minimal fruit in year one (but worth the wait!)
- Stronger plants that resist pests naturally
- Gradual cost savings versus buying organic berries
By year two, your patience pays off. Healthy plants produce abundant fruit for up to five years. You’ll taste the difference in every juicy bite while knowing exactly how your food was grown.
Exploring Strawberry Types: Junebearing, Everbearing, and Day-Neutral

Did you know strawberry plants respond to sunlight like nature’s alarm clock? Their flowering patterns hinge on day length and temperature, creating three distinct personalities in your garden. Let’s decode what makes each type unique.
Key Characteristics and Differences
Junebearing varieties are the sprinters of the strawberry world. They explode with one massive crop each year, usually in late spring. These short-day plants flower when daylight dips below 10 hours, then switch to growing runners once days lengthen.
Everbearing strawberries play the long game. As long-day plants, they need 12+ hours of sunlight to initiate blooms. You’ll get two harvest waves: early summer and late August. Perfect for gardeners who want fresh berries for multiple recipes.
Day-neutral types break all the rules. They’ll produce flowers and fruits continuously from May through October, ignoring daylight changes. Just keep soil temperatures between 40-90°F, and they’ll keep pumping out berries.
Harvest Timing and Production Insights
Here’s what to expect from each type:
- Junebearing: 2-4 week bonanza with large, juicy fruits (great for preserves)
- Everbearing: Two moderate harvests (ideal for fresh eating)
- Day-neutral: Steady supply of smaller berries (perfect for snacking)
Watch summer heatwaves – temperatures above 90°F can fry blossoms on everbearing and day-neutral plants. Pro tip: Use shade cloth during heat spikes to protect your crop.
Choosing the Right Varieties: Best Strawberries for an Organic Strawberry Garden

Not all strawberries thrive under the same sun and soil. Your garden’s success hinges on matching plants to your area’s unique weather quirks. Let’s explore how to pick winners that’ll flourish in your backyard.
Top Performers for Every Growing Condition
Four strawberry varieties consistently deliver stellar results. Charlotte reigns supreme for flavor—its berries burst with honey-like sweetness. For scorching summers, Eversweet laughs at 95°F heat while pumping out giant fruits. Coastal growers swear by Seascape, which balances productivity with juicy, crimson berries. Need longer shelf life? Albion’s firm texture keeps berries fresh for days.
Smart gardeners mix multiple types from the same category. This strategy stretches your harvest window by 3-6 weeks. Imagine picking fresh berries from June through September!
Three factors determine ideal matches:
- Winter chill hours (200-800 depending on variety)
- Average summer temperatures
- Local pest/disease pressures
Always verify plants at purchase—reputable nurseries label varieties clearly. One gardener’s “Albion” turned out to be generic everbearing after mislabeling. Don’t let that happen to you!
Preparing Your Organic Strawberry Garden

The secret to a thriving strawberry patch lies in where and how you plant. Like real estate, berry success boils down to location, layout, and smart planning. Let’s transform your yard into a fruit-producing powerhouse.
Site Selection and Garden Planning
Start by scouting areas with 6-8 hours of daily sunlight. Morning sun dries dew quickly, reducing fungal risks. Avoid low spots where frost settles—cold air sinks, and tender blossoms hate surprise chills.
Drainage matters as much as sunshine. Test soil by digging a 12-inch hole and filling it with water. If it drains slower than 1 inch per hour, consider raised beds. One gardener shared: “Switching to mounds saved my plants from root rot during rainy springs.”
Wind protection boosts yields. Plant near fences or shrubs that break gusts but allow airflow. Ideal spots balance shelter with open space to prevent humidity buildup.
Three layout options work best:
- Raised beds: Warmer soil, fewer weeds
- Containers: Perfect for small spaces
- In-ground rows: Traditional approach
Space plants 18 inches apart in staggered rows. This gives runners room to spread without crowding. Companion planting with onions or thyme deters pests naturally.
Smart planning today means fewer headaches tomorrow. Once your site’s ready, we’ll dive into creating nutrient-rich soil—the foundation of organic success.
Soil Preparation for Vibrant Growth

Great berries begin with great dirt—but what makes soil truly strawberry-ready? Your plants’ performance hinges on creating a nutrient-rich foundation that balances drainage with moisture retention. Let’s transform your garden bed into a berry-producing powerhouse.
Incorporating Organic Compost and Amendments
Start by testing your soil’s pH. Strawberries thrive in slightly acidic conditions (5.5-6.5). If your test shows alkaline tendencies, mix in peat moss or pine needles. One Oregon grower shared: “Adding composted coffee grounds lowered my pH naturally while boosting nitrogen levels.”
Work 3-4 inches of organic compost into raised beds or planting rows. This improves texture and feeds beneficial microbes. For container gardens, blend equal parts compost, coconut coir, and perlite. These lightweight mixes prevent soggy roots while retaining nutrients.
Boosting Soil Nutrition with Bonemeal
Give new plants a phosphorus kickstart by adding 1 tablespoon of bonemeal to each planting hole. This organic amendment releases nutrients slowly, supporting root development and flower production. Pair it with these soil enhancers:
- Aged manure: Improves fertility (wait 4 months before harvesting)
- Leaf mold: Increases water retention in sandy soils
- Worm castings: Provides trace minerals for sweeter berries
Time your amendments wisely. Mix compost 2-3 weeks before planting to let microbes activate. For no-dig gardening methods, layer amendments on the soil surface and let earthworms do the mixing. Healthy soil means resilient plants that shrug off pests and produce bumper crops year after year.
Planting Methods: Bare Root Plants vs. Runners
The journey from dormant roots to juicy berries begins with smart planting choices. Whether starting with bare-root stock or propagating runners, your approach impacts plant vitality and future harvests. Let’s explore both paths to berry success.
How to Prepare and Plant Bare Root Strawberries
Bare-root strawberry plants need careful hydration before hitting soil. Soak them in cool water for 4-6 hours in a shaded spot—this wakes up thirsty roots. Use a dibber to create wide holes, spacing each plant 12-18 inches apart. This gives new plants room to spread without competition.
Plant in early spring when soil reaches 50°F. Crowns should sit level with the surface—burying them invites rot. Gently fan out roots like octopus arms for better nutrient absorption. Water deeply, then mulch with straw to retain moisture.
Best Practices for Using Strawberry Runners
Established plants send out runners in late summer. Choose vigorous ones with 2-3 leaves and visible roots. Peg them into small pots filled with compost while still attached to the mother plant. This lets them draw energy while developing independence.
Snip connections after 4-6 weeks, then transplant in spring. Limit each parent plant to 3-4 runners—too many drain resources needed for flowers and fruit. Prioritize quality over quantity for robust strawberries that thrive organically.