
Want fresh greens even when frost hits? A cold frame is your secret weapon. These simple structures shield plants from harsh weather, letting you harvest longer in spring and fall. Gardeners in chilly areas like Minnesota use them to turn short growing seasons into year-round success.
Maria Genovese, a Vermont Master Gardener, swears by them: “With a well-placed frame, I pick lettuce in December!” You don’t need fancy tools—old windows or PVC pipes work perfectly. The Midwest Regional Climate Center maps help time setups for your zone.
Best part? Even beginners can build one. Protect seedlings, grow hardy crops, and enjoy homegrown food beyond summer. Ready to try?
Why Cold Frame Gardening Basics Help You Extend Your Growing Season

Ever wish you could harvest crisp veggies long after summer ends? A cold frame acts like a cozy blanket for your plants, shielding them from biting frost and harsh wind. These simple structures trap the sun’s warmth, creating a microclimate 5–14°F warmer than outside—perfect for stretching your garden’s productivity.
How Cold Frames Protect Plants from Frost and Wind
Unlike flimsy row covers, a sturdy cold frame blocks icy gusts and insulates against sudden temperature drops. Research shows windbreaks can double seedling growth compared to exposed plants. Here’s how protection methods stack up:
| Method | Frost Protection (°F) | Best For |
|---|---|---|
| Cold Frame | Down to 15°F | Winter harvesting |
| Row Covers | Down to 25°F | Early spring starts |
| Milk Jug Cloches | Down to 30°F | Individual plants |
Early Spring and Late Fall Harvest Benefits
With a south-facing cold frame, you can sow seeds 4–6 weeks earlier in spring and keep picking greens deep into fall. Hardy crops like kale, spinach, and broccoli thrive in these conditions. A Minnesota gardener reported harvesting lettuce in December—proof that extend your growing season is possible even in chilly climates.
Pro tip: Pair your frame with black plastic mulch to boost soil warmth. The result? A garden that defies the calendar.
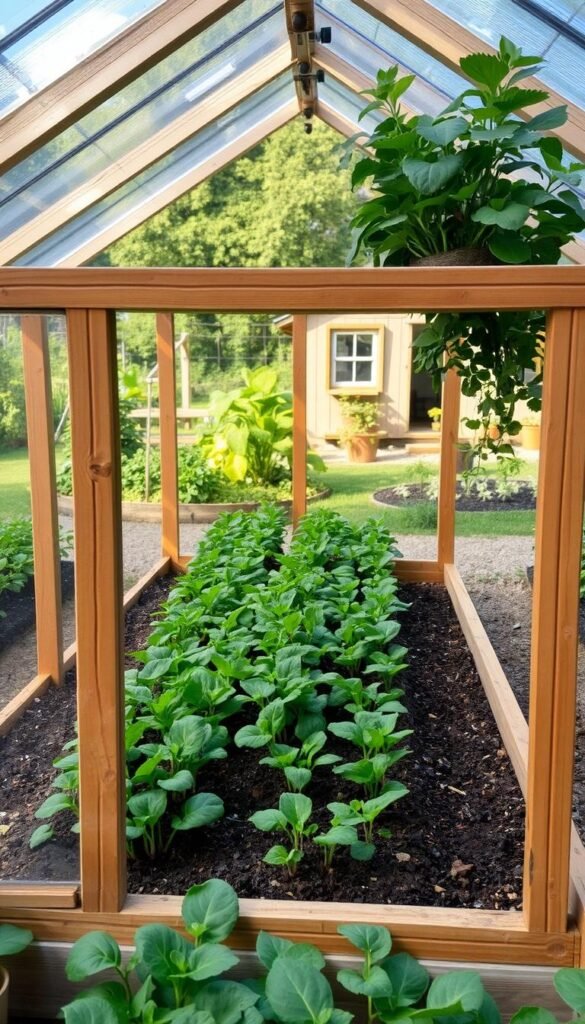
Building Your Cold Frame: Simple Materials and Steps

Turn spare materials into a plant-protecting powerhouse with a DIY cold frame. With salvaged glass and basic wood, you’ll create a microclimate for hardy greens. Best part? It costs less than store-bought kits.
Finding and Repurposing Old Windows
Scout local salvage yards or contractors for free 4x3ft windows. Portland gardener Liam Carter shares: “My frame uses discarded storm windows—they’re thick enough to trap heat but lightweight for easy lifting.” Ensure the glass is crack-free for durability.
Essential Tools and Lumber Measurements
Grab these tools: a cordless drill, measuring tape, and oil-based paint (to weatherproof wood). Cut plywood to these exact sizes:
| Piece | Dimensions |
|---|---|
| Front | 9″x48″ |
| Back | 15″x48″ |
| Angled Sides | 15″x36″x9″ |
Assembling the Frame and Attaching Hinges
Secure the frame with galvanized hinges—they resist rust. Use adjustable props to vent the lid on warm days. Pro tip: Loop paracord around open lids to prevent wind damage.
With these steps, your cold frame will shield plants for seasons to come.
Choosing the Perfect Spot for Your Cold Frame

Dream of fresh salads when snow covers the ground? Location decides whether your plants thrive or barely survive. Pick wisely, and your setup becomes a heat-trapping champion.
Sun Exposure and Wind Protection Tips
South-facing spots capture 50% more sun, according to horticulture studies. Use a compass app to align the frame perfectly. Block icy wind by placing it near fences or shrubs.
Vermont gardener Elise Rivera shares: “My raised bed against the house stays 10°F warmer—thanks to wind protection.” Avoid low areas where frost settles.
South-Facing Placement for Maximum Warmth
Angle the lid steeply in winter to grab weak sun. Dig a 6″ trench on the north side and fill it with straw for insulation. This maximizes sunlight exposure year-round.
Pro tip: Paint the back black to absorb extra heat. Your garden will thank you with crisp greens long after neighbors’ plots fade.
Preparing Soil and Planting Inside a Cold Frame

Warm soil equals happy plants—here’s how to achieve it. The right prep lets you grow crisp vegetables even as temperatures drop. Focus on three keys: heat retention, hardy crops, and smart spacing.
Soil Warming Techniques
Black plastic raises soil temps by 5°F, while clear plastic adds 14°F but needs weed control. Lay sheets 1–2 weeks before planting for faster germination. For raised beds, mix compost into the top 12″ to boost warmth and drainage.
| Material | Temp Increase | Best Use |
|---|---|---|
| Black Plastic | 5°F | Early spring planting |
| Clear Plastic | 14°F | Fall crops (watch for weeds) |
| IRT Green Mulch | 8°F | Melons/squash |
Top Cold-Tolerant Crops
Spinach, Swiss chard, and overwintering onions thrive in chilly soil. These vegetables handle frost and need minimal care. For roots like carrots, ensure 12″ depth in beds.
Spacing and Watering Tips
Avoid overcrowding—give leafy greens 6″ space. Use drip irrigation under mulch to prevent dry soil. Pro tip: Water in the morning to reduce nighttime frost risk.
Daily Maintenance and Temperature Control

Keep your plants thriving with smart temperature control. A well-tuned setup balances warmth and airflow, preventing stress during unpredictable weather. Just 5 minutes of daily checks can double your harvest potential.
Smart Ventilation Strategies
Open the lid when heat exceeds 75°F. Use adjustable wooden stakes to prop it open—this allows gradual airflow without shocking plants. Vermont gardener Maria Genovese advises: “Vent in the morning, then close by 3 PM to trap energy for chilly nights.”
Wireless thermometers give real-time alerts for sudden changes. During unseasonably warm days, drape shade cloth over the frame. Tilt lids slightly to reduce condensation buildup.
Adapting to Weather Swings
Secure row covers with landscape staples when storms approach. For extreme temperature drops, add foam board insulation along the north side. This blocks wind while reflecting sun.
Rotate crops every 14 days to prevent pests. In the top tier of your frame, grow quick-turnover greens like arugula. Their shallow roots adapt well to changing conditions.
Seasonal Adjustments for Year-Round Use
Transform your garden into a year-round haven with simple seasonal tweaks. A well-tuned setup adapts to winter chills and spring thaws, ensuring continuous harvests. Whether insulating against frost or prepping for early planting, these strategies keep your environment productive.
Winter Insulation: Mulch and Tarps
When temperatures drop, layer straw mulch over beds or drape tarps to trap heat. Studies show this combo maintains soil temps above freezing—critical for root survival. For extreme cold:
- Wrap frames with bubble wrap or old blankets during polar vortices
- Replace summer vegetables with winter-hardy varieties by late October
- Use black plastic to absorb daytime warmth
Spring Transition Tactics
As days lengthen, repurpose your frame to harden off seedlings. Minnesota’s soil temp maps help pinpoint the ideal date for spring planting. Follow these steps:
- Gradually open lids over 7 days to acclimate plants
- Rotate crops—plant peas after spinach to replenish soil
- Test pH biweekly; adjust with compost for nutrient balance
Pro tip: Angle lids steeper in early spring to capture low sunlight. Your season of abundance starts here.
Start Your Cold Frame Garden Today for Fresh Harvests Tomorrow
Ready to enjoy homegrown veggies through winter? A cold frame lets you harvest crisp greens for 8+ months—no fancy materials needed. Repurpose old windows to build one for free, unlike $300 store-bought kits.
Johnnie Brook Creative proves their durability: Their 15-year-old frame still shelters plants during Vermont winters. Grab our free planting calendar for zones 3–7 to time crops perfectly.
Build yours this weekend! With basic tools and salvaged glass, you’ll trap the sun’s energy and outsmart pests. As master gardener Maria says: “Every frosty morning is a harvest opportunity!”


