
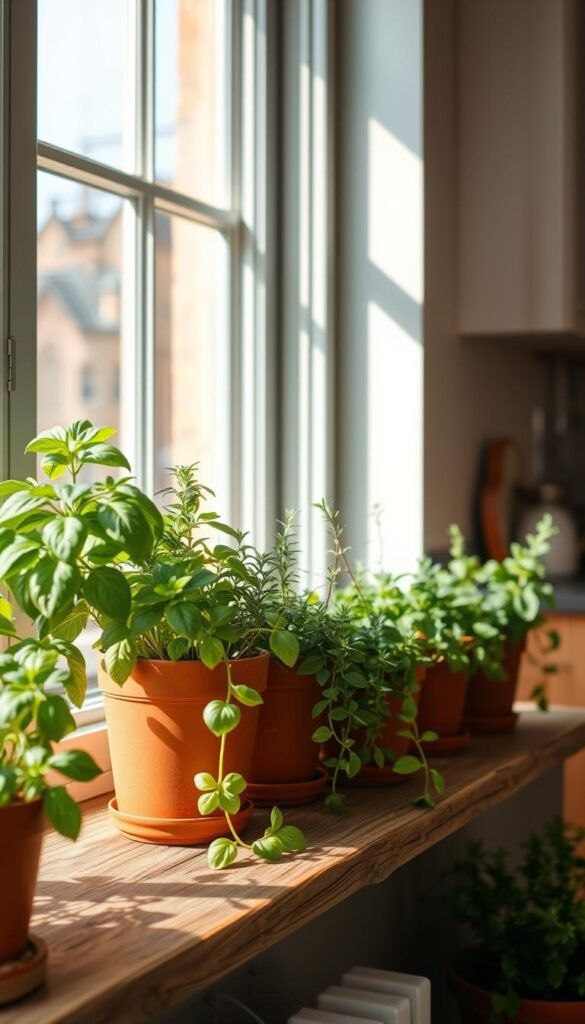
Imagine snipping basil for your pasta or mint for your tea without stepping outside. Whether you’re in a studio apartment or have just a sunny windowsill, growing fresh flavors is simpler than you think. Potted plants offer a flexible way to bring nature indoors, turning cramped corners into vibrant green spaces.
This guide walks you through every stage – from picking the right pots to keeping your plants happy. You’ll discover how even a few square feet can yield enough oregano for pizza night or rosemary for roasted veggies. No backyard? No problem. Balconies, countertops, and fire escapes become perfect spots for greenery.
Why settle for dried spices when live options taste better? Homegrown herbs add bright flavors to meals and make your space feel alive. We’ll share smart tips for choosing soil that drains well and containers that suit your style. Soon, you’ll have a mini oasis that’s both pretty and practical.
Ready to transform that empty corner? Let’s dig into the secrets of successful small-space growing.
Getting Started with Your Kitchen Herb Garden

Your windowsill could be the start of a flavorful adventure. Growing fresh seasonings at home puts vibrant tastes within reach while cutting grocery bills. Best of all, you don’t need fancy tools or a green thumb to begin.
Why Fresh Beats Store-Bought
Store-bought herbs often wilt quickly and cost $2-$4 per bunch. Compare that to a $3 plant that keeps giving for months. Homegrown options pack more nutrients too – studies show they retain 30% more antioxidants than dried versions.
| Cost per Month | Flavor Intensity | Convenience | |
|---|---|---|---|
| Store-Bought | $10-$15 | Medium | Limited shelf life |
| Homegrown | $1-$3 | High | Always available |
Making the Most of Your Area
Start by observing light patterns. Most herbs need 4-6 hours of sunlight daily. No south-facing window? Try compact varieties like chives that tolerate shade. For tight spots, stack vertical planters or use hanging pots.
Grocery stores sell live basil and mint plants year-round – perfect starter options. Repot them in quality soil, water when the top inch feels dry, and watch your culinary corner thrive.
Container Gardening Hacks: Create a Kitchen Herb Garden in Any Space

Limited square footage becomes a non-issue when you embrace this adaptable approach. Unlike traditional methods, pot-based cultivation lets you control every aspect of your plants’ environment. You’re no longer at the mercy of outdoor weather patterns or curious critters.
Smart Solutions for Small Spaces
Dedicated planters with multiple compartments keep your thyme and oregano neatly separated. These systems prevent root competition while maximizing vertical space – ideal for narrow countertops. Self-watering designs take the guesswork out of hydration, especially helpful for busy urban dwellers.
Mint serves as a perfect starter plant, growing vigorously even in modest conditions. Its trailing stems can cascade from hanging pots, adding visual interest. Other low-maintenance options like parsley and lemon balm adapt well to indoor light cycles.
| Feature | Standard Pots | Specialized Planters |
|---|---|---|
| Space Efficiency | Single plants | Multi-herb capacity |
| Water Management | Manual watering | Built-in reservoirs |
| Mobility | Heavy when filled | Lightweight materials |
Rotate your planter weekly to ensure even sun exposure. Use a simple moisture meter (or your finger) to test soil before watering. With these strategies, you’ll enjoy fresh garnishes even during winter storms or summer heatwaves.
Pro tip: Place aromatic varieties near cooking areas for easy access while sautéing. The scent alone will make your kitchen feel like a gourmet restaurant.
Choosing the Perfect Containers and Soil

What makes a pot more than just decor? Your plants’ health depends on smart material choices and earth that breathes. Let’s explore how to pair style with functionality for thriving greens.
Material Matters
Ceramic pots add charm but can crack in frost. Lightweight plastic works for renters who move often. Fabric grow bags offer superior airflow – great for moisture-sensitive roots. Match your selection to both your space’s aesthetics and your herbs’ needs.
| Material | Pros | Cons |
|---|---|---|
| Terracotta | Natural look, porous | Heavy, dries quickly |
| Resin | Weather-resistant | Less breathable |
| Metal | Modern style | Overheats roots |
Earth and Water Balance
Drainage holes are non-negotiable – aim for at least ¼ inch width. Line oversized openings with coffee filters to keep soil in place. Use quality potting soil mixed with perlite for faster water movement.
Root rot sneaks up when moisture lingers. A 2-inch gravel layer at the pot’s base helps excess water escape. Test drainage after planting: water should flow freely from the bottom within 30 seconds. Refresh soil every spring to maintain nutrients and texture.
Gathering Essential Tools and Supplies

Building your herb-growing toolkit feels like prepping for a culinary adventure. You’ll need just a few basics to start strong. Let’s explore smart options that balance function with budget-friendly creativity.
Must-Have Gardening Tools for Your Herb Planter
Start with these essentials:
- A compact trowel for potting mix transfers
- Pruning snips for precise harvesting
- Watering can with a narrow spout
- Reusable plant markers
Repurpose household items to save cash. Old yogurt containers become seedling starters when poked with drainage holes. Chopsticks work as plant stakes, while mason jars double as propagation stations. For plant identification, paint wooden clothespins or use wine corks on skewers.
When selecting a planter, consider your herbs’ growth habits. Basil needs deeper roots – choose pots at least 8 inches tall. Compact herbs like thyme thrive in shallow trays. Metal containers offer modern flair but line them with plastic to prevent rust stains.
| Supply | Purpose | DIY Alternative |
|---|---|---|
| Potting mix | Nutrient-rich base | Compost + perlite blend |
| Drainage layer | Prevents root rot | Broken terra cotta pieces |
| Plant labels | Organization | Painted rocks |
Mix two parts potting soil with one part coarse sand for better drainage. Add slow-release fertilizer pellets during planting for steady nutrition. With these supplies ready, you’re set to grow flavors that outshine store-bought jars.
Step-by-Step Guide to Planting Your Herbs

Transform your windowsill into a living spice rack with these easy planting steps. You’ll need just 20 minutes and basic supplies to set up a thriving edible display.
Prepping Your Planter
Start with clean drainage: Check your pot’s bottom holes – they should be pencil-width. Cover them with coffee filters to keep soil in while letting water flow out. This prevents messy leaks and protects roots from sitting in moisture.
Fill halfway with a 3:1 potting mix and perlite blend. The gritty texture helps oxygen reach roots while holding nutrients. Press gently to eliminate air pockets, leaving 2 inches below the rim for watering space.
Smart Plant Placement
Arrange taller plants like rosemary in the center, surrounded by medium growers like basil. Trailing varieties like oregano belong near edges. Leave 3-4 inches between each to allow airflow and future growth.
Water thoroughly until liquid flows from the bottom. Wait 2 hours, then check soil moisture – it should feel like a damp sponge. If puddles form, add more perlite to your mix next time.
Pro tip: Label stems with washi tape on chopsticks until you recognize leaf shapes. Rotate pots weekly so all sides get equal light exposure for balanced growth.
Creative Solutions for Limited Space Herb Gardening

Your spice rack just got a sustainable upgrade. Transform forgotten household items into charming homes for greenery. Upcycled planters save money, reduce waste, and let you put together custom growing stations that fit your space perfectly.
From Trash to Treasure
Clean tin cans become rustic herb pots when painted and hung with twine. Drill drainage holes in their bottoms, then cluster them on a wall-mounted board. Lemon balm thrives in these shallow containers, releasing citrusy scents as you brush past.
Repurpose a shoe organizer into a vertical garden. Fill each pocket with soil and plant compact varieties like thyme or oregano. This setup uses unused wall space while keeping herbs right at eye level for easy snipping.
| Container Type | Best Herbs | Space Saved |
|---|---|---|
| Mason jars | Basil, mint | Windowsill-friendly |
| Gutter sections | Chives, parsley | Vertical surfaces |
| Teacups | Dwarf lavender | Countertop corners |
Old colanders make excellent hanging planters – their holes provide built-in drainage. Line them with burlap to hold soil, then add trailing plants like creeping rosemary. These airy displays grow fresh flavors without crowding your counters.
Try painting mismatched mugs with chalkboard labels for a cohesive look. Cluster them near your coffee station with peppermint and chamomile. Rotate the mugs weekly so each plant gets equal light exposure.
Caring for Your Indoor Herb Garden

Keep your green friends thriving with simple daily habits. Indoor conditions demand different care than outdoor plots, but with a few adjustments, your plants will reward you with vibrant growth. Start by observing leaves daily – they’ll tell you when something’s off.
Watering, Light, and Temperature Tips
Check soil moisture every morning by sticking your finger an inch deep. Water only when dry, aiming for the base to avoid leaf rot. Most herbs prefer 65-75°F – keep them away from drafty windows or heating vents.
South-facing windows provide ideal light, but east-facing ones work too. Rotate pots 180 degrees every Wednesday and Sunday for even growth. If leaves yellow, try moving plants 6 inches farther from the glass.
Pruning, Harvesting, and Ongoing Maintenance
Snip mint weekly to encourage bushier growth – always cut above leaf nodes. For rosemary, wait until stems are 6 inches tall before trimming. Harvest in the morning when oils peak for maximum flavor.
Wipe leaves monthly with a damp cloth to remove dust. Replace topsoil every 8-10 weeks to refresh nutrients. Want fresh herbs right when cooking? Keep a small planter near your stove for instant access to basil or thyme.
Pro tip: Use harvested stems to propagate new plants. Place cuttings in water until roots form, then transplant to soil. This free method keeps your herb gardens productive year-round.
Troubleshooting Common Gardening Challenges
Even thriving herb gardens hit snags sometimes—here’s how to spot trouble early. Many issues stem from too much love (yes, overwatering counts!) or uninvited guests. Let’s tackle these hurdles head-on with simple fixes.
Rescuing Waterlogged Roots
Yellow leaves? Mushy stems? Your plants might be drowning. Check drainage holes first—they should let water flow freely. If soil stays soggy for days, mix in perlite or sand to improve airflow around roots herbs.
| Symptom | Quick Fix | Prevention |
|---|---|---|
| Wilting despite wet soil | Remove plant, trim dark roots herbs | Use pots with 3+ drainage holes |
| White crust on soil | Flush with distilled water | Water less frequently |
| Fungus gnats | Sticky traps & cinnamon sprinkle | Let soil dry between waterings |
Outsmarting Pests Naturally
Notice tiny webs or sticky residue? Spider mites love basil. Wipe leaves with diluted neem oil weekly. For oregano’s aphid issues, blast them off with water. Thyme rarely has pests but watch for mealybugs—dab them with alcohol swabs.
Adjust care routines throughout the day. Morning checks help catch problems early. If leaves droop by afternoon, move plants away from hot windows. Post your trickiest cases on gardening forums—experienced growers love sharing solutions!
Wrapping Up Your Indoor Herb Garden Journey
Your journey from soil to seasoning starts with a single pot. You’ve learned to choose pots that breathe, mix nutrient-rich soil, and position plants for maximum growth. Now, your windowsill bursts with fragrant basil, earthy rosemary, and peppery oregano – all within arm’s reach while cooking.
Remember these essentials: check soil moisture daily, rotate plants weekly, and trim regularly to encourage bushier growth. Those clever upcycled planters prove you don’t need fancy gear to grow fresh flavors. A mason jar or old colander can become a thriving home for mint or lemon balm.
Picture plucking thyme for Sunday roast or garnishing cocktails with homegrown mint. Each snip saves grocery trips while connecting you to nature’s rhythms. Share your triumphs – maybe that first pesto made with your basil – and inspire others to start their edible oasis.
Ready for more? Explore advanced techniques like propagating cuttings or creating themed herb trios. Your kitchen’s new greenery isn’t just decoration – it’s a living, breathing testament to your growing skills. Every leaf whispers, “You’ve got this.”


