
Does your yard feel messy or unfinished? Crisp boundaries between planting areas and open spaces can instantly elevate your property’s appearance. Well-maintained borders don’t just look tidy—they block weeds, keep grass in check, and add structure to your landscape.
You might think achieving this polished look requires expensive tools or professional help. Not true! With simple techniques and a little effort, you can create stunning results that boost curb appeal. This guide shows you how to revitalize overgrown areas using materials you might already own.
We’ll cover budget-friendly methods suitable for all skill levels. Whether you prefer natural curves or geometric lines, you’ll find solutions that match your style. Learn how proper edging protects flower beds while giving your entire yard a cohesive, intentional design.
By the end, you’ll know exactly how to turn uneven margins into eye-catching features. Let’s explore practical steps to make your outdoor area look professionally designed—without the high cost.
Understanding the Benefits of Clean Garden Borders
Sharp dividers do more than just look pretty. They create visual order in your outdoor areas while solving common yard problems. Think of them as functional artwork that keeps your property looking its best year-round.
Visual Harmony Made Simple
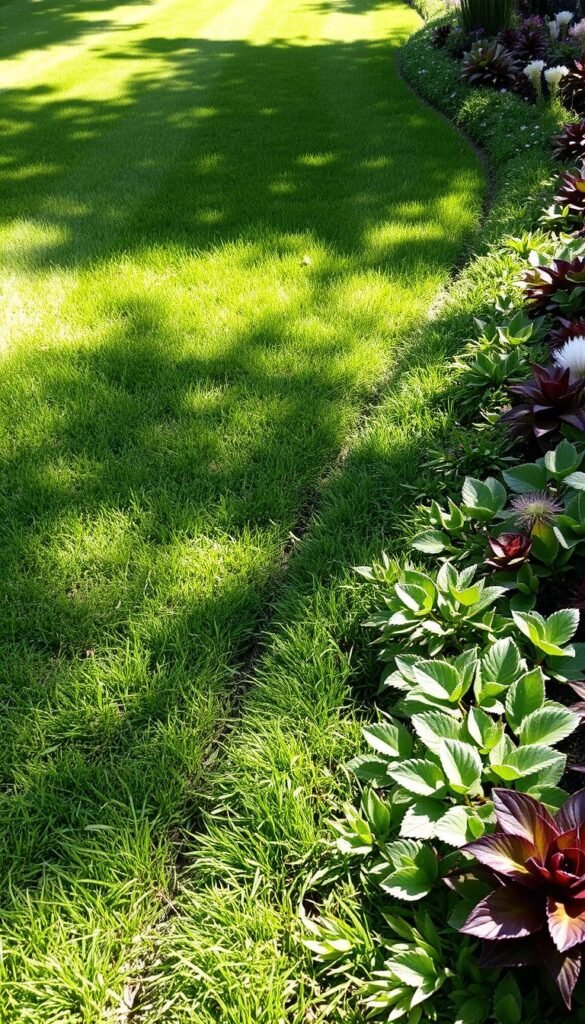
Neat lines between flower beds and walkways give your space a polished look. This separation makes colorful blooms pop against green grass. You’ll notice how defined pathways guide the eye through your yard, creating natural flow.
Smart Yard Care Solutions
Say goodbye to weekly battles with stray grass blades. Clear dividers act as physical barriers, keeping turf where it belongs. Your string trimmer will work less, and weeding becomes quicker since invaders can’t easily cross established boundaries.
Properly installed dividers help water drain away from delicate plants. This protects roots during heavy rains while reducing soil erosion. Over time, you’ll spend less on plant replacements and chemical treatments.
Choosing the Right Edging Materials for Your Garden

Your material selection shapes both your landscape’s appearance and functionality. With options for every budget and design preference, understanding key differences helps you make informed choices that last.
Budget-Friendly Options
Plastic and vinyl strips lead the pack for affordability. These materials bend easily around curves, making them ideal for organic-shaped flower beds. While less durable than pricier alternatives, they’re perfect for temporary designs or renters.
Metal edging offers a mid-range solution with upgraded resilience. Aluminum or steel strips create crisp lines that withstand foot traffic and weather shifts. Though installation requires more effort, their sleek profile elevates your space instantly.
High-End Material Considerations
Natural stone and brick deliver unmatched elegance. Flagstone or cobblestone borders become permanent landscape features, though they demand higher upfront costs. For creative gardening ideas, try mixing reclaimed bricks with native rocks for character.
Consider long-term value when investing in premium materials. While stone requires professional installation, it adds curb appeal that boosts property value. Maintenance? Nearly zero—just occasional weed removal between pavers.
Planning and Designing Your Garden Border

Great landscape designs begin with smart planning. Before grabbing tools, map out how your borders will enhance both function and beauty. This phase lets you create a roadmap for transforming ordinary spaces into intentional, eye-catching areas.
Assessing Your Yard’s Blueprint
Walk your property to spot weak spots. Look for places where grass creeps into planting zones or where mulch spills onto paths. These trouble areas need clear lines to restore order. Note how sunlight and foot traffic affect each zone—this shapes your final design.
Bringing Ideas to Life
Lay garden hoses where you want borders. Adjust curves until they feel natural. For straight edges, try chalk lines or painter’s tape. Pro tip: Step back frequently to check proportions from different angles. Your goal? Balanced shapes that guide the eye smoothly.
Matching Your Home’s Personality
Choose border styles that echo your house’s architecture. Sleek metal strips suit modern facades, while rustic stones complement farmhouse vibes. Think of your landscape as an extension of your living space—every line should feel intentional.
| Home Style | Design Approach | Material Suggestions |
|---|---|---|
| Traditional | Symmetrical lines | Brick, cast iron |
| Modern | Geometric shapes | Corten steel, concrete |
| Cottage | Soft curves | Reclaimed stone, wood |
Always leave room for plants to grow. Wider beds near mature shrubs prevent future overcrowding. Remember: strong designs balance open spaces with lush planting zones for year-round appeal.
Preparing Your Lawn for Edge Conversion

Proper preparation transforms your yard work from frustrating to fulfilling. Before shaping crisp dividers, you’ll need to set the stage for success. This phase ensures your tools work efficiently and prevents surprises during installation.
Clearing Debris and Overgrown Grass
Start by removing rocks, twigs, and hidden objects near your lawn margins. Check for sprinkler heads or utility lines using a metal detector or local service maps. Overgrown grass along boundaries? Trim it back with shears for precise cuts.
Moist soil makes root removal easier. Wait 24-48 hours after rain—damp earth helps tools slice through turf smoothly. Mow the area first to expose hidden obstacles and create uniform working conditions.
Marking Your New Border Lines
Visual guides prevent wavy or uneven results. Bright spray paint works best for curved designs, while string lines suit geometric shapes. Adjust markings until they feel natural with your landscape’s flow.
| Marking Tool | Best For | Pro Tip |
|---|---|---|
| Spray Paint | Organic shapes | Use neon colors for visibility |
| String & Stakes | Straight lines | Check alignment with a level |
| Garden Hose | Testing curves | Walk the path before cutting |
Double-check measurements from multiple angles. Step back frequently—what looks straight up close might appear crooked from your porch. Remember: preparation time directly impacts your final results!
Converting existing lawn edges into clean, defined garden borders

Transform your landscape with precise cuts that create lasting structure. This hands-on phase turns your markings into crisp divisions between planting zones and open spaces. Proper technique here determines how well your bed edges withstand weather and growth.
A Step-by-Step Process
Grab a sharp spade and position it vertically along your marked line. Push straight down through the turf using steady pressure—imagine slicing butter. Complete this initial cut along the entire border.
Shift to the inner side of your outline. Angle the spade 45 degrees toward the trench you just made. Remove excess soil and grass roots in wedge-shaped sections. This “Victorian trench” method creates a natural barrier against creeping grass.
Maintain 4-6 inches of depth as you work. Check periodically with a ruler—consistency prevents weak spots. Clear debris immediately to keep your workspace manageable.
Common Pitfalls to Avoid
Rushing leads to wavy lines and uneven depths. Work in 3-foot sections, refining each before moving forward. Tired arms cause mistakes—take water breaks and reassess your progress.
| Mistake | Consequence | Smart Fix |
|---|---|---|
| Shallow cuts | Grass invades beds | Use depth markers |
| Uneven angles | Weak edge structure | Check with level |
| Delayed cleanup | Hardened soil clumps | Remove as you go |
Adjust curves by viewing them from your home’s windows. What looks perfect at ground level might appear crooked from higher viewpoints. Remember: patience now means less maintenance later!
Applying Trenching Techniques for a Neat Edge

Creating crisp garden borders starts with mastering trenching fundamentals. This method forms physical barriers that keep plants contained and grass at bay. Let’s break down how to achieve clean lines that last through seasons.
Essential Tools and Proper Angles
Grab a sharp spade—its flat edge slices through turf like a knife. Position it vertically along your marked line. Push straight down 3 inches, creating your initial cut. This first step determines your border’s starting point.
Angle your tool 45 degrees inward for the second slice. The sloped side of your trench blocks grass roots while directing water flow. For curved designs, a half-moon edger offers better control than standard shovels.
Establishing the Correct Depth
Consistency matters most. Use a ruler to check 4-inch depth every few feet. Deeper cuts weaken over time, while shallow trenches invite weeds. Remove excavated soil immediately—pile it on a tarp for easy cleanup.
Smooth the inner slope gently downward. This lets mulch settle naturally and prevents erosion. Remember: precise angles and uniform depth make maintenance easier for years to come!
| Tool | Best Use | Pro Tip |
|---|---|---|
| Flat Spade | Straight lines | Sharpen monthly |
| Half-Moon Edger | Curved designs | Wet blade for clean cuts |
| Garden Trowel | Detail work | Use for final smoothing |
Installing Edging Materials and Tools
Wondering which edging materials best suit your landscape? The right choice balances durability, style, and installation effort. Let’s explore popular options that create crisp lines while matching your home’s personality.
Flexible Solutions for Curved Designs
Plastic strips win for quick installations. Their bendable nature hugs organic shapes without cracking. While less durable than other materials, they’re perfect for temporary beds or rental properties.
Modern and Traditional Choices
Steel edging tool kits create razor-sharp lines that elevate contemporary spaces. Powder-coated options resist rust, maintaining their sleek look for decades. For classic charm, interlocking bricks add warmth to cottage-style gardens.
| Material | Durability | Best For |
|---|---|---|
| Plastic Strips | 2-5 years | Rental properties |
| Steel Edging | 15+ years | Modern landscapes |
| Concrete | Permanent | High-traffic areas |
| Bricks | 20+ years | Traditional designs |
Concrete borders demand careful planning but offer unmatched permanence. Pre-formed sections simplify installation, while poured versions allow custom shapes. Always use proper edging tools—metal cutters for steel, masonry saws for concrete.
Remember: Thicker strips prevent warping in frost-prone areas. For brick or stone layouts, prepare a gravel base to ensure stability. Your chosen materials should complement both your home’s style and maintenance preferences!
Caring for and Maintaining Your Edge Throughout the Seasons
Keep your landscape looking sharp year-round with smart upkeep habits. Regular attention prevents small issues from becoming major headaches. Timing your efforts with nature’s rhythms makes the work feel effortless.
Spring and Summer Edging Tips
Early spring is prime time to redefine boundaries after winter’s wear. Clear stray grass roots and reshape trenches before plants awaken. Pair this maintenance with your first lawn care schedule adjustments for efficiency.
Through summer’s growth spurts, plan quick weekly checks. Trim encroaching blades after mowing—this keeps edges crisp with minimal effort. Hotter months demand lighter touch-ups rather than deep cuts to protect stressed plants.
Fall and Winter Maintenance Strategies
Autumn prepares your borders for colder days. Remove fallen leaves that trap moisture and invite rot. Apply fresh mulch to insulate roots while reinforcing divider lines.
Winter calls for protective measures. Avoid heavy tools on frozen ground—use hand pruners for stray growth. Monitor erosion after storms and note areas needing spring repairs. A little seasonal care now saves hours come blooming time.


