
Imagine stepping into your backyard to gather armfuls of vibrant, long-stemmed blossoms ready for arranging. Creating a dedicated space for specialty plants opens new creative horizons – especially when you focus on varieties bred for their durability and visual impact. Unlike typical landscape selections, these specimens prioritize qualities that matter most when bringing beauty indoors.
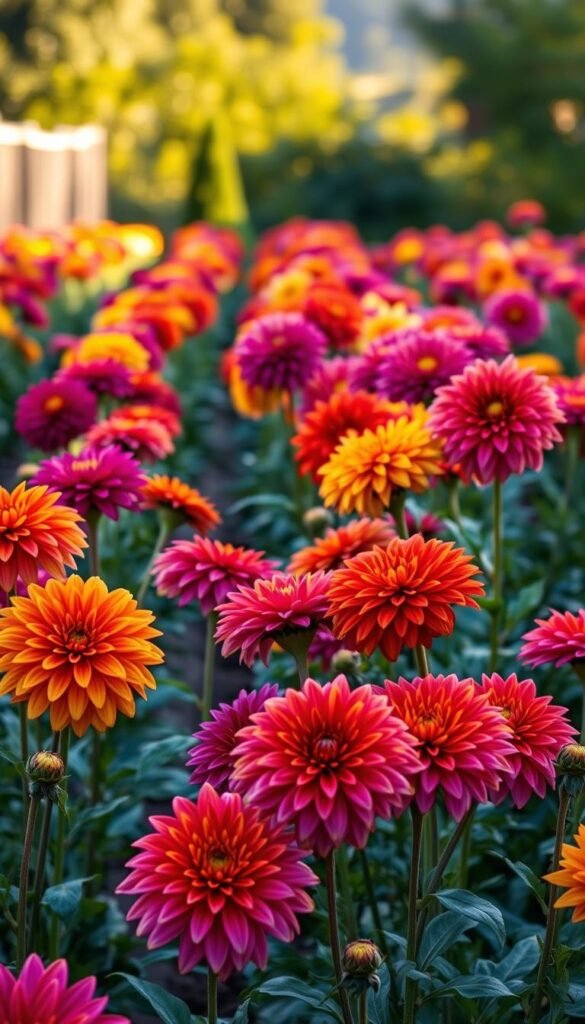
You’ll find certain types stand out for their 18-24 inch stems and petals that resist wilting. Ball-shaped varieties particularly shine, offering up to five days of freshness in water – perfect timing for celebrations needing one-day wow factor. Their color range spans sunset oranges to velvety purples, letting you craft arrangements that match any season or theme.
Timing your plantings ensures a steady supply from midsummer through fall’s first frost. Many growers stagger tubers for continuous harvests, pairing early and late bloomers. This approach works beautifully for beginner-friendly flowers that thrive with basic care, though sun exposure and proper spacing remain crucial.
Whether preparing for weddings or simply brightening your kitchen table, understanding these plants’ unique strengths helps maximize their potential. You’ll soon discover how strategic variety selection transforms ordinary cuttings into memorable floral statements.
Getting Started with Your Dahlia Cutting Garden

Creating a space dedicated to harvesting stems requires a fresh perspective. Unlike ornamental beds, this setup focuses solely on producing stems that shine indoors. You’ll need to embrace plants that might appear scraggly but deliver jaw-dropping blossoms perfect for arrangements.
Understanding the Purpose of a Cutting Garden
Professional growers often joke that their plots look “messy but magical.” That’s because they prioritize stem length and bloom durability over neat foliage. Your goal? Grow specimens that channel energy into flower production rather than maintaining tidy shapes.
Essential Tools and Materials
Success starts with the right gear. Sharp bypass pruners ensure clean slices that heal quickly, while sanitized buckets prevent bacterial buildup. Make sure your toolkit includes these non-negotiables:
| Tool | Purpose | Maintenance Tip |
|---|---|---|
| Pruning Shears | Precise stem cuts | Disinfect after each use |
| 5-Gallon Buckets | Hydrate blooms immediately | Bleach weekly |
| Water Thermometer | Maintain 65°F water | Calibrate monthly |
Sterilizing tools isn’t just for hospitals – it’s critical for extending vase life. A quick dip in diluted bleach solution keeps buckets free from slime-causing microbes. Pair this routine with strategic planting schedules, and you’ll keep your spaces blooming from July through October.
Selecting the Perfect Dahlia Varieties

Your variety picks directly impact how long arrangements stay fresh and how easily they adapt to different designs. Ball-shaped types lead the pack with their layered spherical blooms that maintain form better than open-faced cousins. Their secret? Tightly packed petals that lock in moisture and resist drooping.
Vase Life Superstars
Clearview Peachy sets the standard with two-week staying power – triple the average. Its sturdy stems shrug off handling, while sunset-toned petals add warmth to any container. For beginners, Cornel Bronze delivers reliable performance with copper-hued blossoms that complement both rustic and modern styles.
Color Strategy Matters
Versatile picks like Coralie let you pivot from summer pastels to rich autumn palettes. Consider these top performers:
| Variety | Color Profile | Vase Days | Best For |
|---|---|---|---|
| Brown Sugar | Cinnamon rust | 10-12 | Fall arrangements |
| Chimacum Troy | Deep wine | 8-10 | Dramatic contrasts |
| Caitlin’s Joy | Shimmering gold | 9-11 | Wedding accents |
Darker hues like Chimacum Troy’s burgundy add depth to bouquets, while peachy tones bridge seasonal transitions. Pair early bloomers with late performers for continuous color from July through frost.
Soil Preparation and Intensive Spacing Techniques

Transform your growing space into a powerhouse of productivity through smart soil work and layout design. Professional growers achieve triple yields not by magic, but through strategic bed preparation and spacing innovations that turn limited areas into high-output zones.
Preparing Heavily Amended Beds for Success
Think of your planting area as a five-star hotel for roots. Mix 4 inches of compost into the top 12 inches of soil, creating a fluffy texture that holds moisture without waterlogging. Add these amendments per 10 sq ft:
| Amendment | Purpose | Application Rate |
|---|---|---|
| Worm Castings | Microbe boost | 1.5 cups |
| Bone Meal | Root development | 1 cup |
| Kelp Meal | Stress resistance | 0.5 cups |
This nutrient-rich foundation lets plants form robust root systems. One flower farm reported 233% more stems after switching to amended beds compared to their old unimproved soil.
Implementing Grid-Style Planting for Maximum Yield
Ditch single-file rows for a chessboard pattern. Stagger plants in offset lines to utilize every inch. See how grid planting outperforms traditional methods:
| Method | Plants per 70ft Bed | Support Needs |
|---|---|---|
| Traditional Rows | 140 | Individual stakes |
| 12×18″ Grid | 466 | Group support netting |
Closely spaced specimens create a living trellis – stems gently brace neighbors against wind. This approach works wonders for farms aiming to maximize production without expanding acreage. Just remember: intensive planting demands consistent watering and biweekly fertilizer applications.
Planting Strategies and Daily Garden Care

Mastering plant placement transforms your growing space into a stem-producing powerhouse. The right techniques boost both quantity and quality while reducing maintenance headaches. Let’s break down the methods professional growers use to achieve jaw-dropping results.
Proper Planting Depth and Orientation
Bury tubers 4-6 inches deep with the eye facing upward – this small bump near the stem base determines growth direction. Space them 18 inches apart to prevent overcrowding. One Oregon grower reported 37% more stems after adjusting planting angles to 45 degrees, which encourages stronger root development.
Daily care starts with morning watering at the soil line to avoid leaf diseases. Check these signs weekly:
- Yellowing leaves (overwatering)
- Crispy edges (thirsty plants)
- Stunted growth (nutrient deficiency)
When gathering stems, slice 18-24 inches below the bloom just above leaf nodes. This triggers two new shoots per cut – a trick that tripled harvests for Michigan flower farmers. Remember: varieties from different climates might sulk for a year before thriving. One grower’s ‘Café au Lait’ plants took three summers to reach full potential but then produced 200 blooms annually.
Consistency matters most. Plants monitored daily develop fewer pests and bounce back faster from summer storms. Stick to routines, and you’ll see healthier specimens each season.
Effective Pruning, Deadheading, and Support Methods

Transform your pruning routine into a growth engine for healthier specimens and nonstop blossoms. While many gardeners focus on aesthetics, cutting-focused growers prioritize practices that maximize stem production and longevity.
Techniques to Encourage New Growth
Professional growers treat deadheading like clockwork. Instead of snipping faded petals, remove the entire stem at its base using the same method as proper deadheading techniques. This approach:
- Triggers two new shoots per cut
- Prevents disease by eliminating decaying material
- Maintains clean stem lines for arrangements
Skip the traditional pinching method. Strategic harvesting naturally controls height while boosting yields. One California farm increased production by 40% after switching to this system.
Clear the lower 6 inches of every stem. Exposed bases allow air movement that:
- Reduces fungal risks by 65%
- Makes insect inspections easier
- Encourages stronger root development
Support systems adapt to your spacing strategy. Tightly planted specimens form natural grids where stems support neighbors. For wider beds, use horizontal netting at 18″ and 36″ heights to prevent drooping.
Dahlia Cut Flower Garden: Grow Showstopping Blooms for Bouquets
Professional growers operate by a simple rule: harvesting shapes future growth. When you remove stems at their main junctions, plants redirect energy into creating new shoots designed for your vase. This “train-as-you-cut” approach yields increasingly better results each season.
Commercial operations demand specimens with 12-15 inch stems – a standard home growers can adopt. Here’s how home and pro practices compare:
| Aspect | Home Garden | Pro Standard |
|---|---|---|
| Minimum Stem Length | 10 inches | 15 inches |
| Plant Height | 3-4 feet | 5-6 feet |
| Weekly Harvests | 8-12 stems | 30-50 stems |
That seemingly harsh cut removing unopened buds? It’s actually a growth trigger. One New York flower farm increased marketable stems by 62% after switching to this method. Your plants learn to prioritize strong vertical growth over lateral branching when harvested this way.
Taller specimens naturally develop longer stems – that’s why cutting varieties tower over landscape types. Regular harvesting at 18-24 inches teaches plants to focus resources upward. Within three seasons, many growers match commercial stem lengths while maintaining smaller-scale charm.
Remember: every snip sends a message. Consistent cuts below leaf nodes tell your plants “more like this, please”. It’s how hobbyists transform backyards into boutique flower sources – one strategic harvest at a time.
Harvesting Techniques for Long-Lasting Cut Flowers
The secret to vibrant arrangements starts before the first snip. Timing your harvests perfectly ensures specimens stay fresh longer while protecting local pollinators. Let’s explore how professionals balance plant health with post-harvest performance.
Optimal Cutting Times and Stem Selection
Gather stems either at dawn when dew lingers or after sunset when pollinators finish their work. Bees often rest inside larger blossoms during midday heat – wait until twilight to avoid disturbing them. Choose stems with firm, unblemished bases that can support heavy flower heads.
For events happening tomorrow, select blossoms that just opened fully. Need blooms to last 5 days? Cut them when petals are halfway unfurled. Check freshness by flipping the flower over – if rear petals feel supple, you’ve got 48+ hours of vibrancy.
Caring for Harvested Blooms Immediately
Never let freshly gathered stems sit without hydration. Use buckets filled with 6-8 inches of cool water (55-65°F ideal) to prevent shock. This depth supports proper uptake while keeping foliage dry to inhibit bacteria.
Clean containers matter as much as water temperature. One study showed 72% longer vase life when using sanitized buckets versus reused ones. Match your harvest quantity to arrangement needs – gather extra stems two days before big events for peak freshness.
| Harvest Timing | Bloom Stage | Expected Vase Days |
|---|---|---|
| Morning Dew | Half-open | 7-10 |
| Evening Cool | Fully open | 3-5 |
Rotate your cutting schedule based on upcoming needs. Specimens gathered Tuesday morning work beautifully for Friday centerpieces, while same-day blooms shine at weekend markets. With practice, you’ll sync nature’s clock with your creative plans.
Conditioning and Handling Your Fresh Dahlias
The final flourish in creating stunning arrangements happens after harvesting. How you treat stems in the first hour determines whether petals stay perky for days or droop prematurely. Follow these pro techniques to maximize your blooms’ potential.
Using Clean Tools and Water Baths for Conditioning
Start with surgical-level cleanliness. Scrub buckets with bleach solution after each use—bacteria-laden containers shorten vase life dramatically. Sharp pruners make cleaner cuts that make it easier for stems to drink, while dull blades crush delicate tissues.
After cutting, plunge flowers into 55°F water immediately. Let them rest overnight in a cool, dark space—this “chill shock” slows petal aging. Many growers skip commercial flower food, as plain water often works better when changed daily.
For events needing peak performance, try a Quick Dip treatment. This hydrating solution boosts water uptake in thick-stemmed varieties. Remember: every step from snip to vase impacts how long your cut flowers radiate beauty.


