
When frost covers your yard and gardening gloves gather dust, indoor container arrangements become your creative escape. These living displays let you experiment with textures, colors, and natural elements while staying cozy indoors.
Unlike small potted succulents or basic houseplants, these setups mirror outdoor gardening on a smaller scale. You’ll work with varied heights, trailing vines, and eye-catching accents to build depth. Think of it as designing a tiny ecosystem where every detail matters.
This guide reveals how to combine stones, ground covers, and foliage for showstopping results. You’ll learn techniques used by professional landscapers – adapted for tabletops and shelves. Whether you’re a seasoned grower or new to greenery, these projects keep your skills sharp through every season.
We’ll break down each step: selecting containers, balancing plant needs, and arranging materials artistically. By the end, you’ll create centerpieces that spark joy all winter long – and impress guests with your nature-inspired artistry.
Introduction to Indoor Dish Gardens

Imagine bringing a slice of nature’s harmony into your living room. These curated indoor container setups trace their roots to 19th-century Japan, where botanists crafted miniature landscapes to display plant artistry. Unlike standard houseplants, these arrangements blend textures and heights like a painter’s canvas – think bonsai meets modern decor.
Bright spaces near windows become perfect homes for these living ecosystems. Professionals originally used them as marketing tools, showcasing rare species in compact displays. Today, they’re a creative way to merge gardening with interior design – no backyard required.
Here’s what makes them special:
- Combines visual principles from floral arrangements and landscape design
- Thrives in natural light without demanding outdoor space
- Evolves over time as plants grow and interact
Modern enthusiasts love how these tabletop gardens challenge traditional potted displays. Instead of single specimens, you’re building layered scenes where every element – from pebbles to trailing vines – plays a role. It’s horticulture meets storytelling, right on your windowsill.
What is a Dish Garden?

Picture this: a thriving mini-landscape that fits on your coffee table. A dish garden groups multiple greenery varieties in one shallow container, creating a tiny world of textures and colors. Unlike single-plant pots, these arrangements let you play with design principles while keeping care simple.
Defining the Concept
These setups use containers no deeper than 4 inches – think ceramic bowls or wide trays. You’ll combine slow-growing houseplants that enjoy similar light levels but can have different watering needs. There’s a clever trick here: some growers keep each plant in its nursery pot, hiding them under decorative moss or stones.
Why does this work? It’s like staging a photo shoot – you control every element without disturbing roots. This non-committal approach means you can swap out a fern for a peperomia next month. No repotting stress, no messy soil spills.
Unique Benefits for Indoor Spaces
Tabletop ecosystems solve two problems at once. First, they maximize limited space by layering vertically. Second, they let you mix plants that normally wouldn’t share a pot. A cactus can neighbor a humidity-loving nerve plant if each stays in its own container.
Beginners love how forgiving this method is. Overwatered one specimen? Just lift its pot out to dry. Want to test color combinations? Rearrange till you nail the look. It’s gardening without the guesswork – or the muddy knees.
Essential Supplies for Your Dish Garden

What separates a basic plant grouping from a showstopping display? The right foundation. Four key elements transform ordinary containers into living art: a waterproof base, moisture management layers, curated greenery, and finishing touches that hide the mechanics.
Container Options and Considerations
Your vessel sets the stage – literally. Waterproof containers prevent leaks on furniture, but you’re not limited to traditional pots. Upcycle vintage tins, enamel trays, or even chipped teacups for quirky charm. One rule applies: if it holds water, it works. For heavy arrangements, choose weighted bases like stoneware urns to prevent tipping.
Drainage Materials and Top Dressing
Skip the messy soil with smart layering. Gravel remains popular for airflow, but try volcanic pumice stones if weight matters. “Lightweight drainage material lets you rearrange plants without straining wrists,” notes a Brooklyn-based plant stylist. Finish with sphagnum moss or crushed shells to mask nursery pots while locking in moisture.
Balance practicality with personality – a marble-chip topping elevates office displays, while cocoa husks add earthy warmth to bohemian spaces. Your final layer isn’t just decoration; it’s the glue holding your miniature world together.
Preparing Your Workspace and Tools

Creating a functional workspace transforms your plant projects from chaotic to controlled. Start by clearing a flat surface in your kitchen or dining area – anywhere with easy access to water and natural light. Keep paper towels handy for quick spills, and lay down a silicone mat to protect surfaces.
Setting Up Your Garden Station
Your toolkit matters more than you think. A petite watering can with a slender spout lets you target specific pots without disturbing neighboring greenery. “The right spout shape prevents overwatering accidents,” says a Chicago-based plant stylist. If space allows, keep these essentials within arm’s reach:
- Pruning shears for trimming wayward leaves
- Soft-bristle brush for cleaning decorative stones
- Measuring cup for consistent watering
The pot-within-container method shines here. Since you’re not using loose soil, your kitchen stays crumb-free. Simply nestle nursery pots into your chosen vessel, then camouflage them with moss or gravel. This approach makes rearranging plants as simple as swapping coffee mugs.
Make sure to test your layout before finalizing. For more ideas on elevating your indoor greenery projects, explore our guide to space-efficient plant styling. A well-organized station turns maintenance into meditation rather than a chore.
Dish Garden Designs to Impress: Layering Rock, Moss, and Plants

Ever tried painting with plants instead of brushes? That’s the magic of planning your tabletop ecosystem. Start by sketching rough ideas on paper – circles for tall specimens, squiggles for cascading vines. This blueprint helps avoid overcrowding and ensures each element shines.
The Thrillers, Fillers & Spillers Formula
Professional designers swear by this trio approach. Your thriller acts as the star – maybe a spiky dracaena or flowering kalanchoe. Surround it with leafy fillers like peperomia or ferns. Finally, add spillers that drape over edges, such as string-of-pearls or creeping fig.
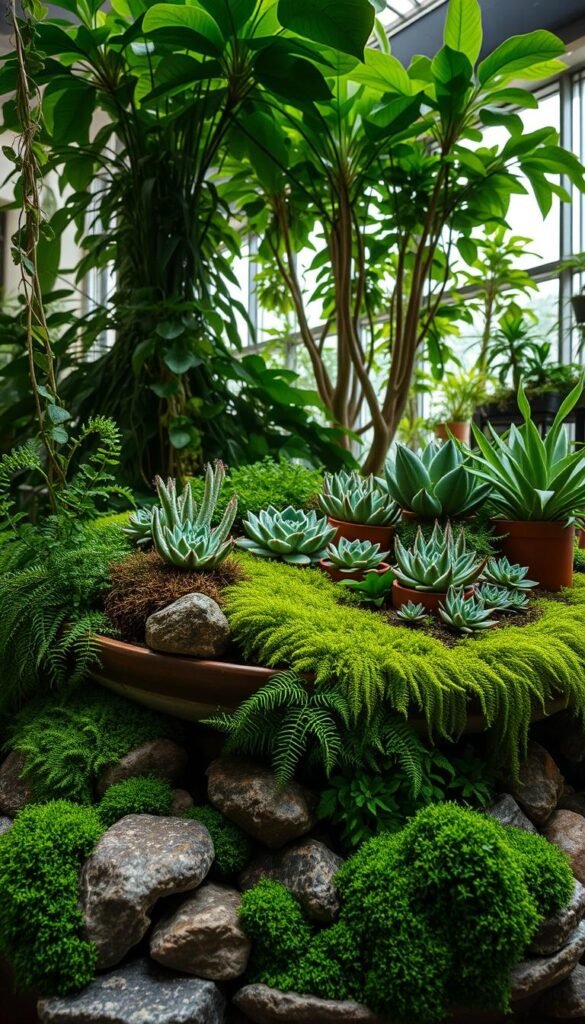
Rocks and moss form your landscape’s backbone. Place larger stones first to anchor the design, then tuck velvety moss around them. “These natural props create elevation changes without bulky soil,” notes a Seattle-based plant artist. They also hide nursery pots while adding earthy tones.
Balance is key. Mix upright plants with rounded forms, and pair bold leaves with delicate fronds. For cohesion, repeat one color – like burgundy accents in both foliage and stones. Trailing varieties soften container edges, making arrangements feel lived-in rather than perfect.
Test layouts temporarily before locking anything in. Shift components until your eye flows smoothly across heights and textures. This prep work transforms random greenery into intentional art that breathes life into any room.
Step-by-Step Assembly of Your Dish Garden
Let’s transform that collection of greenery into a living masterpiece. Start by prepping your container – this foundation determines your arrangement’s health and longevity. You’ll need drainage material, your chosen plants, and a playful mindset.
Adding Drainage and Arranging Pots
Pour drainage material like lava rocks or clay pebbles into your container’s bottom. Aim for 1-2 inches – enough to catch excess water without touching pot bases. “This air pocket prevents root rot better than any fancy gadget,” says a Miami plant consultant.
| Material | Purpose | Tip |
|---|---|---|
| Gravel | Drainage base | Rinse dust first |
| Sphagnum Moss | Moisture control | Soak 10 minutes |
| Perlite | Aeration | Mix with gravel |
Water all plants thoroughly before placing them. Begin with tallest specimens in the center, then work outward. Crowd them slightly – leaves should whisper to neighbors but not overlap. This more is more approach creates instant lushness.
Top Dressing and Finishing Touches
Camouflage nursery pots with decorative stones or bark chips. Twist the container to check sightlines – adjust any leaning plants. Finally, mist leaves to remove dust and add dewy freshness.
Your tabletop ecosystem should feel wild yet intentional. Rotate weekly for even light exposure, and enjoy watching your miniature world evolve.
Techniques for Colorful and Textured Plant Arrangements
Transform your tabletop into a living canvas by combining plants with contrasting features. Start with a focal bloom like cyclamen, then build around it using leafy companions. This approach creates depth while keeping care manageable.
Mixing Heights, Colors, and Shapes
Pair tall orchids with low-growing peperomia for vertical drama. Alternate broad elephant ear leaves with wispy ferns to create movement. “Three height levels make arrangements feel dynamic yet balanced,” suggests a New York floral designer.
| Plant Type | Visual Role | Container Size |
|---|---|---|
| Orchid | Vertical anchor | 4-6″ pot |
| Kalanchoe | Color pop | 3-4″ pot |
| Pilea | Texture contrast | 2-3″ pot |
Balancing Foliage and Flowering Plants
Use flowering specimens sparingly – one bloom cluster per three leafy plants. This ratio prevents visual overload while letting colors shine. For year-round interest, try rex begonia leaves that rival flowers in vibrancy.
When selecting container gardens, consider growth patterns. Trailing ivy softens edges, while upright sansevieria adds structure. Rotate pots weekly to maintain even foliage development across all specimens.
Innovative Use of Rocks and Moss in Your Design
Your tabletop landscape comes alive when natural elements work together. Strategic placement of stones and ground covers creates depth while solving practical challenges. Let’s explore how these components elevate your arrangement from pretty to professional.
Selecting Natural Rocks
Choose stones that echo your theme. Smooth river rocks suit tropical setups, while jagged slate pieces mimic mountain terrain. “Size variation adds realism,” notes a Colorado-based landscape artist. For desert scenes, pair sandstone chunks with coarse sand to replicate arid environments.
| Rock Type | Best For | Placement Tip |
|---|---|---|
| Lava rock | Drainage & contrast | Cluster near container edges |
| Quartz | Light reflection | Place under foliage |
| Slate | Vertical interest | Lean against taller plants |
Emphasizing Texture with Various Mosses
Moss acts as nature’s carpet, hiding seams between elements. Preserved green varieties maintain color without watering, while sphagnum moss helps retain moisture for humidity-loving specimens. Let strands drape over edges for that “found in the wild” look.
Try this pro trick: mix moss types in one arrangement. Use feathery sheet moss near smooth stones and tufted cushion moss around gravel patches. This contrast makes your miniature world feel authentically aged.
Caring for Your Indoor Dish Garden
Keep your miniature ecosystem thriving with smart care habits. Unlike traditional setups, these arrangements demand attention to individual needs while maintaining overall harmony. Let’s explore how to balance both.
Mastering Moisture Control
Check each plant’s soil weekly using your fingertip. If the top inch feels dry, water slowly until it drains from the nursery pot’s base. A slim-spouted can lets you target roots without splashing neighboring greenery.
Indoor heat and sun exposure create unique challenges. South-facing windows might require twice-weekly checks during winter, while shaded spots need less. Make sure to rotate your display monthly for even light distribution.
Most setups stabilize after 3-4 weeks. Watch for clues:
- Drooping leaves often signal thirst
- Yellowing suggests excess water
- Crispy edges indicate low humidity
For more insights on managing mixed container gardens, explore seasonal adjustment tips. Your dish garden will reward this vigilance with lush, vibrant growth that lasts beyond the frosty months.


