
Growing plants in tight urban areas can feel challenging, but what if you could keep your greenery thriving without daily effort? Imagine a setup that delivers precise hydration exactly where your plants need it. This approach isn’t just convenient – it’s a game-changer for conserving our planet’s most precious resource.
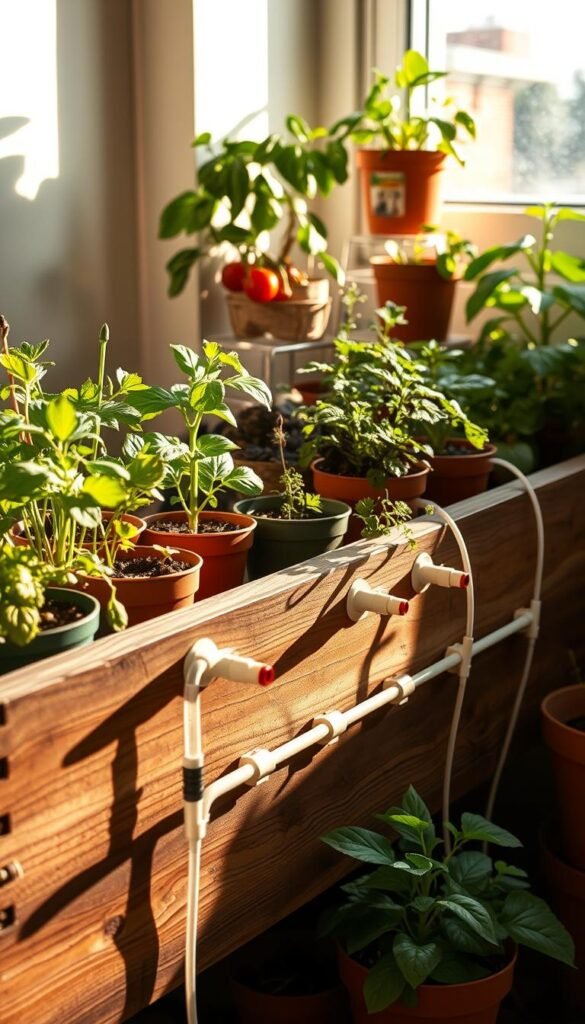
Gardener T.A. Johnson transformed his Sandy, Utah balcony using flexible tubing and adjustable emitters. His results? Healthier plants, fewer weeds, and 70% less water use compared to traditional methods. Like building with Lego blocks, these modular components adapt to any layout – whether you’re working with herb pots or vertical planters.
Why does this method work so well? Instead of spraying leaves or soaking entire containers, moisture goes straight to root zones. This prevents fungal issues while keeping soil consistently nourished. Add a simple timer, and your garden gets care even when you’re busy.
Ready to create your personalized solution? We’ll walk through choosing parts like pressure regulators and filters, plus show how to connect them without special tools. You’ll discover how small tweaks can make big differences in plant health and water savings.
Exploring the Benefits of Drip Irrigation for Your Urban Garden

City gardeners often juggle busy schedules while trying to nurture their green spaces. A smart watering strategy solves both challenges by working smarter, not harder. Let’s explore how precision hydration transforms plant care in limited spaces.
Water Efficiency and Plant Health
Traditional methods like sprinklers waste up to 50% of water through evaporation or runoff. With targeted emitters, moisture reaches root zones directly. This steady supply prevents soil from drying out between sessions, keeping tomatoes and herbs consistently hydrated.
Brooklyn gardener Maria Lopez noticed her basil plants doubled in size after switching to this method. “Leaves stayed fungus-free since water didn’t splash onto stems,” she explains. Healthier roots also mean better nutrient absorption and stronger growth.
Reduced Weed Growth and Disease Prevention
Surface-level watering unintentionally feeds weeds. By focusing flow underground, you starve unwanted sprouts. Less damp foliage also cuts mildew risks – a common issue in tightly packed planters.
Pair your setup with a timer to automate morning hydration. Plants drink deeply before summer heat hits, while you enjoy reclaimed time. Over six months, Denver resident Ellie Kim saved $38 on water bills using this approach in her 15-container setup.
Selecting the Right Components for a Successful System
Assembling the perfect hydration network starts with understanding your puzzle pieces. Like matching spices to recipes, each part plays a specific role in keeping plants happy.
Core Pieces That Make It Work
Begin with a pressure regulator – it’s your system’s traffic cop, preventing surges from blowing out emitters. Pair it with a filter to catch debris, especially if using rainwater or well sources. Flexible ½-inch tubing acts as your main artery, while ¼-inch lines branch off like capillaries to pots.
Seattle gardener Lin Chen uses interchangeable parts from Raindrip and Rain Bird kits. “Their connectors snapped together without leaks,” she notes. Always check local codes – some areas require backflow preventers to protect water supplies.
Smart Shopping Strategies
Big-box stores stock basic kits under $30 – perfect for 10-15 containers. Upgrade gradually with adjustable emitters ($2 each) for thirsty tomatoes. Reuse old garden hoses as main lines by adding punch-in adapters.
Pro tip: Use nail clippers to trim micro tubing cleanly. Phoenix resident Raj Patel saved 40% using generic fittings from hardware stores. “Same quality as brand names,” he confirms. Remember – precise parts mean fewer clogs and consistent moisture where roots need it most.
Planning and Designing Your Irrigation Layout

Smart hydration starts with a blueprint. Before cutting any tubing, sketch your space like a treasure map – pots become islands, and planters form coastlines. This visual guide helps avoid tangled lines and thirsty plants.
Mapping Your Garden’s Water Needs
Grab a tape measure and note distances between containers. Sandy soil? Space emitters closer for faster-draining areas. Clay-heavy spots need wider gaps. Chicago gardener Lila Reyes marks each plant’s “thirst score” – 1 for drought-tolerant succulents, 3 for water-loving lettuces.
Calculate total tubing length by adding 10% for curves. Use ½-inch main lines along balcony rails, branching into ¼-inch micro tubing. A 15-foot run with five tomato plants might need three 1-gph emitters per stem base. Pro tip: Windy locations require extra stakes to secure lines.
Aligning Emitters with Plant Root Zones
Tomato roots stretch 18 inches wide – place two emitters at opposite sides. Shallow herbs? Cluster low-flow drippers near stems. Portland landscaper Amir Chen suggests: “Bury emitters 2 inches deep for trees, surface-level for annuals.”
Account for sun patterns – south-facing pots dry faster. Use adjustable emitters to boost flow during heatwaves. Test your design by running water briefly. Watch for dry patches or pooling, then tweak placements. Proper planning turns guesswork into precision watering.
DIY Drip Irrigation Systems for Urban & Balcony Gardens

Let’s roll up our sleeves and create a hydration network that fits your unique space. Whether you’re tending window boxes or raised beds, this hands-on guide walks through every connection and adjustment. You’ll need about an hour and basic tools – no plumbing experience required.
From Box to Watering Wonder
Start by laying out components from kits like Raindrip R560DP or Rain Bird XFS. Connect your main tubing to the faucet using a pressure regulator – this prevents bursts from sudden water surges. Run ½-inch lines along planter edges, securing them with plastic stakes every 3 feet.
Punch holes for ¼-inch micro tubing where plants sit. Attach 1-gph emitters for herbs and 2-gph models for thirsty tomatoes. Pro tip: Use goof plugs to fix misplaced holes. Test the system for 10 minutes – check for leaks at connections before covering tubes with mulch.
Tailoring to Your Green Space
Balcony growers: Loop tubing through railing gaps and use adjustable emitters for pots. In-ground beds? Bury lines 2-3 inches deep and space emitters 12 inches apart. For clay soil, extend spacing to 18 inches to prevent waterlogging.
Sync your timer to run at 5 AM and 7 PM – cooler hours reduce evaporation. Seattle gardener Mei Lin shares: “My 15-container setup waters itself in 20 minutes daily. I reclaim 3 hours weekly for plant care instead of hose dragging.”
Remember: Flush the system monthly to clear mineral buildup. With these tweaks, your green friends stay quenched without wasting a drop.
Comparing Gravity-Fed and Pressurized Irrigation Systems

Watering your plants efficiently doesn’t always require fancy equipment – sometimes gravity does the heavy lifting. Urban growers often choose between two approaches: systems that rely on elevated water sources or those connected to faucets. Let’s break down which option suits your space best.
When Gravity Becomes Your Helper
Gravity-fed setups work best for small container gardens without faucet access. Elevate a 5-gallon bucket 3 feet above your plants, attach a brass drain faucet, and connect ¼-inch tubing. Seattle gardener Nina Park waters 12 herb pots this way: “My thyme gets ½ gallon daily without touching a hose.”
These systems shine when you need:
| Factor | Gravity-Fed | Pressurized |
|---|---|---|
| Water Source | Bucket/Rain Barrel | Faucet Connection |
| Pressure Range | 0.5-1.5 PSI | 15-30 PSI |
| Best For | 10-15 containers | 20+ plants |
| Tubing Size | ¼-inch recommended | ½-inch main lines |
Pressure Matters More Than You Think
Low-pressure systems struggle with emitters farther from the water source. If your basil gets less flow than mint, try elevating the bucket higher or using ½-inch header tubing. Pro tip: Clean filters weekly – sediment clogs tiny drip holes fast.
Pressurized setups handle complex layouts better but need regulators. Austin gardener Carlos Mendez learned this after his first tomato season: “Without a pressure reducer, emitters shot off like mini rockets!” Match your water source to your plant count – gravity works for modest needs, while faucet systems support expansion.
Maintenance, Troubleshooting, and Seasonal Adjustments

Keeping your plants happy year-round requires more than just setup—it’s about consistent care. Regular checkups prevent clogs and leaks while adapting to changing weather patterns. Let’s explore how to protect your watering solution through frosty months and scorching days.
Winterizing Your Watering Setup
Before the first freeze, disconnect all tubing from faucets. Blow compressed air through lines to clear lingering moisture—this prevents ice damage. Store backflow preventers and timers indoors where temperatures stay above freezing.
Use plastic wrap to seal exposed connectors on balcony railings. For buried lines in raised beds, cover openings with waterproof tape. Minneapolis gardener Sasha Petrov shares: “I label each part with painter’s tape during disassembly—spring reassembly takes 15 minutes!”
Smart Year-Round Habits
Flush your system every spring using this method:
- Remove end caps from main lines
- Run water for 5 minutes to push out debris
- Inspect emitters for mineral buildup
Uneven flow? Soak clogged drippers in vinegar overnight. For plants getting too much water, install adjustable emitters. Check pressure gauges monthly—readings above 30 PSI can burst tubing.
Adjust watering times as seasons shift. Summer might need twice-daily cycles, while spring thrives on every-other-day schedules. When expanding your garden, add secondary lines instead of stretching existing ones. Healthy roots mean happy plants!
Wrapping Up Your Drip Irrigation Journey
Transforming your green space with precise watering isn’t just smart—it’s rewarding. You’ve learned how flexible tubing, emitters, and timers work together to save water while keeping plants vibrant. Whether nurturing herbs in containers or tomatoes in raised beds, these systems adapt to your unique setup.
Remember: success starts with planning. Map your space, match components to plant needs, and test flow rates. Even low-pressure setups thrive when you elevate reservoirs or use wider tubing. Seasonal tweaks and monthly flushes keep everything running smoothly.
Your efforts pay off in healthier soil, fewer weeds, and up to 70% less water waste. Share your creative solutions—like repurposing garden hoses or designing vertical layouts—to inspire fellow growers. Every balcony or patio can become an oasis with the right approach.
Ready to see your garden flourish? Start small, observe results, and expand confidently. Drop a comment below with your setup photos or clever hacks. Together, we’re growing greener cities—one drip at a time.


