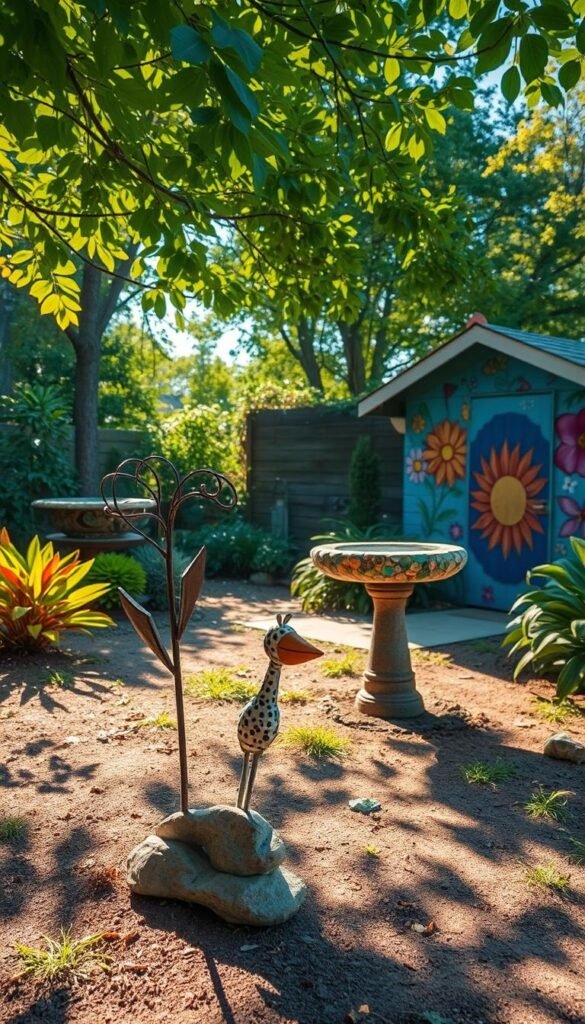
Your outdoor area deserves more than just plants. With a little imagination, you can turn it into a vibrant reflection of your style. Handmade projects let you add character without breaking the bank, blending practicality with artistic flair.
Simple materials like stones, broken tiles, or old household items become stunning accents. Paint patterns on rocks for playful pathways, or arrange mosaic pieces into eye-catching focal points. Even beginners can craft unique pieces using everyday supplies.
These creations do more than beautify – they tell your story. Repurposing items like vintage containers or wooden crates adds eco-friendly charm. For those starting small, container gardening offers endless ways to experiment with space-saving designs.
You don’t need professional skills to make magic happen. Whether arranging upcycled planters or designing whimsical wind chimes, each project invites you to play with colors and textures. Let’s explore how ordinary objects can transform your sanctuary into something extraordinary.
Getting Started with Creative Garden Art Ideas
Every backyard holds hidden potential waiting to be unlocked through creative expression. Before diving into projects, take time to observe your outdoor space like an artist studying a blank canvas. What makes your area unique? Notice how sunlight dances across flower beds or where shadows create natural focal points.
Understanding Your Outdoor Canvas
Start by sketching a rough map of your yard. Identify three key elements:
- Sun patterns: Track where light shines brightest for sun-loving designs
- Texture zones: Mix smooth patio areas with wilder planting beds
- Natural accents: Use existing trees or slopes as design anchors
This groundwork helps match projects to your space’s personality. A shady corner might crave bright mosaic tiles, while windy spots could showcase tinkling wind chimes.
Essential Materials and Tools
You’ll be surprised how basic supplies can spark magic. Keep these essentials handy:
- Weather-resistant paints and brushes
- Recycled containers for planters or sculptures
- Durable adhesives for outdoor conditions
Organize materials by project type in labeled bins. Repurpose old kitchen jars for storing small items like beads or nails. Remember – your gardening gloves double as art tools when handling rough edges!
Pro tip: Personalize pieces using local stones or repurposed fence wood. These touches make creations feel rooted in your landscape’s story.
Exploring Colorful Garden Art Inspirations

Color breathes life into every corner of your outdoor sanctuary. Imagine transforming plain surfaces into dynamic displays using simple materials. Mixing bold hues with natural textures creates focal points that surprise and delight visitors.
Vibrant Mosaics and Painted Rocks
Turn ordinary stones into storytelling tools with weatherproof acrylics. Create mandala patterns or animal shapes using layered paint techniques. Broken ceramic tiles become dazzling mosaics when arranged on tabletops or tree surrounds.
Try these ideas for pathways:
- Arrange painted rocks as directional markers
- Embed glass pieces between stepping stones
- Use contrasting colors to outline flower beds
Whimsical Sculptures and Upcycled Pieces
Old bicycle wheels become swirling wind catchers when hung from branches. Stack vintage teacups into a quirky tower for a playful centerpiece. These art pieces spark joy while reducing waste.
For modern designs, spray-paint metal frames in jewel tones. Pair geometric shapes with flowing plants to balance structure and wildness. Each recycled creation adds personality without compromising style.
Embracing Nature with DIY Twig Sculptures
Transform fallen branches into stunning sculptures that blend seamlessly with your landscape. These organic creations add texture and movement while celebrating nature’s raw beauty. Start by gathering materials during seasonal cleanups or after storms – it’s like your yard provides free art supplies!
Cultivating Environmentally Friendly Art
Collect twigs in various thicknesses for visual interest. Remove loose bark and let them dry completely to prevent mold. For sturdy designs, use thicker branches as bases and secure smaller pieces with outdoor-grade glue or copper wire.
| Twig Type | Best Use | Preparation Tip |
|---|---|---|
| Straight Birch | Geometric frames | Sand rough edges |
| Curved Willow | Arched accents | Soak for flexibility |
| Forked Branches | Plant supports | Seal with beeswax |
Place finished pieces where they’ll interact with living elements. A twig obelisk peeking through climbing roses adds vertical drama. Scatter smaller sculptures near hostas to mirror their leaf shapes.
These zero-waste projects celebrate your local ecosystem while reducing cleanup efforts. As seasons change, weathered wood develops a silvery patina that harmonizes with blooming plants. Each sculpture becomes a testament to your landscape’s unique character.
Personalizing Your Garden with Custom Plant Markers
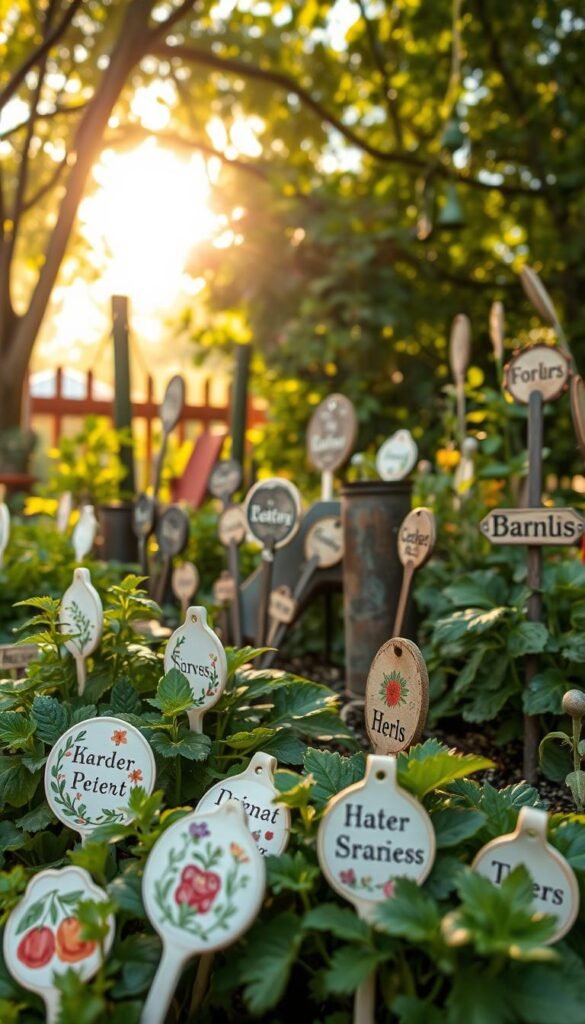
Labeling your flowers becomes an artistic adventure when you craft unique identifiers. These functional accents merge practicality with playful design, letting you showcase your creativity while keeping beds organized.
Crafting Painted Rock Markers
Start by hunting for flat, smooth stones in riverbeds or landscaping stores. Wash them thoroughly and let dry. Use outdoor acrylic paint to write herb names or sketch simple icons like tomatoes or sunflowers.
Seal designs with clear weatherproof spray. Place these vibrant labels at the base of plants or line them along pathways. They withstand rain while adding pops of color among greenery.
Natural Wood and Recycled Options
For rustic charm, cut fallen branches into slices using a handsaw. Burn plant names into wood with a pyrography pen or carve letters with a chisel. Stain slices with natural oils to highlight grain patterns.
Repurpose household items like silverware or vinyl blinds. Paint spoon handles with herb names, or cut blind slats into pointed stakes. These unexpected materials spark conversations while reducing home waste.
Mix styles for visual interest – pair sleek metal tags with rough-hewn wood pieces. Your markers become miniature art installations that evolve with each growing season.
Transforming Everyday Items into Garden Lanterns
Light up your nights by repurposing common cans into enchanting lanterns. These glowing accents add warmth to pathways and seating areas while giving new life to household items. With basic tools and creativity, you’ll craft eye-catching decor that dances with shadows after sunset.
Breathing New Life into Metal Containers
Start by cleaning empty cans thoroughly. Remove labels and smooth sharp edges with sandpaper. Fill them with water before freezing overnight – this prevents denting when hammering patterns.
Use nails or a drill to create starbursts, geometric shapes, or nature-inspired designs. Space holes evenly for balanced light distribution. For hanging versions, punch two holes near the top rim and thread sturdy wire through.
| Tool | Pattern Style | Pro Tip |
|---|---|---|
| Hammer & Nail | Organic shapes | Use varying nail sizes |
| Power Drill | Symmetrical dots | Mark grid lines first |
| Paintbrush | Color accents | Seal with clear coat |
Customize lanterns with weather-resistant spray paint or metallic finishes. Earth tones blend with natural surroundings, while bold hues create playful contrasts. Cluster painted cans near backyard benches or line them along stair edges.
Place battery-operated tea lights inside for worry-free illumination. Suspend groupings from tree branches at different heights to mimic fireflies. These projects turn overlooked objects into conversation starters that shine through every season.
Designing Mosaic Garden Stepping Stones
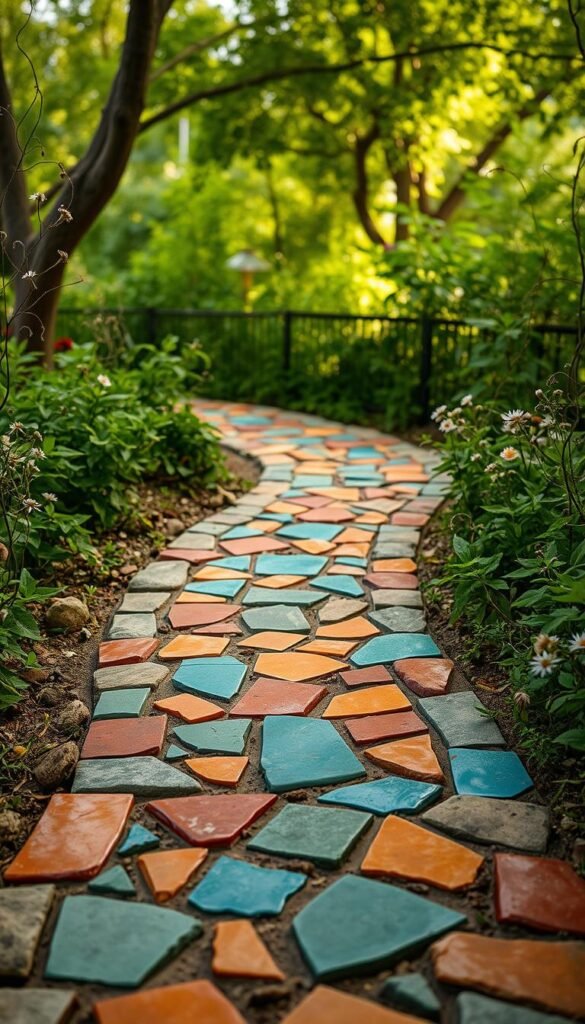
Pathways become storytelling elements when adorned with handmade mosaics. These functional art pieces guide visitors while showcasing your creative vision. Start by sketching simple patterns that complement your landscape’s natural flow.
Planning Your Layout and Color Scheme
Choose hues that harmonize with surrounding beds and foliage. Earthy tones blend seamlessly, while bold colors create striking contrasts. For cohesive designs, limit your palette to 3–4 shades and repeat them across multiple stones.
Incorporating Recycled Materials
Transform chipped dishes or cracked tiles into mosaic treasures. Crush materials into irregular shapes for organic textures, or cut them precisely for geometric patterns. Mix concrete with pea gravel for stability, pressing fragments into the wet surface at angles to catch light.
Install finished stones by digging 2-inch deep holes and backfilling with sand. This prevents shifting during frost or heavy rain. Space them a comfortable stride apart to create natural rhythm. Explore pebble mosaic techniques for additional texture variations.
View each stone as a miniature canvas that directs your way through the landscape. Cluster them near seating areas or use as playful markers along herb spirals. Over time, weather will soften edges, blending your project into the living tapestry of your outdoor space.
Crafting Unique DIY Garden Wind Chimes
Melodic breezes bring life to your landscape through handcrafted wind chimes. These moving art pieces combine visual charm with nature’s music, creating multi-sensory interest. Start by gathering materials that withstand weather while producing pleasant tones.
Choosing the Right Materials
Driftwood makes excellent tops for its natural curves and durability. Pair it with metal pipes or aluminum tubes for clear resonance. Add colorful glass beads or sea shells between pieces to catch sunlight. Use nylon fishing line or copper wire for hanging elements – both resist moisture and stretching.
Follow these steps for assembly:
- Drill evenly spaced holes in your base material
- Cut strings 6-8″ longer than desired length
- Secure chime elements with double knots and waterproof glue
Tips for Optimal Placement
Hang your creation where breezes frequently dance – near pergolas or between trees. Position it 7-8 feet high to prevent tangling while allowing sound to travel. Avoid placing over delicate outdoor space features that could be damaged by swinging components.
Experiment with object combinations for unique harmonies. Longer metal tubes create deeper tones, while ceramic fragments produce soft clicks. Cluster smaller chimes together near seating areas for layered melodies that enhance relaxation. Your project becomes both a visual focal point and a natural soundtrack for summer evenings.
Creating Painted Terracotta Pot Art
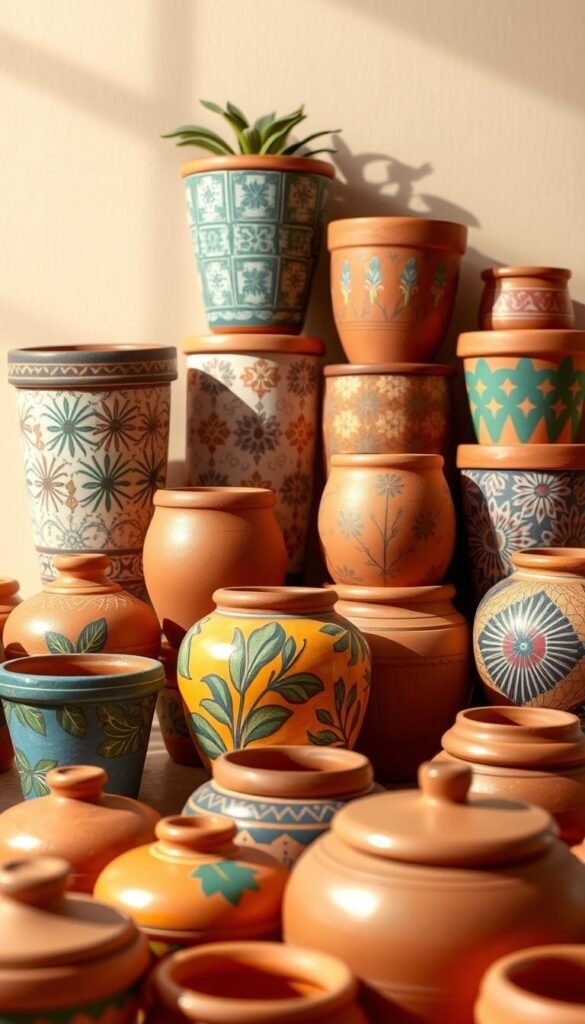
Terracotta planters offer a perfect canvas for blending earthy charm with bold creativity. Their porous surface holds colors beautifully, letting you craft functional art that complements your blooms. Start by wiping pots with a damp cloth to remove dust – this helps paint adhere better.
Selecting Your Color Palette
Choose hues that enhance your flower varieties and outdoor decor. Warm terracotta pairs well with cobalt blue or sunflower yellow for striking contrasts. Soft sage greens and creamy whites create subtle elegance. Test swatches on broken pot fragments before committing.
Techniques for Long-Lasting Designs
Apply two thin base coats instead of one thick layer to prevent cracking. Use painter’s tape for crisp geometric patterns or try freehand vines trailing around the rim. Stencils work great for repeating motifs like polka dots or leafy shapes.
| Step | Material | Pro Tip |
|---|---|---|
| Base Layer | Acrylic primer | Sand lightly between coats |
| Design Phase | Weatherproof paints | Use angled brushes for details |
| Protection | Clear sealant spray | Apply 3 thin layers |
Seal finished pieces with UV-resistant sealant to guard against water damage and fading. Rotate pots seasonally to ensure even sun exposure. Pair your creations with smart watering practices to keep both plants and designs thriving.
Mix matte and glossy finishes for visual depth. Cluster painted planters in varying sizes near entryways or along walkways. Each becomes a signature piece that evolves with your style through the years.
Building Eco-Friendly Garden Edging with Recycled Glass Bottles
Turn discarded glass into a shimmering border that defines your landscape while reducing waste. This project merges sustainability with striking visual appeal, transforming empty bottles into functional garden decor. Best of all, it requires minimal tools and repurposes materials destined for landfills.
Step-by-Step Installation Tips
Begin by collecting bottles in various hues – greens, blues, and browns work beautifully. Soak them in warm soapy water to remove labels, then rinse thoroughly. Always wear gloves to protect hands from sharp edges during cleaning.
Dig a 6-inch deep trench along your bed’s perimeter using a spade. Layer 2 inches of gravel at the bottom for drainage. Arrange bottles neck-down, packing soil tightly around each one. Alternate colors to create patterns like sunbursts or ombre gradients.
| Tool | Purpose | Safety Tip |
|---|---|---|
| Work Gloves | Handling glass | Choose cut-resistant material |
| Rubber Mallet | Securing bottles | Tap gently to avoid breakage |
| Level | Aligning heights | Check every 3-4 bottles |
For stability, fill gaps between bottles with sand or pea gravel. This prevents shifting during rain or frost. The finished edge glows when sunlight filters through colored glass, adding magic to your outdoor space at golden hour.
This approach aligns perfectly with eco-friendly container gardening practices. It’s a creative way to reuse materials while adding structure to your landscape. Best of all, the bottles withstand weather extremes better than wooden borders, making them a durable design choice.
Attracting Wildlife with Homemade Bird Feeders
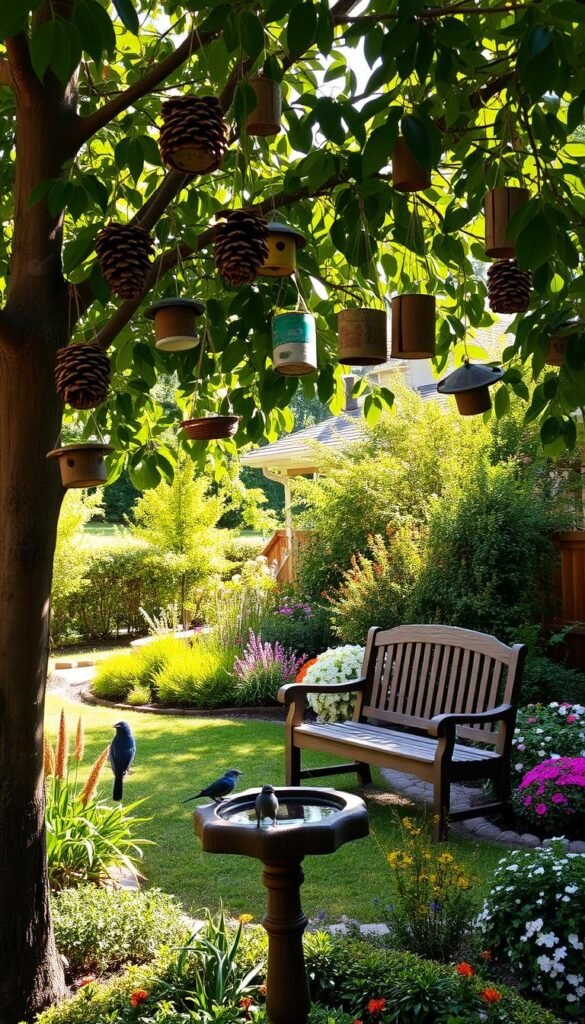
Invite feathered friends to your landscape while adding rustic charm through functional art pieces. Simple feeders made from natural materials support local ecosystems and let your creativity take flight. Start with basic pine cone designs, then explore inventive variations that turn everyday items into wildlife magnets.
Simple Pine Cone Feeder Projects
Gather large pine cones from your yard or nearby parks. Tie a sturdy string around the base for hanging. Spread peanut butter between the scales using a butter knife, then roll in birdseed until fully coated.
Hang these edible ornaments near plants that birds naturally visit, like sunflowers or berry bushes. Refresh every 2-3 weeks to maintain freshness. For rainy areas, add a drip tray using repurposed bottle caps secured with waterproof glue.
Creative Variations for Your Garden
Transform teacups into hanging feeders by attaching chains to their handles. Fill with seed mixes and position near garden benches for up-close birdwatching. Old muffin tins become multi-port buffets when mounted on fence posts.
| Material | Design Idea | Bird Attraction Tip |
|---|---|---|
| Citrus Halves | Seed-filled orange cups | Attract orioles |
| Wine Bottles | Self-dispensing feeder | Perfect for finches |
| Terra Cotta Pots | Inverted planter station | Invites chickadees |
Place feeders 5-6 feet high near shrubs for quick shelter access. Keep a shallow water source nearby for drinking and bathing. Rotate feeder styles seasonally – try suet cakes in winter and fruit slices during summer migrations.
This project beautifies your backyard while teaching valuable lessons about local ecosystems. Children can help craft colorful seed markers using painted rocks, making nature observation both educational and artistic.
Innovative Art Ideas with Suspended Upcycled Decor
Elevate your landscape with floating treasures that dance in the breeze. Suspended creations add dimension to blank walls and unused vertical areas, turning overlooked spaces into conversation starters. These projects breathe new life into forgotten objects while showcasing your creative vision.
Using Salvaged Materials Creatively
Start by hunting for unique materials at thrift stores or flea markets. Old colanders become plant holders, while vintage shutters transform into textured backdrops. Always clean items thoroughly with vinegar solutions to remove grime or rust.
- Test durability by exposing materials to water for 24 hours
- Sand rough edges to prevent snagging
- Seal porous items with UV-resistant spray
Arranging Vertical Displays
Create depth by layering objects at different heights. Hang lightweight wind chimes above heavier planters to balance visual weight. Use these techniques for stability:
| Material | Hanging Method | Weight Limit |
|---|---|---|
| Copper Pipes | Chain links | 15 lbs |
| Glass Bottles | Fishing line | 5 lbs |
| Wooden Frames | Rope knots | 25 lbs |
Mix industrial elements like gears with natural wood slices for contrast. Cluster geometric shapes near flowing vines to blend structure with organic growth. These designs work beautifully beside bright floral arrangements, creating cohesive visual stories.
Experiment with temporary installations using removable hooks. Swap pieces seasonally – try metallic accents in fall and pastels during spring. Your outdoor space becomes an ever-changing gallery that reflects your evolving style.
Elevating Your Front Yard with Artistic Accessories
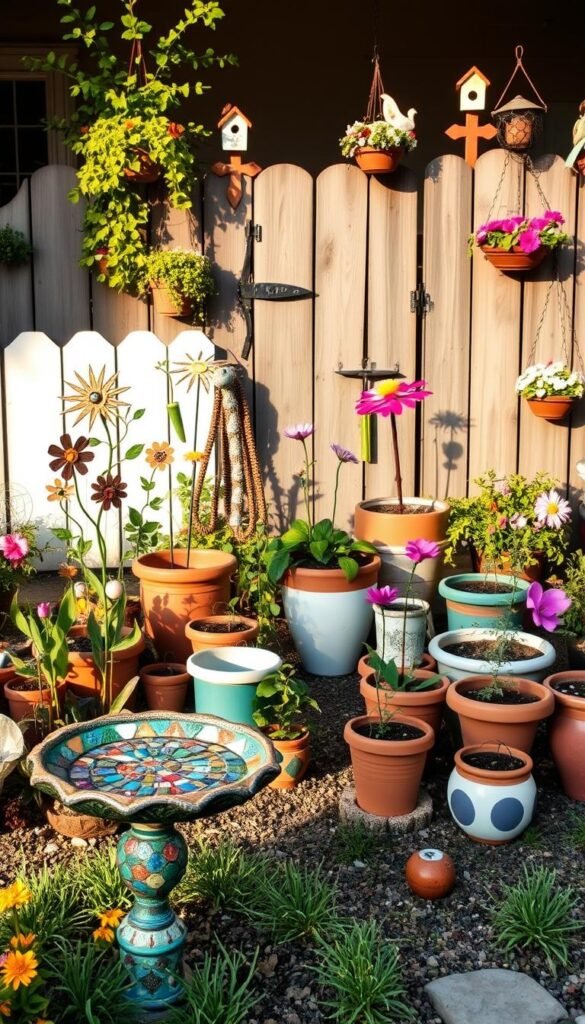
Your front yard sets the stage for your home’s personality before guests even step inside. A few thoughtfully placed accents can turn ordinary landscaping into a curated display of beauty and charm. Upcycled items bring unexpected character while keeping your space eco-conscious.
Upcycled Decor for Curb Appeal
Transform forgotten objects into conversation starters. An old wooden ladder becomes a vertical planter display when hung horizontally against a fence. Vintage shutters painted in coordinating hues make striking backdrops for climbing flowers.
Try these creative swaps:
- Bicycle wheels as circular trellises
- Rainboots turned into whimsical herb holders
- Colander light fixtures dangling from tree limbs
Group pieces in odd numbers for visual balance. Place a trio of painted tires along walkways, stacking them with cascading petunias. The key is maintaining a cohesive style – rustic, modern, or eclectic – that ties your yard together.
| Material | Transformation | Style Impact |
|---|---|---|
| Mason Jars | Solar light holders | Farmhouse warmth |
| Window Frames | Mirror installations | Space-enhancing illusion |
| Plumbing Pipes | Industrial plant stands | Urban edge |
Coordinate colors with existing garden decor for harmony. A bright blue bench pairs perfectly with ceramic art pieces in similar shades. These touches create appeal that evolves with the seasons, inviting neighbors to pause and admire your creative vision.
Modern Twists: DIY Metal and Glass Garden Sculptures
Modern materials bring fresh energy to outdoor spaces through their sleek profiles and light-catching properties. Metal and glass creations introduce contemporary flair while standing strong against sun, rain, and wind. These elements elevate ordinary corners into artistic statements that evolve with shifting daylight.
Benefits of Contemporary Materials
Stainless steel and tempered glass outlast traditional options with minimal upkeep. Their reflective surfaces multiply visual interest – polished chrome mirrors foliage, while textured panels scatter sunlight like prismatic confetti. Consider these advantages:
- Weather-resistant finishes prevent rust and corrosion
- Modular designs adapt to changing layouts
- Translucent elements create depth without blocking views
Maintenance and Durability Tips
Protect your art pieces with simple seasonal care. Apply automotive wax to metal surfaces every spring to repel water spots. For glass components, use vinegar solutions to dissolve mineral deposits without harsh chemicals.
| Material | Protection Method | Care Frequency |
|---|---|---|
| Coated Steel | Touch-up spray paint | Biannually |
| Stained Glass | Silicone sealant edges | Every 3 years |
| Aluminum | Pressure wash | Monthly |
Position sculptures where they’ll interact with natural elements. A spiraled metal tower catches morning dew, while angled glass panels cast rainbow shadows at dusk. These dynamic designs become living installations that change with your environment.
Layering Your Garden: Arranging Art for Visual Impact
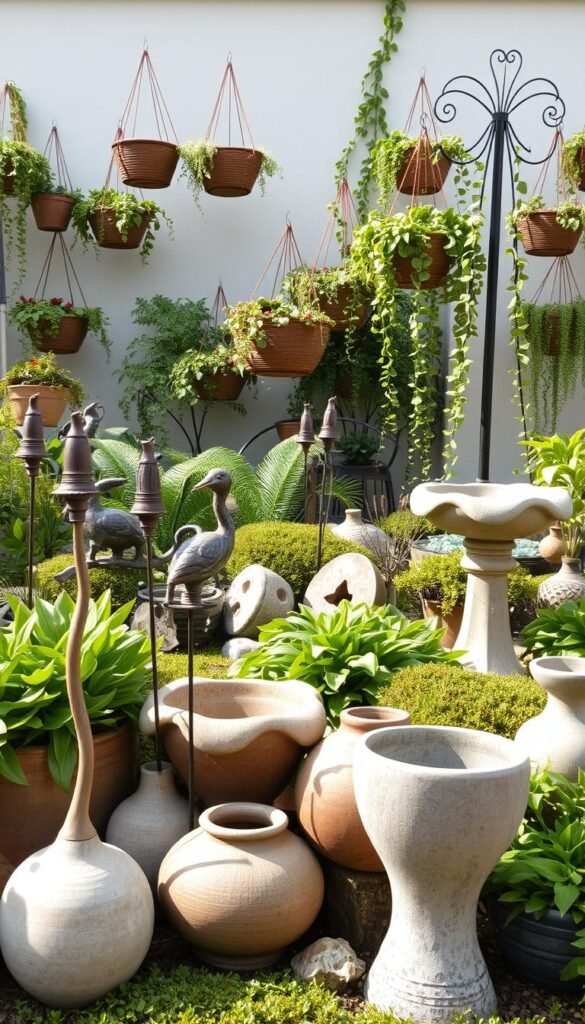
Transform your landscape into a living gallery by mastering the art of layered composition. Strategic placement turns individual pieces into cohesive stories that draw the eye through your outdoor space. Like arranging furniture indoors, every sculpture or marker should feel intentional yet organic.
Strategic Placement for Maximum Effect
Start by identifying natural pathways and sightlines. Position larger elements as focal points where paths converge or views open up. Smaller accents work best along edges, creating surprises for visitors to discover. This design approach adds depth while guiding exploration.
Follow these principles for balanced arrangements:
- Anchor corners with tall sculptures or vertical installations
- Use mid-sized pieces to bridge gaps between planting beds
- Scatter tiny treasures like painted stones near seating areas
Soft transitions matter most. Let ivy creep over a mosaic edge or allow grasses to frame a metal sculpture. Nature’s textures help blend handmade art with growing gardening spaces. Rotate seasonal pieces to maintain fresh energy – swap winter’s evergreen wreaths for spring’s floral mobiles.
| Focal Point Type | Placement Tip | Visual Effect |
|---|---|---|
| Statement Sculpture | End of main path | Creates destination |
| Hanging Installation | Above curved bench | Adds overhead interest |
| Reflective Art | Near water feature | Doubles light play |
Experiment with temporary arrangements using garden stakes and string. Mark potential spots with potted plants before committing. Your designs should feel like natural extensions of the landscape, not forced additions. Remember – the best way to perfect placement is through playful trial and error.
DIY Garden Art: Easy Crafts to Personalize Your Green Space
Your landscape becomes a living storybook when blending different artistic elements. By combining techniques from earlier sections, you craft a space that reflects your personality while staying functional. The magic lies in balancing bold statements with subtle accents.
Mix and Match Craft Ideas
Pair painted pots with mosaic pathways for coordinated charm. Hang wind chimes above upcycled planters to add motion and sound. Even simple projects like stone markers gain depth when clustered with metal sculptures.
Consider these combinations:
- Rustic twig frames surrounding modern glass edging
- Terracotta planter towers accented with suspended bottle art
- Geometric metal pieces contrasting wildflower beds
Tailoring Projects to Your Garden’s Style
Match your decor to the existing vibe. Cottage-style spaces shine with repurposed teacup feeders and pastel colors. Modern gardens demand sleek lines – think angular metal sculptures or monochrome mosaics.
Test temporary arrangements before committing. Use removable hooks for hanging items or prop sculptures with bricks. This lets you refine placements until every piece feels naturally integrated.
Your outdoor canvas evolves with each season. Swap summer’s bright pots for autumn’s earthy tones. Let winter’s bare branches showcase frost-resistant installations. Through playful experimentation, your creativity becomes the garden’s heartbeat.
Wrapping Up Your Creative Garden Journey
Your journey through crafting unique outdoor accents leaves a lasting imprint on both space and spirit. Each project discussed—from shimmering glass borders to melodic wind sculptures—adds layers of character to your yard. These pieces do more than decorate; they invite connection with nature while showcasing personal style.
View every creation as a stepping stone toward an outdoor sanctuary that mirrors your vision. Whether arranging painted markers among herbs or installing sculptural focal points, these touches transform ordinary areas into dynamic showcases. The blend of functionality and creativity ensures your garden remains both practical and inspiring.
Lasting appeal comes from balancing bold statements with subtle details. A handcrafted flower pot here, a repurposed pathway accent there—each element contributes to a cohesive narrative. These artistic choices elevate everyday moments, turning morning coffees outdoors into gallery visits.
Keep experimenting as seasons shift. Swap summer’s bright hues for autumn’s earthy tones, or introduce winter-friendly installations. Your home’s exterior becomes a living canvas that evolves with your imagination. There’s no final destination, only joyful exploration.
May your gardens always reflect the vibrant stories you cultivate. Every brushstroke, mosaic tile, and upcycled treasure whispers: This space is uniquely yours.

