
Imagine growing fresh herbs and vegetables indoors, even if you’ve never touched a seed packet. That’s the magic of building your own soil-free growing setup. Whether you’re limited by space or tired of unpredictable outdoor weather, this method lets you take control of your food supply—right from your kitchen or living room.
My journey began with a stubborn basil plant that refused to thrive in a cramped apartment. After experimenting with traditional pots and grow lights, I discovered how combining simple hardware—like a Raspberry Pi and moisture sensors—could automate care for plants. This blend of hands-on creativity and tech turned a hobby into a reliable way to grow greens year-round.
In this guide, we’ll walk through every step, from choosing containers to mixing nutrient solutions. You’ll learn how to maintain ideal water levels, ensure roots get enough oxygen, and adapt your setup as plants grow. No prior experience? No problem. We’ll keep it straightforward so you can focus on what matters: fresh, homegrown flavors at your fingertips.
Key Takeaways
- Grow plants indoors without soil using water-based systems
- Use affordable tech like sensors to monitor plant health
- Customize container sizes for small spaces or larger yields
- Maintain oxygen flow to roots for faster growth
- Adjust nutrient levels as plants mature
Understanding the Fundamentals of Hydroponic Gardening
Picture plucking crisp lettuce leaves from your countertop setup while snow falls outside. This soil-free approach replaces dirt with precise nutrient delivery, letting roots thrive in controlled conditions. By bypassing traditional gardening hurdles, you create a micro-environment where plants grow faster and healthier.

What is Hydroponics and Why It Works
At its core, hydroponics feeds plants through oxygen-rich water solutions instead of soil. Roots absorb nutrients directly from liquid mixtures, eliminating competition from weeds. One urban gardener noted: “My basil doubled in size once I switched to clay pebbles and monitored pH levels.” Systems like the Kratky method use static reservoirs, proving you don’t need complex equipment.
Benefits for Indoor and Home Gardening
Small spaces shine with vertical setups or compact containers. Net cups cradle seedlings above water, allowing roots to stretch downward while staying aerated. A complete guide for beginners emphasizes using opaque storage bins to prevent algae growth. You’ll adjust water levels as plants drink, ensuring roots never dry out or drown.
Choose containers based on plant size—shallow trays for herbs, deeper tubs for tomatoes. Growth media like perlite or coconut coir stabilize stems while letting oxygen flow. It’s simpler than it sounds: select seeds, mix nutrients, and watch your indoor oasis flourish.
Essential Materials and DIY Setup Guide
Building your own soil-free garden starts with gathering the right materials. Quality components ensure your greens thrive without constant upkeep. Let’s break down what you’ll need and how to prepare them for success.

Key Tools and Supplies You Need
You’ll need durable HDPE plastic containers—opaque to block light and prevent algae. Net cups hold plants in place, while rockwool cubes or coconut pith give seeds a cozy start. Don’t forget clay pebbles for root support and a submersible pump to circulate water.
Clean clay pellets thoroughly before use—dust can clog pumps. Some growers spray-paint clear containers for better light protection. As one enthusiast shared: “Prepping materials upfront saves hours of troubleshooting later.”
Step-by-Step Container and Net Cup Preparation
Drill 2-inch holes in your container’s lid, spacing them 6-8 inches apart. This gives plants room to spread leaves without crowding. Place net cups in each hole, ensuring they sit securely.
Fill cups halfway with rinsed clay pebbles. Add a rockwool cube soaked in nutrient-rich water, then sprinkle seeds on top. Cover lightly with coconut fiber to retain moisture. Check water levels weekly—roots should barely touch the solution below.
Remember: Start with small containers for herbs like mint or basil. Larger systems work for tomatoes, but require more frequent monitoring. Your setup grows with your skills!
DIY Hydroponic Gardening: Setting Up a Basic Home System
Want fresh greens without pumps or electricity? The Kratky approach lets roots breathe while sitting in nutrient-rich water. This hands-off method works wonders for leafy greens and herbs, using just a storage bin and net cups.

Simplified Setup for Busy Growers
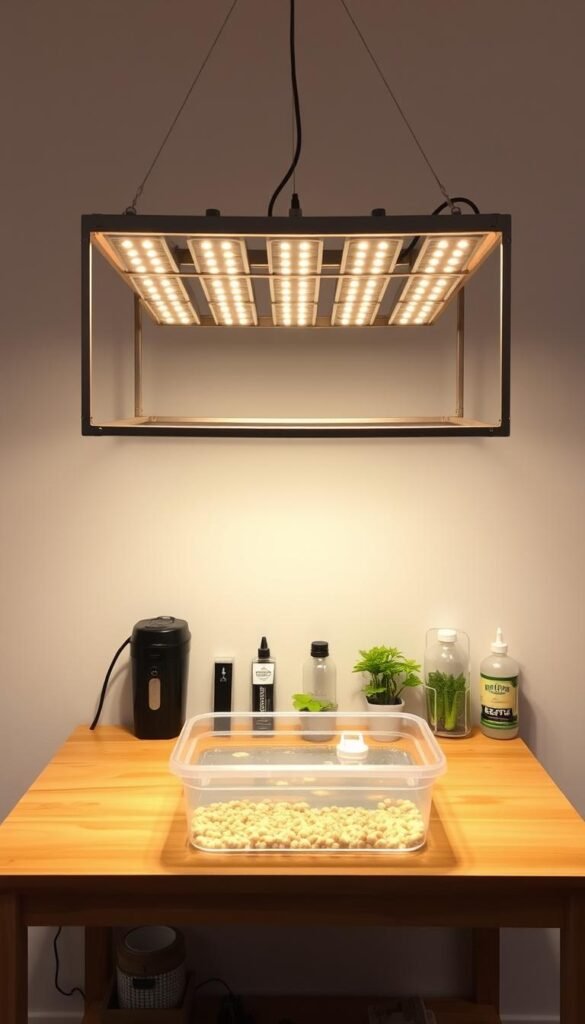
Start with an opaque plastic container—paint it if needed to block light. Cut holes in the lid spaced 8 inches apart. Place net cups filled with clay pellets or coconut husk into each opening. One gardener reported: “My lettuce grew faster in this setup than in soil, with zero maintenance between harvests.”
Water Level Wizardry
Fill the reservoir until it barely touches the net cups. As plants drink, the solution drops, creating an air gap for roots. Check levels weekly—top up only when 80% depleted. Use a measuring stick marked at 3-4 cm below the lid as your guide.
| Aspect | Kratky Method | Deep Water Culture |
|---|---|---|
| Components | Container + net cups | Pumps + air stones |
| Maintenance | Monthly checks | Weekly adjustments |
| Cost | $15-$30 | $50-$100+ |
| Oxygen Source | Air gap | Bubbling system |
Nutrient Balancing Act
Mix liquid fertilizer at half strength initially. Increase concentration as plants mature—leafy greens need less than fruiting varieties. Test pH weekly with strips, aiming for 5.5-6.5. If leaves yellow, flush the system and refresh the solution.
Rotate containers every few days for even light exposure. Harvest outer leaves first to prolong growth. With this method, you’ll enjoy continuous yields while learning your plants’ unique needs.
Smart Monitoring and Maintenance Strategies
Technology turns guesswork into precision for your indoor garden. With affordable tools, you can track every water level shift and nutrient fluctuation before they affect your greens. Let’s explore how to automate oversight and keep your setup thriving.

Your Garden’s Digital Assistant
Connect a Raspberry Pi to sensors for real-time updates. The BME680 tracks air quality and humidity, while pH probes measure acidity in your nutrient solution. One grower shared: “My plants started thriving once I could see their daily progress through time-lapse videos.”
Set up timelapse tracking with a basic USB camera. Platforms like Viam send alerts if:
- Water drops below minimum levels
- pH drifts beyond 5.5–6.5 range
- Root zones lack oxygen flow
Chemistry Made Simple
Test your solution weekly with pH strips. If readings climb above 6.5, add citric acid drops. For low pH, mix in baking soda—a teaspoon at a time. Always recalibrate sensors monthly using calibration fluid.
Follow this 3-step routine:
- Check electrical conductivity (EC) with a meter
- Adjust nutrient concentration based on plant growth stage
- Flush containers every 2-3 weeks to prevent salt buildup
Smart monitoring cuts maintenance time by 40% while boosting yields. You’ll catch issues like algae growth or pump failures before they ruin crops. Less stress, more harvests—that’s modern gardening!
Conclusion
Your journey to fresh, homegrown produce starts with understanding one truth: plants thrive when their needs are met consistently. By adopting a soil-free approach, you’ve learned to balance water, nutrients, and oxygen in ways traditional gardening can’t match. The Kratky method proves that even passive systems yield impressive results—no pumps or complex equipment required.
From selecting containers to monitoring pH levels, every step builds toward self-sufficiency. Smart sensors take the stress out of maintenance, letting you focus on growth rather than guesswork. Whether growing herbs in net cups or leafy greens in storage bins, success lies in adapting techniques to your space and schedule.
Now’s the time to take action. Start small with a single container, track progress with simple tools, and expand as confidence grows. Remember: every thriving seedling began as an experiment. With patience and the right strategies, your indoor oasis will flourish—one crisp leaf at a time.


