
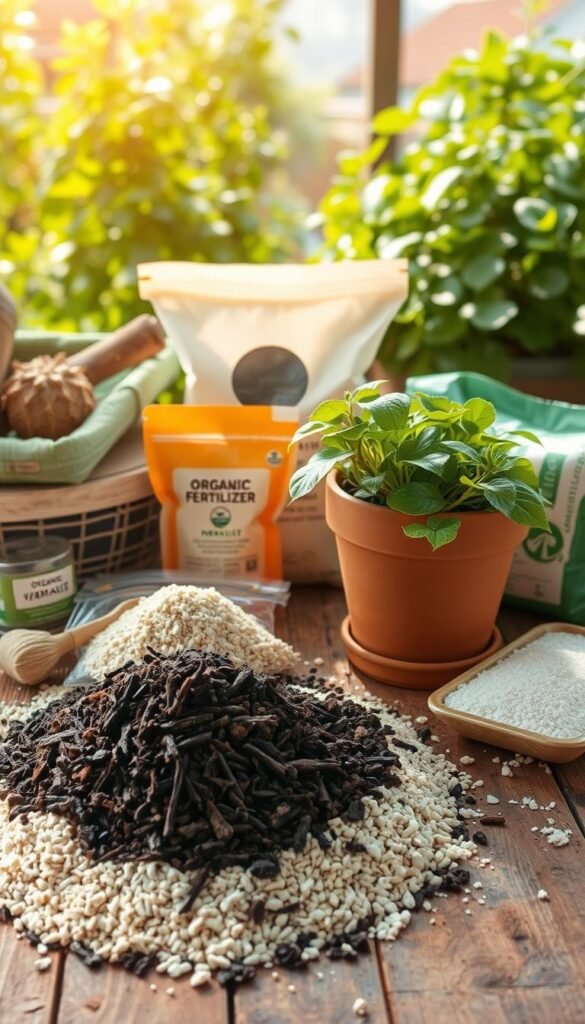
Growing healthy vegetables and herbs in pots starts with one secret: the right foundation. Store-bought potting soil often lacks the balance your plants need. By creating your own blend, you control what goes into it—ensuring proper drainage, moisture retention, and nutrients for robust roots.
A perfect mix feels light and crumbly. It holds water without drowning delicate roots. Organic materials like compost or peat moss feed plants over time. Inorganic additives like perlite or sand keep the blend airy. Together, they create a cozy home for roots to spread and thrive.
Tailoring your recipe lets you adjust for specific needs. Tomatoes crave more drainage than basil. Herbs might prefer less moisture than leafy greens. With simple ingredients and a little know-how, you can craft mixes that outperform even premium brands like Miracle-Gro.
This guide walks through ingredient ratios, safety tips, and testing methods. You’ll learn how to combine components for optimal growth. Let’s dig into the dirt on building better soil!
Key Takeaways
- Homemade blends let you customize drainage and nutrients for specific plants
- Balance organic matter (compost) with aerators (perlite) for healthy roots
- Proper moisture retention prevents overwatering in confined spaces
- Adjust recipes based on plant types and container sizes
- Quality ingredients outperform generic store-bought options
Understanding the Basics of Container Gardening
Healthy container plants depend on the unseen foundation: their growing environment. Unlike traditional garden beds, pots create unique challenges for roots. Limited space demands smarter material choices to prevent waterlogging and nutrient shortages.

Soil versus Potting Mix: What You Need to Know
Garden soil works great outdoors but fails in containers. It compacts easily, suffocating roots and trapping moisture. Commercial potting mix solves this with lighter ingredients like peat moss and perlite.
| Garden Soil | Potting Mix |
|---|---|
| Heavy, dense texture | Light, fluffy structure |
| Designed for open ground | Made for confined spaces |
| Contains clay/silt | Includes aerators like perlite |
Brands like Miracle-Gro use balanced formulas, but DIY recipes let you tweak ratios. For tomatoes, add extra perlite. Basil thrives with more compost. Customization beats one-size-fits-all solutions.
Importance of Drainage and Moisture Retention
Roots need both air and water to flourish. Too much moisture causes rot, while rapid drying stresses plants. A quality mix holds just enough water while letting excess drain freely.
Organic matter like compost acts like a sponge, releasing nutrients slowly. Inorganic additives create air pockets—perlite’s white specks aren’t just decoration. Together, they mimic natural soil conditions in miniature.
Ingredients for a Successful DIY Soil Mix
Building great potting mix starts with knowing your materials. Think of ingredients as puzzle pieces—each plays a specific role in root health and plant growth. Let’s break down what goes into a balanced blend.

Organic Components: Nature’s Nutrient Boosters
Organic materials feed your plants while improving texture. Compost adds slow-release nutrients and beneficial microbes. Peat moss holds moisture like a sponge but can acidify the mix slightly. For eco-conscious growers, coconut coir works as a renewable peat alternative with similar water retention.
Inorganic Additives: Structure Engineers
These ingredients keep roots breathing and prevent soggy soil. Perlite (those white pebbles) creates air pockets for drainage. Vermiculite holds both water and nutrients, while coarse sand adds weight and improves flow in heavy mixes.
| Material | Function | Ideal % |
|---|---|---|
| Compost | Nutrient source | 30-40% |
| Peat/Coir | Moisture control | 30% |
| Perlite | Aeration | 20-25% |
| Vermiculite | Water retention | 10-15% |
Most store-bought mixes use similar ratios but often skimp on compost quality. By adding worm castings, you’ll pack more nutrients into your recipe. Test different combinations—leafy greens love extra vermiculite, while herbs thrive with higher perlite content.
DIY Soil Mixes for Thriving Container Vegetables and Herbs
Transform ordinary ingredients into a powerhouse blend for potted edibles. Start with three core components: moisture managers, aerators, and nutrient sources. This combination creates the ideal environment for roots to breathe and grow vigorously.

Step-by-Step Mix Recipe for Beginners
Try this all-purpose starter formula:
- Fill a wheelbarrow with 3 parts peat moss or coconut coir
- Add 2 parts quality compost – sift out large chunks
- Mix in 1 part perlite using your hands or shovel
- Moisten slightly until it holds shape when squeezed
| Plant Type | Base Mix | Additions |
|---|---|---|
| Tomatoes/Peppers | 3:2:1 (peat:compost:perlite) | 1 cup worm castings per gallon |
| Leafy Greens | Equal parts peat & compost | Extra vermiculite |
| Herbs | 2:1:1 (coir:compost:perlite) | Handful of coarse sand |
Adjusting Ratios for Different Plants
Too dense? Add perlite a handful at a time. Mix crumbling apart? Blend in more compost. For seedlings, use finer-textured ingredients and sterilize components first.
Always wear gloves when handling dry peat moss – it can irritate skin. Store unused mix in sealed containers to maintain freshness. Your plants will show their appreciation through vigorous growth!
Tailoring Your Mix for Specific Vegetables and Herbs
Plants speak through their roots—if you listen closely. What works for basil might drown rosemary. Tomatoes demand different meals than lettuce. Your potting mix becomes a custom menu when you match ingredients to each plant’s cravings.
Herb-Specific Adjustments and Groupings
Mediterranean herbs like rosemary and thyme prefer gritty, fast-draining beds. Add coarse sand to your base mix—about 20%—to mimic their native rocky soils. Basil and parsley enjoy slightly richer blends with extra compost for leafy growth.
Group herbs by water needs:
- Hot & dry: Oregano, lavender, sage (extra perlite)
- Moderate moisture: Cilantro, dill, chives (balanced compost)
Vegetable Nutrient Needs and Drainage Requirements
Heavy feeders like tomatoes crave nutrient-dense blends. Boost your recipe with worm castings every 4-6 weeks. Leafy greens thrive with steady moisture—add vermiculite to retain water without sogginess.
Root crops need loose textures. Try this carrot-friendly blend:
- 40% coconut coir
- 30% compost
- 20% perlite
- 10% horticultural sand
Watch for clues. Yellow leaves? Maybe more nitrogen. Wilting despite water? Improve drainage. Your garden will tell you what tweaks it needs.
Safety, Testing, and Quality Checks
Creating a safe growing environment begins before you even plant your first seedling. Proper precautions ensure your mix nourishes plants without introducing hazards. Let’s explore how to handle materials responsibly and verify your blend’s performance.

Protective Gear and Safe Handling Practices
Always suit up before mixing ingredients. Dust from peat moss or compost can irritate lungs and skin. Wear these three essentials:
- N95 mask to filter airborne particles
- Nitrile gloves for hand protection
- Safety glasses to shield eyes
Sterilize homemade compost at 140°F for 30 minutes to kill pathogens. Work in well-ventilated areas—open garages or outdoor spaces work best. Store unused materials in sealed containers to prevent contamination.
Testing pH and Nutrient Levels
Plants thrive in slightly acidic conditions (pH 6.0-6.8). Use these methods to check your potting mix:
- Digital pH meters for instant readings
- Test strips for quick visual results
- Soil testing kits mailed to extension services
| Test Type | Cost | Accuracy |
|---|---|---|
| pH Strips | $5-10 | Basic |
| Digital Meter | $15-40 | High |
| Lab Analysis | $30-75 | Professional |
Adjust acidity with lime (to raise pH) or sulfur (to lower it). Add slow-release fertilizers if nitrogen levels dip below 2%. Your plants will reward these checks with vibrant growth!
Tips for Long-Term Success in Container Gardening

Your container garden’s vitality depends on consistent care beyond the initial planting phase. Seasonal shifts demand adjustments to watering, feeding, and soil management. Let’s explore how to keep your plants thriving year-round.
Seasonal Maintenance and Fertilization Tips
Summer heat accelerates moisture loss. Check pots daily—stick your finger 1″ deep. If dry, water thoroughly until it drains from the bottom. Every third watering, add liquid fertilizers like compost tea or fish emulsion for nutrient boosts.
Winter brings different challenges. Move sensitive plants indoors before frost. Reduce watering frequency by 50% as growth slows. Refresh the top 2″ of mix in spring to replenish organic matter.
| Season | Key Task | Benefit |
|---|---|---|
| Spring | Repot with fresh mix | Recharges nutrients |
| Summer | Mulch surface with straw | Slows evaporation |
| Fall | Add slow-release granules | Prepares for dormancy |
| Winter | Group containers together | Insulates roots |
Test your potting mix annually. Squeeze a handful—it should hold shape briefly before crumbling. If compacted, blend in perlite or coconut coir. For heavy feeders like tomatoes, top-dress with compost every 6 weeks.
Organize your space strategically. Cluster herbs needing similar light on wheeled container carts. Elevate vegetable pots on stands to improve airflow. With smart routines, your garden becomes a self-sustaining ecosystem.
Conclusion
Crafting your own growing medium unlocks the full potential of potted edibles. By blending organic compost with aerators like perlite, you create a tailored environment where roots access both nutrients and oxygen. This balance transforms ordinary containers into productive mini-ecosystems.
Remember: successful potting mix combines science with observation. Test drainage by squeezing a handful—good structure holds shape briefly before crumbling. Adjust recipes based on plant feedback; yellow leaves may demand more nitrogen, while sagging stems often signal soggy soil.
Safety remains crucial. Always wear gloves and masks when handling dry ingredients. Regular pH checks prevent surprises, ensuring your mix stays slightly acidic for optimal nutrient uptake. Seasonal refreshes with fresh compost or worm castings keep beds thriving year-round.
Ready to experiment? Start with the all-purpose recipe, then tweak ratios as you learn your plants’ preferences. Share your basil’s bushy growth or tomato harvest photos online—your successes might inspire fellow gardeners!
With each customized blend, you’re not just filling pots. You’re engineering homes where roots stretch freely and harvests multiply. Trust the process, embrace adjustments, and watch your edible oasis flourish.


