
Got a tiny backyard or balcony? You can still grow lush greenery by building upward. Vertical structures let you turn blank walls or narrow corners into thriving plant displays. This guide shows how to create custom supports that fit your unique outdoor area.
We’ll walk through everything from choosing durable materials to designing layouts that boost your harvest. Whether you’re growing tomatoes, flowers, or climbing vines, these projects adapt to your available room. No fancy tools needed – just simple techniques anyone can master.
Our step-by-step plans focus on common supplies like wood, wire, or recycled items. You’ll learn how to measure your space, pick the right plants, and create sturdy frames that last seasons. Even renters can try these temporary setups that leave no permanent marks.
Key Takeaways
- Maximize growing areas in compact yards or patios
- Customize designs using affordable, easy-to-find materials
- Support climbing plants while adding visual interest
- Follow beginner-friendly construction methods
- Adapt projects for both permanent and temporary use
Introduction to Vertical Gardening in Small Spaces
Working with limited outdoor areas? Many gardeners face tight corners where traditional planting feels impossible. Limited ground space often leads to crowded roots, uneven sunlight, and poor air circulation. These challenges can turn your green dreams into frustration.

Understanding the Challenges of Limited Garden Space
Small growing zones force tough choices. You might sacrifice flower variety for vegetable yields or struggle with tangled plant branches. Soil quality degrades faster in compact beds, and watering becomes a daily chore. Over time, these issues drain the joy from your hobby.
How Vertical Solutions Can Change Your Gardening Game
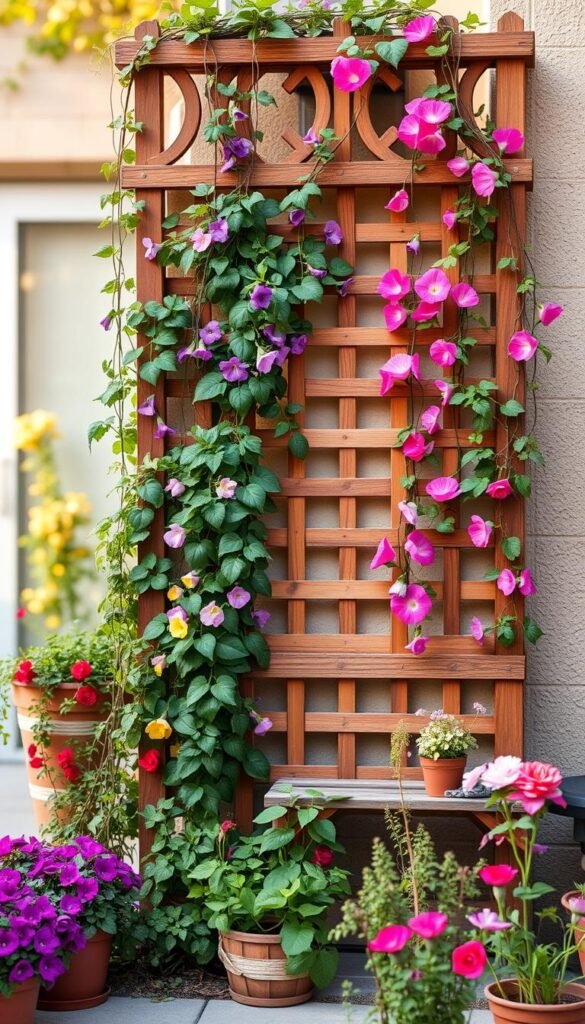
Wall-mounted systems and climbing frames transform unused surfaces into productive green zones. A simple trellis lets cucumbers climb instead of sprawl, while hanging pockets let herbs thrive near windows. Repurpose items like old ladders, wire grids, or wooden pallets – many materials already exist in your home.
This guide will show how to match plant types with support structures. Learn to pick weather-resistant materials and create layouts that save time on maintenance. You’ll discover designs that work for renters and homeowners alike, blending function with visual charm.
Benefits of Vertical Gardening for Your Garden
Want healthier plants with less work? Growing upward transforms how your green space functions. By lifting foliage off the soil, you create conditions that help your garden thrive naturally.

Less Weeding, Better Breathing Room
When vines climb a garden trellis, they leave little room for weeds to grow. Elevated plants block sunlight from reaching unwanted sprouts below. Air moves freely around leaves and branches, drying moisture that causes mold or blight.
Fewer Bugs, Simpler Harvests
Pests struggle to reach beans and tomatoes growing high on a trellis. You’ll spend less time battling aphids or caterpillars. Maintenance becomes easier too – no more crouching to pick produce hidden in ground-level foliage.
| Benefit | Traditional Gardening | Vertical Setup |
|---|---|---|
| Weed Growth | High | Low |
| Disease Risk | Moderate | Reduced |
| Harvest Time | 15+ minutes | Under 5 minutes |
Structures like wire fences or wooden frames keep your garden organized. They guide plant growth upward, making it easier to spot ripe veggies. For more ideas on maximizing these advantages, explore our guide to vertical gardening techniques.
DIY Trellises: Going Vertical in Small Spaces
Transforming tight areas into green oases starts with smart design. Your diy trellis can become both a functional support and a decorative feature. The key? Combining creativity with items you already own.

Repurpose fallen branches from your yard to craft rustic frames. Old ladders make instant climbing racks for beans or morning glories. Even wire baking racks or bamboo poles can form sturdy bases when secured properly. These solutions cost little but add big character.
| Material | Cost | Durability | Best For |
|---|---|---|---|
| Bamboo | $ | 3-5 years | Lightweight plants |
| Branches | Free | 1-2 seasons | Temporary setups |
| Wire Grids | $$ | 5+ years | Heavy climbers |
Mix textures and shapes to match your style. A curved willow frame adds whimsy to flower beds, while geometric wire panels suit modern patios. Your garden trellis should reflect your taste while maximizing every inch of space.
Up next: Detailed plans for building these structures using common tools. You’ll learn how to adapt designs for balconies, narrow walls, or raised beds. Let’s turn those trellis ideas into reality!
Choosing the Right Materials for Your DIY Trellis
Your trellis materials determine both function and style. Look around your home and yard first – fallen branches, old wire fence sections, or leftover lumber often make perfect supports. These free resources let you test designs before investing in pricier options.

Wood offers classic appeal but needs weatherproofing. Cedar and redwood resist rot naturally, while pine requires sealant. For quick setups, bamboo stakes create lightweight trellis frames that blend into gardening spaces. Pair them with twine for adjustable plant training.
| Material | Best Use | Durability | Cost |
|---|---|---|---|
| Wood | Flowering vines | 5-8 years | $$ |
| Bamboo | Peas/beans | 2-3 years | $ |
| Cattle Panels | Heavy veggies | 10+ years | $$$ |
| Metal Fence | Secure setups | 15+ years | $$$$ |
Galvanized cattle panels handle squash and melons with ease. Their grid pattern supports weight without bending. For windy areas, metal fence posts add stability but cost more upfront. Always match your material’s strength to your plants’ growth habits.
Reclaimed wood pieces bring character while reducing waste. Sand rough edges and apply linseed oil for protection. Rotate materials seasonally – use branches for annuals and invest in long-lasting metals for perennial climbers.
Step-by-Step Guide to Building Your Trellis
Ready to craft your plant support system? Start by sketching your design on paper. Measure your available ground space and note nearby walls or fences. This prevents oversizing and ensures proper airflow between plants.

Gather these tools: pruning shears, measuring tape, and gloves. For materials, collect straight branches (1-2″ thick), durable twine, and metal stakes. Visit your local hardware store for missing items like wire panel sections or zip ties.
- Trim branches to equal lengths using shears
- Lay them in a ladder pattern on flat ground
- Secure intersections with crisscrossed twine knots
Anchor your structure by driving stakes 12″ into the ground. Tie horizontal branches to these anchors using double-layer twine. “Always cross-check your knots twice,” advises Portland gardener Mara Lin. “Wind tests structures more than plant weight.”
Boost stability by adding diagonal support beams. Attach them at 45-degree angles from the main frame. For heavy climbers like squash, screw metal panel grids to wooden posts using zip ties or brackets.
Check tension points monthly. Retie loose twine before plants mature. Apply wood sealant to branches if using outdoors year-round. Your diy trellis will stay sturdy through harvest season!
Creative Trellis Ideas to Enhance Your Garden
Elevate your green space with artistic supports that spark joy. String trellises work wonders for delicate climbers like sweet peas. Use weather-resistant twine to weave geometric patterns between wooden posts or branches. These airy designs let light filter through while guiding vining plants upward.
Teepee-style frames add rustic charm to vegetable patches. Arrange bamboo poles in a cone shape and secure them with jute rope. “This setup helped my cucumbers grow 30% faster,” shares California gardener Luis Rivera. For edible flair, plant snap peas around the base – their tendrils will climb naturally.
Bend flexible willow stems into arched entryways for flower beds. Weave thinner branches horizontally to create climbing lanes. Double-layer the structure with twine grids for heavy bloomers like clematis. This approach blends function with fairytale aesthetics.
Upcycle metal fence panels into modern art pieces. Spray-paint them copper or sage green, then lean against walls for instant vertical gardens. Their rigid grids support tomatoes and beans without sagging. Add potted herbs at the ground level for layered appeal.
Mix materials to match your garden’s personality. Combine chunky logs with delicate wire mesh for contrast. Test unconventional layouts – spiral shapes or zigzag patterns surprise the eye while maximizing growth space. Your trellis ideas become living sculptures that evolve with each season.
Maintaining and Enhancing Your Vertical Garden
Keep your vertical setup thriving with smart care habits. Weekly checks prevent big headaches later. Tighten loose twine before plants get heavy, and wipe down branches or metal fence panels to remove mildew. A quick once-over takes minutes but saves hours fixing collapsed structures.
Rotate potted plants every 3 weeks for even sun exposure. In summer, thin leafy growth to boost airflow. Come fall, trim back dead vines so winter winds won’t strain your trellis. These seasonal tweaks keep your garden healthy year-round.
Reinforce older supports as the years pass. Add crossbeams to wooden frames or swap rusted wires for coated cables. “I refresh my setup each spring with leftover materials,” says Denver gardener Clara Meeks. “It’s cheaper than rebuilding.”
When greenery starts crowding, get creative. Train aggressive climbers sideways along fence lines. Move compact herbs to wall pockets, freeing space below for new seedlings. This reshuffling lets you grow 30% more in the same square footage.
Consistent care keeps your vertical oasis looking sharp. For more vertical gardening techniques that maximize limited areas, explore our detailed guides. Your small garden will reward you with lush growth season after season!
Incorporating Vertical Structures with Your Garden Plants
Your garden’s vertical potential comes alive when plants meet purpose-built supports. Start by matching climbers to your trellis type. Pole beans and sugar snap peas thrive on bamboo grids, while tomatoes need sturdier metal frames. Vining crops like cucumbers naturally reach for sunlight when given upward paths.
Position your structure where it gets 6-8 hours of daily sun. Face it southward for maximum light exposure. Leave 18-24 inches between plants to prevent overcrowding. “Rotate crops yearly to maintain soil health,” suggests Oregon gardener Elise Tanaka. “Peas one season, flowering vines the next.”
| Plant Type | Ideal Trellis | Spacing | Sun Needs |
|---|---|---|---|
| Green Beans | Bamboo Grid | 4-6″ apart | Full Sun |
| Peas | Wire Mesh | 2-3″ apart | Partial Shade |
| Tomatoes | Metal Cage | 12-18″ apart | Full Sun |
| Cucumbers | Wooden Lattice | 8-12″ apart | Full Sun |
Train young shoots early using soft branches or twine ties. Gently wrap tendrils around supports every 3 days. For heavy fruiters like squash, add horizontal bars to distribute weight evenly.
Mix edible and ornamental plants for visual variety. Pair scarlet runner beans with morning glories on a shared frame. This approach beautifies your small garden while maximizing yield. Remember: smart placement turns functional structures into living art.
Budget-Friendly DIY Trellis Options for Your Garden
Who says garden upgrades need big bucks? Smart growers know free materials often make the sturdiest supports. Check your yard for unused cattle panels or leftover wire fencing – these industrial-grade panels handle heavy climbers without bending.
Broken tools and discarded items get new life as plant frames. An old ladder becomes instant shelving for potted herbs. Splintered broom handles transform into grid patterns when lashed with twine. “I built three trellises last year using scrap wood from pallets,” shares Texas gardener Roy Benson.
| Material | Source | Cost | Best Use |
|---|---|---|---|
| Cattle Panels | Farm auctions | $10-15 | Squash/Melons |
| Wire Fencing | Neighbor’s trash | Free | Peas/Beans |
| Bamboo Poles | Local nursery | $0.50 each | Flowering vines |
| Wooden Pallets | Hardware store | Free-$5 | Herb walls |
Hit store clearance racks after planting season. Many garden centers discount trellis kits by 70% in late summer. Online community boards often list free panels or tools – just ask neighbors!
Secure materials with zip ties instead of pricey brackets. They withstand weather and hold weight when doubled up. For temporary setups, use jute twine that decomposes after the growing season.
With clever sourcing and basic gardening skills, you’ll create durable supports that beautify your bed without draining your wallet. The best options often hide in plain sight!
Conclusion
Your green sanctuary starts with smart vertical solutions that work smarter, not harder. Building upward remains a great way to transform cramped corners into lush growing zones. Through clever use of materials like ladders or wire fencing, you create living walls that save space while boosting yields.
Remember: these structures simplify care by improving airflow and keeping pests at bay. Pole beans climb neatly, tomatoes stay mold-free, and herbs thrive within arm’s reach. Regular checks ensure your support system stays sturdy – tighten connections and replace worn pieces before heavy growth seasons.
Mix materials to match your yard’s personality. Repurpose cattle panels for squash or craft artistic grids from store-bought supplies. Every garden tells a story – let your trellis ideas reflect yours through shape, texture, and plant pairings.
Don’t fear limited square footage. With creativity and basic support structures, even postage-stamp patios become productive oases. Your journey to abundant harvests begins with that first bamboo pole or reclaimed ladder. What will you grow back there this season?


