
Got empty bottles or old cans lying around? You’d be surprised how easily these items can become homes for your favorite herbs, flowers, or veggies. This approach lets you grow plants while reducing household waste – a win for your garden and the planet.
Creating plant holders from household objects isn’t just practical – it’s creative. Old mugs, cracked buckets, or even folded newspapers work as unique pots. The secret? Focus on three essentials: quality soil, proper water drainage, and enough sunlight for your green friends to flourish.
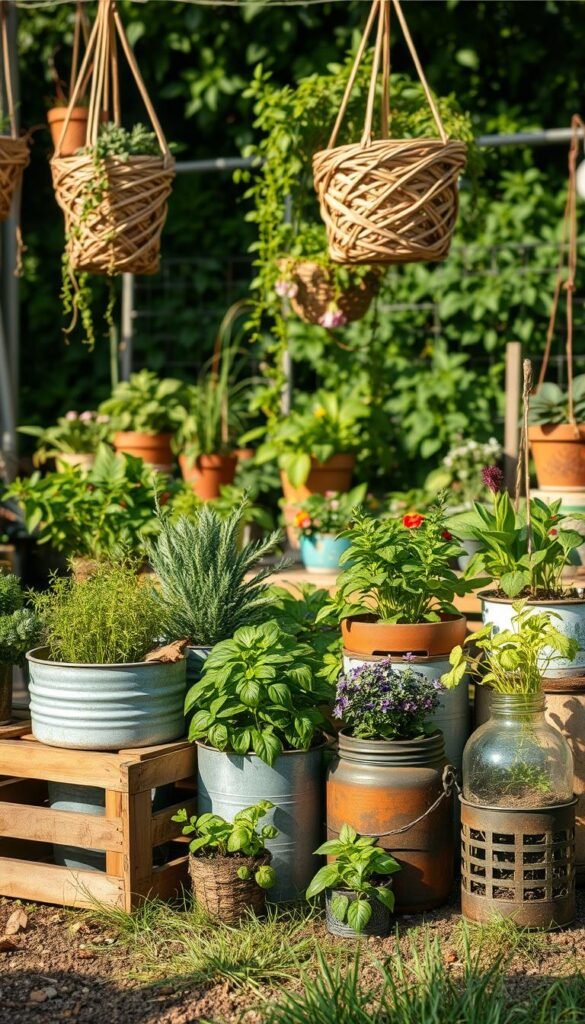
You’ll save money and give discarded materials new purpose. Imagine a colorful windowsill filled with mint growing in painted tin cans or succulents thriving in upcycled plastic jars. These small changes add up, cutting landfill waste while boosting your home’s natural beauty.
Key Takeaways
- Repurpose common household items into creative plant holders
- Balance sustainability with cost savings through DIY projects
- Ensure proper sunlight, drainage, and soil quality for healthy growth
- Start with simple materials like bottles, cans, or newspaper pots
- Reduce environmental impact while personalizing your green space
Getting Started with Eco-Friendly Container Gardening
Turn overlooked corners into green oases by matching your space to your greenery goals. Start by tracking sunlight patterns – most edibles need 6+ hours daily, while shade-loving varieties thrive under indirect light. A sunny balcony suits tomatoes, while ferns brighten dim hallways.

Map Your Light Sources
Use free apps or simple observations to note where shadows fall throughout the day. South-facing windows often provide the strongest light, but reflective surfaces can boost brightness in darker areas. Rotate pots weekly for even growth.
Choose Safe Upcycled Options
Not all household castoffs work equally well. Avoid treated woods or rusty metals that might harm roots. Glass jars make excellent herb homes when drilled with drainage holes, while food-grade buckets become durable veggie planters.
| Material | Best For | Prep Needed |
|---|---|---|
| Plastic bottles | Small herbs | Cut top, add holes |
| Mason jars | Propagation | Layer pebbles |
| Tin cans | Succulents | Sand sharp edges |
| Paper rolls | Seed starters | No prep needed |
Test containers by filling with water overnight – if they hold moisture without warping, they’re plant-ready. Pair your finds with quality potting mix to create thriving mini-ecosystems. Remember: proper drainage prevents 87% of common root issues according to urban farming studies.
DIY Plant Container Basics and Essential Tools
Transforming everyday items into plant homes starts with smart material choices. The right combination of tools and prep work turns potential trash into thriving green spaces. Let’s break down what you need to build durable, functional homes for your plants.

Selecting Safe and Durable DIY Materials
Not all household items work equally well for planting. Avoid chemically treated woods or rusty metals that could harm roots. Food-grade plastic buckets and glass jars often make the safest containers – just add drainage holes at the bottom.
| Material | Best Use | Prep Steps |
|---|---|---|
| Milk jugs | Leafy greens | Cut top, drill 5 holes |
| Ceramic bowls | Cacti | Add gravel layer |
| Wine crates | Strawberries | Line with landscape fabric |
| Yogurt cups | Seed starters | Poke base with nail |
Must-Have Tools and Safety Tips
Basic supplies turn ideas into reality. Keep these essentials handy:
- Power drill with masonry bits for creating drainage
- Heavy-duty gloves to protect hands from sharp edges
- Sandpaper to smooth rough container surfaces
Always wear safety goggles when cutting glass or drilling hard materials. Test your soil mix before planting – it should hold moisture without becoming soggy. A simple trick? Water should drain through your container in 10-15 seconds when poured.
Eco-Friendly Container Gardening: Reusing and Recycling Materials
Transform everyday trash into plant treasures with these simple steps. Whether using tin cans, plastic bottles, or newspaper rolls, proper setup ensures your greenery thrives. Let’s turn those forgotten objects into vibrant homes for herbs and flowers.

Step-by-Step Instructions for Container Setup
Start by thoroughly cleaning your materials. Scrub food residue from cans and rinse bottles with soapy water. For paper-based pots, roll newspaper sheets into cylinders – they’ll decompose naturally when transplanted.
- Drill 3-5 drainage holes in metal or plastic containers using a 1/4″ bit
- Line paper pots with coffee filters to prevent soil leakage
- Sand sharp edges on tin cans with 120-grit sandpaper
Create a soil mix using 60% potting soil and 40% homemade compost. This blend provides nutrients while maintaining airflow. Fill containers 2/3 full, leaving room for roots to expand.
Watering Techniques and Soil Considerations
Check moisture daily by sticking your finger 1″ into the soil. Water slowly until liquid seeps through drainage holes – this prevents root rot. Morning watering reduces evaporation loss.
| Material | Water Frequency | Soil Tip |
|---|---|---|
| Tin cans | Every 2 days | Add perlite for drainage |
| Plastic bottles | 3x weekly | Mix in coconut coir |
| Paper pots | Daily misting | Use vermicompost |
For more inspiration, explore our creative recycling guide featuring unusual planter ideas. Remember: consistent care beats perfect conditions every time!
Creative Ideas for Recycled Garden Containers
Your home holds hidden gems waiting to become plant havens. From forgotten kitchen tools to worn-out furniture, everyday objects can bloom into vibrant growing spaces. Let’s explore clever ways to turn “trash” into thriving green displays.

Unusual Treasures Become Plant Homes
Egg cartons transform into perfect seedling starters. Their compartments cradle young roots, and the cardboard breaks down naturally when transplanted. For taller plants, stack old colanders or wire baskets – their built-in holes provide instant drainage.
Try these quick projects:
- Wrap newspaper sheets around jars to create rustic pots
- Convert broken drawers into shallow herb beds
- Turn pasta strainers into hanging strawberry planters
Grow Up, Not Out
Maximize tight spaces with vertical designs. Mount wooden pallets against walls to hold 18+ small pots. Hang repurposed gutters along fences for cascading flowers or leafy greens. Even shoe organizers become pocket gardens when filled with soil mix.
| Material | Vertical Use | Plant Pairing |
|---|---|---|
| Ladder | Tiered shelf | Trailing ivy & succulents |
| Bike rack | Climbing frame | Beans & peas |
| Shutters | Wall planter | Moss & air plants |
For more inspiration, check out these recycled planter ideas that turn trash into garden gold. Remember to drill holes in container bottoms – proper drainage keeps roots healthy. A coat of non-toxic paint personalizes pieces while protecting materials like tin from rust.
Conclusion
Your journey to a greener space starts with everyday items gathering dust. By transforming unused plastic bottles, worn-out tins, or leftover jars into plant homes, you slash household waste while cultivating life. This approach blends creativity with practicality – turning what you already own into thriving green corners.
Remember the essentials: proper drainage holes at the bottom, nutrient-rich soil blends, and mindful watering habits. Pair these with your repurposed materials to build sustainable homes for herbs, flowers, or veggies. Each DIY planter becomes a small victory against landfill overflow.
Experiment freely – try painting containers for personality or stacking bottles into vertical gardens. Your efforts add up, creating healthier plants and a happier planet. Bookmark this guide for future projects, and watch your garden grow alongside your eco-conscious habits.
With some imagination and reused materials, you’ll craft a vibrant oasis that benefits both your space and the environment. Start small, think big, and let nature do the rest!


