
What makes some growing areas burst with life while others struggle? The answer lies beneath the surface. Nutrient-rich earth forms the foundation of every successful planting space, hosting a vibrant community of microorganisms that feed your plants naturally.
When building your structured growing area, think beyond just dirt. The best earth mixtures breathe like a sponge while holding moisture – crucial for strong root systems. Many gardeners find that combining quality topsoil with organic matter creates ideal conditions. For those starting fresh, our guide on how to build a raised bed offers practical soil-blending tips.
Nature’s perfect recipe includes:
• Balanced texture for air circulation
• Slow-release nutrients from compost
• Proper drainage to prevent waterlogging
By focusing on these elements, you’ll create an environment where plants and soil organisms work together. This partnership reduces the need for artificial additives and leads to heartier crops. The right approach can transform your planting zone into a self-sustaining ecosystem that grows better each season.
In the following sections, you’ll discover how strategic layering mimics natural forest floors and why certain materials outperform others. We’ll break down common mistakes and share professional methods for maintaining fertile, productive earth year after year.
Getting Started with Raised Garden Beds

Ever wondered how to turn a small patio or backyard corner into a thriving green space? Elevated planting zones solve this challenge beautifully. These structured growing areas let you bypass poor native soil and create ideal conditions for your favorite vegetables or flowers.
What Are Raised Garden Beds?
Think of these as custom-built planters that sit above ground level. You fill them with tailored soil mixes instead of relying on existing earth. This setup works like a personalized ecosystem where you decide the nutrients, texture, and moisture levels.
Urban gardeners love them because they fit anywhere – even on concrete surfaces. You’ll notice roots develop faster thanks to loose, uncompacted soil that retains water without drowning plants. For best results, pair your setup with our soil preparation guide to balance drainage and fertility.
Why You Should Consider a Raised Garden Bed
Three game-changing advantages make these systems stand out:
- Custom soil blends combat clay-heavy or sandy ground
- Elevated height means less bending during planting
- Enhanced drainage stops roots from rotting after heavy rains
You’ll spend less time weeding since contained spaces naturally block invasive grasses. The elevated design also warms up faster in spring, extending your growing season. Whether you’re growing tomatoes or tulips, this approach gives plants room to stretch their roots while keeping maintenance manageable.
Understanding the Basics of Raised Bed Gardening

Why do some gardeners swear by elevated planting systems? These setups act like custom-built ecosystems where you control every detail. Unlike traditional plots, they let you sidestep common ground-level challenges while boosting plant vitality.
Benefits of Elevated Gardening Spaces
Elevated setups give roots room to breathe. Loose, oxygen-rich earth lets plants absorb nutrients more efficiently. You’ll notice faster growth rates – especially for vegetables craving deep, uncompacted soil.
The real magic happens in customization. Mix sandy loam for carrots or rich compost for tomatoes without altering your entire yard. Contained walls keep nutrients where they belong, reducing fertilizer needs by up to 30% compared to open gardens.
How Raised Beds Improve Drainage and Soil Quality
Elevation naturally solves water issues. Excess moisture drains through layered materials instead of pooling around roots. This prevents rot in sensitive plants like peppers or lavender that hate “wet feet”.
Your soil stays fluffy season after season. The structured walls prevent compaction from rain or foot traffic. Over time, organic matter breaks down evenly, creating that crumbly texture seedlings adore. Want acidic blueberries next to alkaline-loving kale? Separate zones make it possible.
Preparing Your Garden Bed for Filling

Creating a thriving plant environment begins long before you add soil. A well-prepared foundation prevents future headaches and lets roots access nutrients without competition.
Cleaning and Leveling the Raised Bed
Start by removing every trace of grass, roots, or rocks from your planting area. This clean slate stops weeds from stealing resources later. Check your bed’s frame for loose screws or warped boards – a sturdy structure prevents soil spillage.
Use a carpenter’s level across the bed’s edges. Uneven surfaces cause water to collect in low spots, which might drown plants. If you’re designing a smart garden layout, level ground ensures consistent growth patterns.
Installing a Weed Barrier
Line the bottom with breathable landscape fabric or plain cardboard. This layer blocks invasive grasses while letting water drain properly. Avoid glossy or printed cardboard – the inks could harm your plants.
Soak the barrier thoroughly before adding soil. Damp materials break down faster, creating a seamless transition between layers. You’ll notice fewer weeds within weeks, giving seedlings a clean start.
Pro tip: Double-check corners and seams when placing your barrier. Overlapping edges by 3 inches stops sneaky weeds from finding gaps.
Essential Tips for Layering Materials in Your Bed

Did you know your yard trimmings could become your garden’s best friend? Those fallen leaves and grass clippings you usually bag up hold hidden value. They’re nature’s free building blocks for creating nutrient-rich earth in your planting zone.
Using Organic Materials and Yard Waste
Start by placing coarse materials like sticks at the bottom of your structure. This base layer improves drainage while taking up space that would otherwise require expensive soil. As these woody pieces break down, they feed earthworms and microbes that boost soil health.
Middle layers work best with mixed organic matter. Alternate grass clippings with dry leaves to balance nitrogen and carbon. This combo heats up as it decomposes, creating a slow-release fertilizer. You’ll notice fewer weeds thanks to the natural mulch effect that blocks sunlight from reaching unwanted seeds.
For the top layer, use partially decomposed materials. A 2-inch blanket of shredded bark or compost completes your layered approach. This method helps fill raised beds efficiently while cutting soil costs by up to 40%.
Remember: Thicker layers work better for weed suppression. Aim for at least 4 inches of organic materials between soil levels. Over time, these free resources transform into dark, crumbly earth that roots penetrate easily. Your plants will thrive in this self-renewing system that turns yard “waste” into gardening gold.
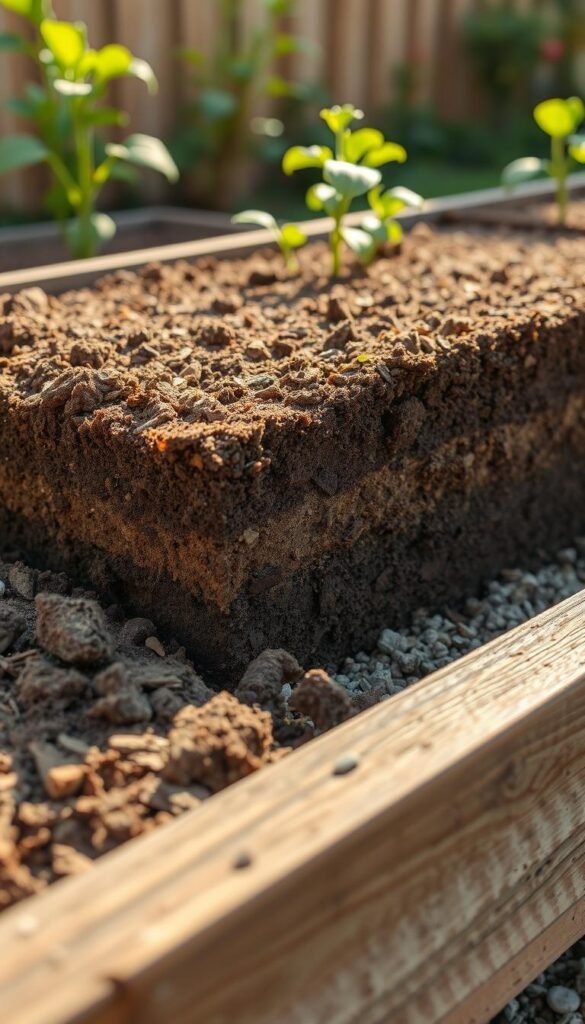
Filling Raised Garden Beds: The Right Layering Technique for Healthy Roots
How much money could you save while building better earth? Structured planters thrive when you let nature do the heavy lifting. Smart layering turns yard debris into plant food while cutting soil expenses.
Start with bulky items at the base. Logs and thick branches occupy space in bottom raised areas, reducing needed soil by 30-50%. A 15-inch planter works best with one-third organic matter – try pinecones or pruned branches. Taller setups can use half the depth for free materials.
Build upward like a lasagna garden:
- Twigs/straw for air pockets
- Leaf litter to fill gaps
- Compost blend as final topping
This method feeds roots gradually as materials break down. You’ll notice the earth level drops 2-3 inches yearly – simply add compost each spring. Pro tip: Water each layer lightly as you build to kickstart decomposition.
Why pay for truckloads of dirt when your property provides free resources? This approach creates self-fertilizing systems where carrots dive deep and tomatoes stretch wide. Your wallet and plants will both thank you.
Selecting Quality Soil Components

Ever thought about what makes your garden’s foundation truly thrive? The secret lives in two powerhouse ingredients working together. Topsoil acts like the skeleton, while compost serves as the nutrient-packed lifeblood. Getting this duo right means your plants get both support and sustenance.
Choosing Topsoil and Compost
Topsoil isn’t just dirt – it’s nature’s building blocks. Look for blends containing mineral particles and decomposed plant material. This gritty texture lets roots anchor securely while allowing water to flow freely.
Compost should smell earthy, not sour or chemical. High-quality versions crumble like chocolate cake and teem with visible worms or beetles. Avoid bagged mixes labeled “compost” that feel slimy or contain plastic bits.
Mixing Organic Matter for Nutrient-Dense Soil
Combine equal parts topsoil and compost in a wheelbarrow or tarp. Use your hands to break up clumps – you want a consistency resembling coffee grounds. For extra richness, mix in aged manure or shredded leaves.
This balanced blend feeds plants gradually while maintaining structure. Vegetables like tomatoes will develop stronger stems, while flowers produce more vibrant blooms. Test your mix by squeezing a handful – it should hold shape briefly before crumbling apart.
Step-by-Step Guide to Layering Your Garden Bed
Building your planting foundation requires precision and patience. Let’s break down the process using materials you likely already have, transforming yard debris into a thriving root environment.
Layering From the Foundation
Start by filling the bottom half of your bed with bulky organic materials. One standard 4x4x16-inch structure needs about a large trash can of sticks, pruned branches, or pinecones. This base layer creates air pockets while reducing soil costs by up to 50%.
Add two bags of organic topsoil next. Spread it evenly to compress the yard waste beneath. You’ll notice the soil acts like a weighted blanket, stabilizing the base while introducing essential minerals.
Smart Material Distribution Methods
Fill gaps with shredded leaves or grass clippings. These lightweight materials settle into crevices, preventing soil from sinking later. For a 4x4x16 bed, four bags of quality raised bed mix complete the upper layers.
Pro tip: Mix compost directly into your soil instead of layering it on top. This ensures nutrients spread evenly as roots grow downward. Water each section lightly – you’ll spot uneven areas as moisture soaks through.
Your final bed should leave 2-3 inches at the top for mulch. This space allows seasonal additions without overflow. With this method, you’ll create a self-feeding system that improves yearly as materials decompose.
Balancing Soil pH and Nutrient Levels
Did you know your plants might be starving even in rich soil? The key lies in pH balance – that invisible scale determining how well roots absorb nutrients. Without proper testing, your carefully layered bed could become a locked pantry full of inaccessible food.
Testing and Adjusting Your Soil pH
Grab a $10 test kit from your local garden center – it’s simpler than baking cookies. Just mix soil samples with water and match the color chart. Most flowering plants prefer slightly acidic conditions (6.0-7.0 pH), while veggies have unique preferences. If numbers stray, sprinkle lime to sweeten acidic earth or sulfur to lower alkaline levels.
Compost works like a pH buffer, slowly releasing acids as it breaks down. For quick fixes, mix amendments into the top 6 inches of your bed. Retest every 3-4 weeks until you hit the sweet spot. Remember: gradual changes prevent plant shock better than drastic swings.
Need help troubleshooting? Our guide on fixing plant nutrient issues covers pH adjustments for specific crops. Pair your balanced soil with regular compost top-ups, and watch those zinnias outcompete store-bought bouquets!


