
Imagine transforming your outdoor area into a captivating sanctuary that stops guests in their tracks. A well-designed structure can turn ordinary yards into enchanting spaces, blending natural beauty with artistic design. These timeless additions do more than just look pretty—they create inviting pathways, frame stunning views, and infuse your landscape with personality.
Why do these curved frameworks work so well? They naturally guide the eye, making even compact areas feel spacious and layered. By adding vertical interest, they give climbing plants like roses or ivy a place to thrive, merging function with charm. Whether draped in blooms or standing bare in winter, they maintain visual appeal year-round.
Beyond aesthetics, these installations carry deeper meaning. Many cultures view them as symbols of growth and transition—a bridge between different life stages or garden zones. Their arched shape mimics nature’s protective embrace, offering both shelter for plants and a sense of security for those who linger beneath them.
Ready to elevate your landscape? Discover how customizing your design unlocks endless possibilities, from material choices to placement strategies. Let’s explore how this single upgrade can redefine your entire outdoor experience.
Understanding Your Garden Arch’s Role as a Focal Point
What if one addition could make your entire outdoor area feel more intentional and inviting? A carefully positioned structure acts like a compass for your landscape, guiding both eyes and footsteps while adding depth to compact spaces. It transforms blank stretches into purposeful zones, whether framing a cozy bench or announcing the entrance to a hidden path.
Why a Focal Point Influences Your Outdoor Space
Strong design anchors need to do more than look pretty—they shape how you experience your surroundings. By pulling attention forward, your centerpiece creates natural flow. Visitors instinctively follow its lines, discovering new angles and hidden details along the way. This movement tricks the eye, making narrow yards feel airy and layered.
Visual and Functional Benefits of a Garden Arch
Even without blooms, these structures maintain visual appeal through crisp lines and open frameworks. They carve out distinct spaces without walls—think of them as gentle room dividers that let light filter through. When draped with vines, they become living sculptures that change with the seasons.
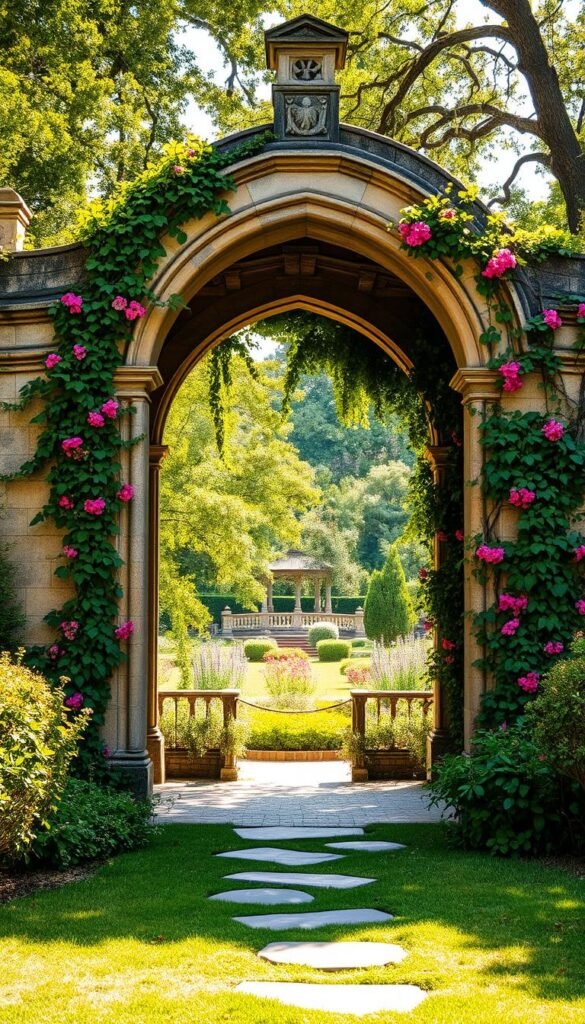
Position your arch where it frames distant trees or architectural details, borrowing beauty from beyond your property line. Over time, it’ll become the place where memories gather—where sunset chats happen and garden parties naturally cluster. That’s the magic of smart design: it works hard while looking effortless.
Flower Arch Garden Feature: Building a Picturesque Focal Point

Your outdoor space becomes a canvas when you add a personalized touch that mirrors your taste. Start by choosing materials that match your vision—wrought iron for sleek modernity or reclaimed wood for earthy charm. The right structure acts like a signature piece, blending seamlessly with your landscape’s personality.
Scale matters more than you might think. A towering design could dwarf a cozy patio, while a petite frame might get lost in sprawling yards. Measure twice, then play with proportions that enhance your space without dominating it. This balance ensures your creation feels intentional, not accidental.
Think about how your choices will mature. A powder-coated metal frame stays crisp for years, while untreated cedar develops a silvery patina. Pair these materials with climbers that evolve seasonally—clematis for spring bursts or ivy for winter texture. Explore rustic or modern styles to find what sparks joy in your daily view.
Consider sightlines from your kitchen window or favorite seating area. Your arch should captivate from every angle, framing vistas or creating privacy screens. Mix foliage colors and bloom sizes to build depth, letting each plant’s unique traits shine through.
Finally, embrace the imperfections that come with time. Weather-worn finishes and twisting vines add character, telling your garden’s story through subtle changes. That’s how you craft a living artwork that grows more captivating with each passing year.
Designing and Planning Your Stunning Arch

Ready to create a centerpiece that feels tailor-made for your landscape? Smart preparation ensures your structure enhances daily enjoyment while blending seamlessly with existing elements. Let’s break down the two most crucial steps for success.
Measuring Your Outdoor Space and Setting the Layout
Grab your tape measure and sketchpad first. Document pathway widths, overhead clearances, and plant bed boundaries. Add 8-12 inches to your arch’s base width for climbing foliage expansion. This prevents overcrowding as your clematis or jasmine matures.
Map sightlines from high-traffic areas: kitchen windows, patio seating, or entry gates. Your design should frame appealing views while avoiding utility lines. Call 811 before digging to locate underground pipes or cables—safety always comes first.
Matching Your Arch Design to Your Garden Style
Cottage enthusiasts love arched tops with lattice panels for roses to weave through. Modern spaces shine with powder-coated steel in geometric shapes. For zen-inspired yards, try bamboo curves that mimic traditional moon gates.
Test materials against your climate—cedar withstands humidity, while galvanized metal thrives in arid regions. Pair your structure’s texture with nearby hardscaping. A stone-bordered path? Try rough-hewn timber. Concrete planters? Sleek aluminum adds contrast.
Remember: Your creation should evolve with your landscape. Leave room for future additions like companion shrubs or lighting fixtures. With thoughtful planning, your arch becomes a timeless anchor that grows more charming each season.
Gathering Materials and Essential Tools

Selecting the right components sets the foundation for a lasting structure. Your choices impact both durability and visual harmony with your landscape. Let’s simplify the selection process so you can focus on creating.
Exploring Material Options: Wood, Metal, and More
Wooden arches bring warmth, especially when using cedar. This wood naturally resists rot and insects, aging gracefully into silvery-gray tones. For coastal or rainy areas, it’s a top pick.
Metal arches offer sleek lines and modern appeal. Powder-coated steel withstands harsh weather, while wrought iron adds classic elegance. Aluminum works well for lightweight designs in mild climates.
| Material | Cost | Durability | Best For |
|---|---|---|---|
| Cedar | $$ | 10-15 years | Humid regions |
| Powder-Coated Steel | $$$ | 20+ years | Snow/heavy rain |
| PVC | $ | 5-8 years | Dry climates |
Your DIY Tool Checklist
Start with these essentials: measuring tape for precise cuts, a circular saw for wood, and metal snips for steel. A power drill secures joints better than hand tools. Don’t forget safety glasses—flying debris doesn’t care about your weekend plans.
Upgrade your kit with angled brackets for extra stability. Galvanized screws outlast standard ones in wet conditions. Local hardware stores often rent specialty tools like post-hole diggers, saving you money for that climbing rose you’ve been eyeing.
Step-by-Step DIY Construction Process

Roll up your sleeves—it’s time to transform materials into a lasting structure. With basic tools and weekend effort, you’ll craft a sturdy frame ready for climbing greenery. Let’s dive into the hands-on process.
Building the Frame
Start by cutting four posts to your desired height using a circular saw. Connect two posts at the top with a curved beam for the classic arch shape. Pre-drill holes to prevent wood splitting, then secure joints with galvanized screws. Double-check measurements—even a ¼-inch error affects stability.
Installing Plant Supports
Attach horizontal crossbars 12 inches apart using metal brackets. For supports climbing plants, add wire mesh or cattle panels. Bend panels into gentle curves, securing them with zip ties. This grid gives vines something to grip as they grow upward.
| Support Type | Installation Time | Weight Capacity |
|---|---|---|
| Wire Mesh | 20 minutes | Light/medium vines |
| Cattle Panels | 45 minutes | Heavy growers |
| Wooden Trellis | 30 minutes | Decorative blooms |
Smart Building Strategies
Use a step stool to reach high connections safely. Apply wood sealant before assembly—it’s easier than staining later. Keep a level handy to ensure posts stay plumb as you work. Remember: Rushing now means wobbles later.
Test your structure by gently shaking it side-to-side. Reinforce weak spots with corner braces if needed. Once stable, celebrate—you’ve built a framework that’ll host blooms for years!
Incorporating Climbing Plants and Floral Elements

Bring your structure to life with strategic plant pairings that enhance its visual power. The right combination of climbing plants and complementary foliage turns functional supports into living masterpieces. Let’s explore how to match greenery to your climate and design goals.
Choosing Climbing Plants for Maximum Impact
Start by assessing your arch’s strength. Sturdy metal frames handle vigorous growers like wisteria, while wooden structures shine with lighter climbers like clematis. For quick coverage, morning glories explode with color in 6-8 weeks. Prefer timeless elegance? Hybrid tea roses offer repeat blooms from spring through frost.
Consider your USDA zone when selecting varieties:
- Zones 3-5: Hardy kiwi vines survive -30°F winters
- Zones 6-8: Confederate jasmine thrives in humid summers
- Zones 9-11: Bougainvillea adds tropical flair year-round
Enhancing Your Arch with Complementary Greenery and Colors
Layer textures by pairing flowering vines with foliage plants. Silver-leafed dichondra softens bold color from geraniums below. For autumn drama, train scarlet Virginia creeper up one side and golden hops down the other.
Create continuity with these seasonal strategies:
- Spring: Plant sweet peas at the base with pansy clusters
- Summer: Add heat-loving black-eyed Susans as ground cover
- Fall: Swap spent annuals for ornamental kale arrangements
Twine delicate stems through support gaps weekly to guide growth patterns. This gentle training prevents damage while encouraging full, even coverage. Remember—your arch’s beauty grows with your plants, not just on them.
Caring for and Maintaining Your Arch through Every Season
Your stunning outdoor centerpiece deserves care that evolves with the seasons. Regular upkeep preserves its beauty and extends its functional life, letting you enjoy years of lush growth and structural integrity. Let’s explore how simple routines keep your creation thriving.
Maintaining Freshness and Durability of Your Flowers
Trim climbing plants every 4-6 weeks to prevent overloading the frame. Remove dead stems before they decay—this stops mold and keeps supports sturdy. Clear fallen leaves monthly using a soft brush, especially where shade encourages moisture buildup.
Seasonal Maintenance and Weather-Proofing Tips
Spring demands rust-preventive spray for metal joints and fresh sealant for wooden sides. Before summer storms, check all bolts and tighten loose connections. Come fall, apply weather-resistant stain to protect against winter rains.
Watch for wood rot near ground contact after heavy precipitation. Use epoxy filler for small damaged areas, replacing entire posts only when necessary. In snowy regions, gently knock accumulated ice off crossbars to prevent warping.
Wrapping Up Your Garden Arch Project and Celebrating Your Creation
As you step back to admire your completed project, take pride in how it ties your outdoor space together. Your new centerpiece isn’t just decorative—it’s a living testament to creativity and smart design. Whether hosting summer gatherings or enjoying quiet mornings, it becomes a natural gathering spot that evolves with your landscape.
Maintain its charm by periodically checking connections and refreshing protective coatings. Pair this routine with seasonal pruning to keep plants thriving without overwhelming the structure. For smaller yards, explore DIY vertical solutions that complement your arch’s aesthetic.
Share photos of your creation online to inspire others—you’ll likely discover fresh ideas for future upgrades. Notice how visitors gravitate toward this focal area, proving its power to shape experiences. Each bloom and weathered mark tells your garden’s unique story.
Now’s the time to celebrate! Host a twilight dinner under your handcrafted masterpiece or simply savor your morning coffee nearby. You’ve built more than a beautiful element—you’ve crafted memories that’ll grow sweeter with time.


