
Creating clear boundaries in your yard brings structure to nature’s beauty. Thoughtful edging solutions separate flower beds from walkways while highlighting your favorite plants. Well-designed borders add polish to any property, making landscapes feel intentional and inviting.
Organic ground covers like wood chips improve soil health as they prevent weeds. Durable rock arrangements create lasting definition without constant upkeep. Short barrier walls or decorative metal strips offer subtle separation between spaces.
Combining different textures builds visual depth in your design. Layered materials work together to frame pathways and flower patches effectively. Strategic placement guides the eye through your landscape while keeping mulch in place during heavy rains.
This guide explores budget-friendly options for every maintenance preference. You’ll learn to mix functional elements with artistic touches that reflect your personal style. Discover how simple upgrades can elevate your home’s exterior while boosting its market appeal.
Introduction to Inspiring Garden Border Concepts

Your landscape’s potential shines when framed by purposeful design elements. Thoughtful edging acts like a picture frame for your outdoor canvas, keeping soil where it belongs while letting flowers take center stage. This simple addition transforms chaotic patches into curated displays that neighbors will admire.
Properly planned edges create invisible guidance systems for both eyes and feet. They stop mulch from migrating onto walkways during storms and protect delicate roots from trampling. You’ll spend less time weeding and more time enjoying your sanctuary.
Beyond practicality, defined spaces influence how you experience your yard. Crisp lines between lawn and flower beds trigger mental calmness, like tidy bookshelves in a cozy library. They help your prized roses command attention without competing with grass or stray pebbles.
For those wanting to elevate your gardening aesthetic, layered materials add intrigue. Imagine smooth river rocks hugging a path, topped with wrought iron strips that whisper vintage charm. These combinations work like home decor—textures and heights guiding the viewer’s gaze.
Whether you prefer subtle separation or bold statements, your choices reflect personal style while solving common yard challenges. The right border becomes both guardian and gallery for your green investments.
Budget-Friendly Garden Edge Materials

Transforming your outdoor space doesn’t require deep pockets—just smart material choices. Simple solutions can define your landscape while keeping costs under control. Let’s explore practical options that balance affordability with lasting results.
Plastic and Pound-In Plastic Edging
Rolled plastic edging materials deliver durability at under $1 per linear foot. You’ll dig a shallow trench (4-6 inches deep) to secure the flexible strips. Once buried, they create seamless boundaries that blend with your lawn.
Prefer an easier install? Pound-in plastic strips use vertical stakes instead of trenches. Just hammer them into the soil—no digging required. Both options withstand weather extremes for 5+ years with minimal upkeep.
Hand and Glass Bottle Options
Grab a spade for hand-cut edges that cost nothing but elbow grease. Sharp, angled trenches between grass and beds create crisp lines. It’s labor-intensive but offers unmatched precision for neatniks.
Upcycle empty wine bottles into whimsical borders. Bury them neck-down in staggered rows—their colorful bases catch sunlight while keeping soil contained. This eco-friendly option turns trash into treasure without spending a dime.
Enhancing Border Appeal with Stone and Gravel

Natural materials bring timeless character to outdoor spaces while solving practical challenges. Strategic combinations of rugged stones and smooth gravel create definition that lasts decades. These elements work together to control erosion while adding organic texture to your landscape design.
Building Foundations with Stone Pillars
Start by marking your desired line with string and stakes. Dig a 4-6″ trench, then fill the base with crushed gravel for drainage. Position flat stones vertically like puzzle pieces, checking alignment with a level every 12 inches.
Terracotta scallops add old-world flair between pillars. Space these curved pieces evenly to create rhythmic patterns. Their warm orange tones contrast beautifully with gray stones, especially when softened by creeping thyme spilling over edges.
Layering Gravel for Visual Impact
Choose pea gravel for walkways—its rounded edges feel gentle underfoot. Larger crushed varieties (1-2″) stabilize sloped areas better. Mix two gravel colors in alternating sections for dynamic stripes that guide visitors through your space.
Top your gravel base with statement stones every 3-4 feet. Try alternating angular slate chunks with smooth river rocks. This technique adds depth while preventing smaller pieces from scattering during heavy rains.
“The best stone arrangements look like they’ve always belonged there—natural yet intentional.”
Maintenance becomes effortless once installed. Simply rake gravel back into place each spring and remove debris between stones. With proper site prep, these features withstand frost heave and foot traffic for years.
Defining Your Space with Low Fence Installations

Transform your outdoor areas into distinct zones without blocking views. Short barrier walls add subtle structure to your lawn while preserving sightlines. These installations create cozy nooks for reading corners or herb gardens, making large yards feel more intimate.
Choose materials that match your lifestyle. Decorative metal panels offer modern flair with rust-resistant coatings. Wooden picket styles bring cottage charm, while composite materials withstand harsh weather for decades. Pro tip: Bury fence posts 18-24 inches deep in gravel-packed holes for stability.
Clever designs serve multiple purposes. Horizontal rails support climbing roses or jasmine vines, creating living screens that bloom seasonally. Pair shorter sections with stone bases to prevent soil erosion near slopes. This layered approach adds depth to your landscaping while keeping maintenance simple.
- Space posts 6-8 feet apart for optimal support
- Keep heights between 24-36 inches for open-air boundaries
- Use weatherproof screws instead of nails for easy repairs
Your space should reflect local character. Match fence colors to your home’s trim for cohesive curb appeal. Check neighborhood guidelines—some communities restrict materials or heights. With smart planning, these features become functional art that defines your lawn without feeling restrictive.
“The right fence height disappears visually while working hard organizationally.”
Creative Mulch Applications for Neat Borders
Mulch does double duty as both protector and decorator for your planting zones. When contained by proper edging, it becomes a soil superhero—locking in moisture while starving unwanted growth. This natural solution keeps your beds looking crisp even during summer droughts.
Organic options like shredded bark feed your soil as they break down. Spread 2-3 inches around plants—enough to block weeds but let roots breathe. Dark cocoa mulch makes green foliage pop, while golden varieties brighten shady corners naturally.
Seasonal upkeep keeps your layers effective. Fluff decomposed mulch in spring before adding fresh material. Work old layers into the soil when refreshing affordable raised beds—they’ll improve drainage and nutrient levels over time.
Blend textures for seamless transitions between spaces. Try pebbles along walkways that graduate into wood chips near shrubs. This creates visual flow while preventing soil migration onto paths. Pro tip: Use edging materials that match your mulch color for a polished finish.
Smart applications reduce maintenance while boosting plant health. You’ll spend less time watering and weeding, leaving more moments to enjoy your thriving outdoor sanctuary.
Options for Natural Log and Timber Edging

Turn fallen timber into functional art that frames your outdoor spaces. Repurposed wood offers earthy textures while reducing waste—a win for both aesthetics and sustainability. These solutions blend rugged character with practical containment for planting zones.
Breathing New Life Into Fallen Trees
Got leftover logs from tree removal? Cut them into 12-18″ sections for instant edging markers. Remove loose bark to discourage pests, then position pieces end-to-end along your desired line. Irregular shapes create playful patterns that look like nature designed them herself.
For curved paths, use flexible branches instead of rigid trunks. Soak them overnight in water for easier bending. Bury half their thickness in soil to lock them in place. Over time, weathered surfaces develop silvery patinas that complement any landscape.
| Feature | Log Edging | Timber Edging |
|---|---|---|
| Lifespan | 3-5 years | 10-15 years |
| Maintenance | Annual bark checks | None |
| Cost | Free (if repurposed) | $1.50-$3 per foot |
| Best For | Casual designs | Formal layouts |
Crafting Precision With Processed Lumber
Pressure-treated timbers bring order to chaotic slopes. Choose 4×4 or 6×6 posts for raised beds—their straight edges create sharp angles. Always wear gloves when handling treated wood, and seal cut ends with copper naphthenate for maximum rot resistance.
Level your installation area with a shovel and tamper first. Stagger joints between timbers like brickwork for stability. Secure layers with 12″ galvanized spikes driven through pre-drilled holes. This technique prevents shifting during freeze-thaw cycles.
For a polished finish, sand rough edges and apply exterior-grade stain. Match existing deck colors or let the wood age naturally. Either way, you’ll create clean lines that make plants pop while containing soil effectively.
DIY Garden Edging Techniques for the Hands-On Gardener
Roll up your sleeves and shape your landscape with precision using basic tools. Hand-cut edges deliver crisp lines that make plants pop while costing nothing but sweat equity. This hands-on approach lets you tweak bed shapes yearly, adapting to your evolving plant collection.
Grab an edging shovel for manual control. Angle the blade 45 degrees toward your lawn, slicing through grass roots in smooth motions. Work in 3-foot sections, removing excess soil to create a clean trench. This method works best in early spring when soil is damp but not soggy.
| Tool | Cost | Effort | Precision |
|---|---|---|---|
| Hand Spade | $0 (if owned) | High | Custom curves |
| Electric Edger | $80-$150 | Low | Straight lines |
| Half-Moon Edger | $25-$40 | Medium | Sharp corners |
Electric edgers offer an easy install way for long straight borders. Mark your path with string first, then let the rotating blade do the heavy lifting. Keep the guard flush against walkways to prevent accidental nicks on hardscapes.
Time your work after rain when soil is soft. Edge twice yearly—spring for definition, fall for winter prep. Touch up monthly by recutting overgrown grass edges with a sharp spade. Store tools dry to prevent rust, sharpening blades annually.
“A well-edged bed looks cared for before you even see the plants.”
Pair these techniques with budget-friendly gardening strategies for cohesive results. Your efforts create visual structure that makes flowers and shrubs appear intentionally placed rather than randomly sprouted.
Eco-Friendly and Recycled Garden Materials
Breathing new life into discarded items creates landscape features that benefit both your yard and the planet. Sustainable choices reduce landfill waste while adding character to your outdoor spaces. These solutions prove environmental responsibility doesn’t mean sacrificing style—they often become focal points that spark conversations.
Rubber Edging Innovations
Old tires find new purpose as flexible borders that hug curves effortlessly. Manufacturers mold recycled rubber into durable strips secured with ground pegs—no digging required. This low-effort option withstands lawnmower blades and harsh weather, maintaining crisp lines for over a decade.
Installation takes minutes: unroll the material along your desired path and tap anchoring spikes through pre-cut holes. The bendable design follows organic shapes better than rigid alternatives. You’ll eliminate tedious trimming since grass blades meet the edge cleanly.
Glass Bottle Revival
Turn empty containers into sun-catching borders by burying them neck-down. Arrange wine and beer bottles in repeating patterns or random clusters for playful effects. Their colored bases create stained-glass illusions when sunlight filters through.
Try these design approaches:
- Group bottles by hue for ombre transitions
- Alternate heights using full and half-buried pieces
- Create seasonal displays with amber autumn tones or cool winter blues
| Feature | Rubber Edging | Glass Bottles |
|---|---|---|
| Durability | 15+ years | 5-8 years |
| Installation | 10 minutes per 20ft | 1 hour per 10ft |
| Customization | Limited colors | Unlimited patterns |
Both options keep thousands of pounds of waste from landfills annually. They require minimal upkeep—occasional rinsing for bottles, and checking rubber pegs after heavy storms. As these materials age, they develop weathered charm that blends with natural surroundings.
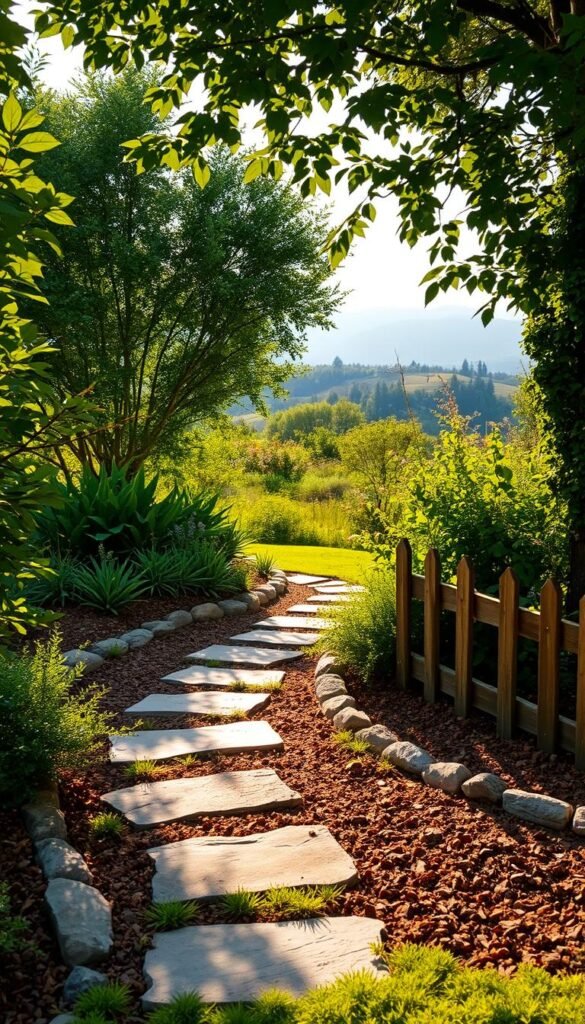
Garden borders ideas incorporating mulch, stone, and low fences
Strategic material combinations transform ordinary edges into standout features. By layering functional elements with artistic flair, you create boundaries that work harder while looking sharper. This trio offers solutions for erosion control, weed prevention, and visual flow—all in one cohesive package.
Balance proportions by letting each component shine. Use stone as anchoring points, mulch for soft texture, and low fences for vertical definition. Match warm-toned gravel to wooden rails or cool slate to metal accents. These pairings unite your landscape with your home’s exterior effortlessly.
Consider seasonal performance when planning. Stone retains heat in winter, while mulch insulates plant roots during summer droughts. Schedule annual fence inspections and mulch refreshes to maintain crisp lines year-round.
Start small if needed—define one bed with two materials, then expand. This phased approach lets your design evolve naturally. With thoughtful combinations, your outdoor spaces become polished extensions of your personal style.


