
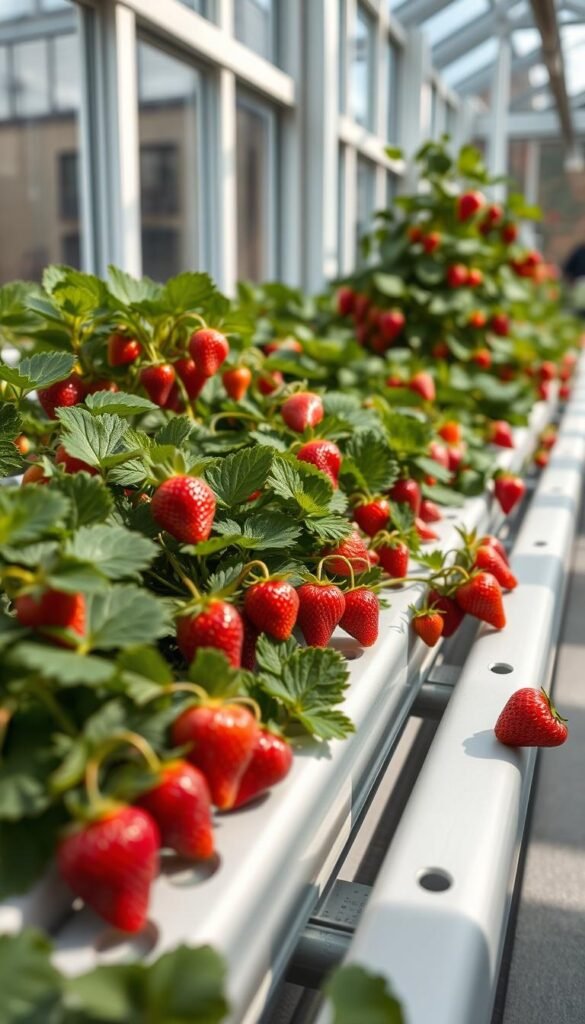
Imagine plucking juicy, ripe strawberries from your living room—no soil, no weeds, just pure sweetness. With hydroponic systems, you can grow vibrant plants indoors using nutrient-rich water instead of dirt. This method isn’t just futuristic; it’s a practical way to enjoy fresh produce regardless of outdoor space or season.
Why are so many gardeners excited about this approach? For starters, plants thrive because their roots absorb nutrients faster in controlled setups. You’ll save space with vertical designs and avoid pests common in traditional gardens. Plus, modern tools like LED grow lights and smart sensors let you fine-tune conditions for bigger yields.
Whether you’re a city dweller or a suburban green thumb, hydroponics puts you in charge. You decide the water pH, light cycles, and temperature—key factors for sweeter, healthier fruit. Ready to transform a corner of your home into a mini oasis? Let’s explore how these systems work and why they’re changing the game for growers everywhere.
Introduction to Indoor Hydroponic Berry Gardening

Transform your kitchen counter into a year-round berry haven without stepping outside. Hydroponic gardening lets you cultivate vibrant fruit like strawberries using water-based systems instead of soil. This method attracts both novices and experts because it simplifies plant care while delivering impressive results.
Cleaner Growth, Bigger Rewards
Traditional gardens battle weeds and pests, but indoor setups eliminate those headaches. Your plants receive precisely measured nutrients through their water, which means faster growth and fewer diseases. You control every detail—lighting schedules, water pH, and temperature—to create ideal conditions.
Space-Smart Solutions for Urban Life
Compact vertical systems fit snugly in apartments or small homes. Unlike soil-based setups, hydroponics uses 90% less water while doubling yields. Check how these methods stack up:
| Factor | Traditional Gardening | Hydroponic Systems |
|---|---|---|
| Space Needed | Large plots | Vertical towers |
| Pest Control | Frequent sprays | Minimal intervention |
| Average Yield | Seasonal harvest | Year-round fruit |
Ready to dive deeper? Later sections will guide you through choosing equipment and balancing nutrient solutions. For now, picture plucking flawless strawberries in January—it’s closer than you think.
Understanding Hydroponics for Successful Indoor Gardening
Ever wondered how plants thrive without a speck of dirt? Hydroponics unlocks this mystery. Instead of soil, plants grow in nutrient-rich water that feeds their roots directly. This method gives you complete control over their diet and environment—like a personalized buffet for your greens.
What Is Hydroponics and How Does It Work?
Hydroponics skips soil entirely. Roots soak in a nutrient solution mixed with water, which circulates through the system. Oxygen pumps or air stones keep the roots healthy, while grow lights mimic sunlight. Popular setups like deep water culture suspend plants in oxygenated water, making them ideal for beginners.
These systems recycle water, cutting waste by up to 90% compared to traditional gardening. You’ll adjust pH and nutrient levels using simple test kits—no guesswork involved. The result? Plants grow 30-50% faster because they don’t waste energy searching for food.
Benefits of Soilless Growing Over Traditional Methods
Without soil, pests and diseases struggle to take hold. Your plants stay cleaner, and you avoid toxic pesticides. Check how hydroponics outperforms old-school methods:
| Factor | Soil Gardening | Hydroponic Systems |
|---|---|---|
| Water Use | High | Low |
| Space Efficiency | Limited | Vertical options |
| Harvest Speed | 6-8 weeks | 3-4 weeks |
Want to start small? Hydroponic gardening for beginners simplifies the process with step-by-step guides. You’ll master pH balancing and nutrient mixing in no time, turning any corner into a thriving garden.
Setting Up Your Indoor Hydroponic Strawberry System

Ready to turn that empty corner into a strawberry paradise? Let’s walk through creating your hydroponic system from scratch. Whether you’re tight on space or want maximum efficiency, these steps will help you build a thriving setup.
Choosing the Ideal Hydroponic System for Your Space
Start by assessing your available area and budget. Compact options like deep water culture work well for small apartments, while drip systems suit larger yields. Compare popular setups:
| System Type | Space Needed | Cost Range |
|---|---|---|
| Deep Water Culture | 2 sq ft | $50-$120 |
| Nutrient Film | 4 sq ft | $90-$200 |
| Drip System | 6 sq ft | $150-$300 |
Once you’ve picked your system, gather key tools: a water pump, LED grow lights, and pH testing strips. For beginners, successful hydroponic setup guides recommend starting with pre-mixed nutrient solutions to avoid early mistakes.
Essential Equipment and Installation Tips
Assemble your reservoir first—it holds the nutrient solution feeding your plants. Connect the water pump to circulate liquid, then position LED lights 12-18 inches above the plants. Pro tip: Use timers to maintain 14-16 light hours daily for optimal growth.
When transplanting strawberry seedlings, gently rinse soil from their roots before placing them in net pots. Check water temperature stays between 65-75°F to prevent stress. Weekly maintenance? Test pH levels and top off the reservoir—simple tasks that keep your hydroponic strawberries flourishing.
Up next: Learn how to nurture your plants through each growth stage for plump, juicy fruit!
Growing Berries Indoors: Hydroponic Strawberries and More

Ever dreamt of harvesting sun-ripened fruit from your windowsill? Let’s break down the process into simple, actionable steps for vibrant yields.
From Seedling to Sweet Reward
Begin with healthy young plants. Gently rinse soil from their roots using lukewarm water before placing them in net pots. This prevents debris from clogging your system.
- Mix the perfect bath: Combine a balanced nutrient solution with water, aiming for pH 5.5-6.2. Test weekly and adjust using pH-up or down drops.
- Light the way: Position LED grow lights 12 inches above your plants. Set timers for 14-16 hours daily to mimic summer days.
- Climate control: Maintain 65-75°F and 60-70% humidity. A small fan improves air circulation, strengthening stems.
When flowers appear, grab a soft paintbrush. Swirl it inside each bloom daily to transfer pollen—this hand-pollination technique ensures plump fruit forms. Watch for petals to drop; that’s your cue to reduce nitrogen in the solution.
Harvest berries when they’re fully red and slightly firm. Twist gently at the stem to avoid bruising. Leave the green cap attached—it keeps your bounty fresh longer. With these steps, you’ll transform your space into a sweet sanctuary!
Optimizing Nutrient Solutions and Water Quality

Your hydroponic strawberry plants rely on precise water chemistry to thrive. Unlike soil gardening, where nutrients are unevenly distributed, hydroponics lets you deliver exactly what your plants need. Start by focusing on three core elements: pH balance, electrical conductivity (EC), and nutrient ratios.
Balancing pH, EC, and Nutrient Levels
Strawberries prefer slightly acidic conditions. Aim for a pH of 5.5–6.2 to help roots absorb nutrients efficiently. Test daily using digital meters or test strips. If levels drift, adjust with pH-up or down solutions. EC measures nutrient concentration—ideal ranges are 1.4–3.0 mS/cm during growth phases. Too low? Plants starve. Too high? Roots burn.
| Parameter | Ideal Range | Adjustment Tool |
|---|---|---|
| pH | 5.5–6.2 | pH control kit |
| EC | 1.4–3.0 mS/cm | EC meter |
| Water Temp | 65–75°F | Aquarium heater |
Selecting Nutrient Solutions for Success
Choose formulas labeled for strawberries or fruiting plants. They need higher potassium and phosphorus during flowering. Mix concentrates according to instructions—overdosing harms roots. Smart sensors simplify monitoring, alerting you when levels shift. Change the solution every 7–10 days to prevent salt buildup.
Avoid these common mistakes:
- Ignoring weekly water changes
- Using tap water without testing hardness
- Mixing incompatible nutrient brands
Struggling with murky water or slow growth? Our hydroponic troubleshooting guide tackles these issues head-on. With consistent care, your plants will reward you with plump, flavorful fruit!
Lighting, Temperature, and Climate Control for Indoor Berry Gardens

Creating the perfect environment for your indoor berry plants is like being a backstage manager for a superstar performance. Every detail matters—from the glow of your LED lights to the steady hum of your climate controls. Let’s fine-tune these elements to keep your plants thriving.
Lighting That Powers Growth
Full-spectrum LED lights mimic natural sunlight, giving plants the energy they crave. Position them 12-18 inches above your setup, and use timers to maintain 10-12 daily light hours. Too much exposure? Leaves may yellow. Too little? Growth slows. Smart dimmers let you adjust intensity as seasons change.
Balancing Warmth and Moisture
Aim for daytime temperatures of 70-75°F and 60-65% humidity. At night, drop to 65°F to mimic outdoor cycles. Clip a hygrometer to your reservoir to track moisture levels. Struggling with dry air? A small humidifier adds moisture without overwatering roots.
| Condition | Day | Night |
|---|---|---|
| Temperature | 70-75°F | 65°F |
| Humidity | 60-65% | 50-55% |
Automated systems simplify monitoring. Pair Wi-Fi sensors with your phone to get alerts if conditions drift. Weekly checks prevent mold and boost fruit quality. Remember: Consistency is key. Your plants will reward you with lush leaves and juicy harvests!
Preventing Pests and Diseases in Your Hydroponic Garden

Even the cleanest hydroponic setups can face challenges, but don’t worry—most issues are manageable with quick action. While soil-free growing reduces many risks, airborne pests and moisture-related diseases still require attention. Let’s explore how to protect your plants without harsh chemicals.
Spotting Trouble Before It Spreads
Common invaders include aphids, spider mites, and whiteflies—tiny pests that love juicy leaves. Fungal problems like powdery mildew thrive in humid environments, while root rot can strike if water isn’t properly oxygenated. Check leaves daily for spots, webs, or curling edges.
Why are hydroponic systems safer? Without soil, you eliminate threats like grubs and nematodes. Compare risks:
| Threat Type | Soil Gardens | Hydroponic Gardens |
|---|---|---|
| Root Pests | Common | Rare |
| Fungal Issues | High | Moderate |
| Airborne Pests | Moderate | Moderate |
Caught bugs early? Mix 2 tsp neem oil with 1 quart water and spray leaves every 3 days. For mildew, improve airflow and trim affected areas. Always test nutrient levels weekly—imbalances weaken plant defenses.
Three prevention essentials:
- Keep grow areas clutter-free
- Maintain 60-65°F water temperature
- Quarantine new plants for 48 hours
Sticky traps near light sources help monitor flying pests. If issues persist, switch to organic pesticides like pyrethrin sprays. Remember: Healthy plants resist invaders better. Pair vigilance with your regular care routine for worry-free harvests!
Harvesting and Storing Your Indoor Hydroponic Berries

The moment you’ve nurtured your plants for has arrived—harvest time! Proper techniques ensure your hard work pays off with vibrant, flavorful rewards. Let’s explore how to pick and preserve your bounty like a pro.
Timing and Techniques for Peak Flavor
Watch for berries that turn fully red with a slight give when gently squeezed. Shiny surfaces and a sweet aroma signal ripeness. Use clean scissors or pinch stems carefully to avoid crushing delicate fruit.
No bees indoors? No problem. Pollinate flowers yourself:
- Swirl a soft brush inside blooms every morning
- Focus on transferring yellow pollen between flowers
- Repeat for 3-4 days until petals drop
| Storage Method | Duration | Best For |
|---|---|---|
| Room Temperature | 1-2 days | Immediate use |
| Refrigerated | 5-7 days | Extended freshness |
| Freezing | 6 months | Smoothies/baking |
Preserving Your Sweet Success
Line containers with paper towels to absorb excess moisture. Arrange berries in single layers—never stack them. Keep fridge temperatures at 34-38°F to slow ripening without freezing.
Troubleshooting common issues:
- Mold spots? Remove affected fruit immediately
- Mushy texture? Check for excess humidity
- Fading color? Harvest slightly earlier next cycle
Your system delivers year-round treats when handled right. With these tips, every harvest feels like opening nature’s candy box!
Final Reflections on Your Hydroponic Berry Journey
Your journey into soilless gardening has transformed that spare corner into a source of fresh, homegrown delight. From choosing the right system to balancing nutrient levels, you’ve mastered how to create ideal conditions for vibrant growth. Each pluck of a ripe strawberry proves that small spaces can yield big rewards.
Remember: Success lies in consistency. Monitoring water quality, adjusting light cycles, and maintaining climate control aren’t chores—they’re your tools for year-round harvests. Troubleshooting hiccups? That’s part of the learning curve, not failure.
Join online communities to swap tips or celebrate wins. Share photos of your thriving plants—you’ll inspire others to start their own edible oasis. With every sweet bite, you’re redefining what a garden can be.
Ready for more? Expand your setup or try new varieties. The skills you’ve gained apply to any crop. Keep experimenting, stay curious, and let those roots dig deeper into this rewarding hobby!


